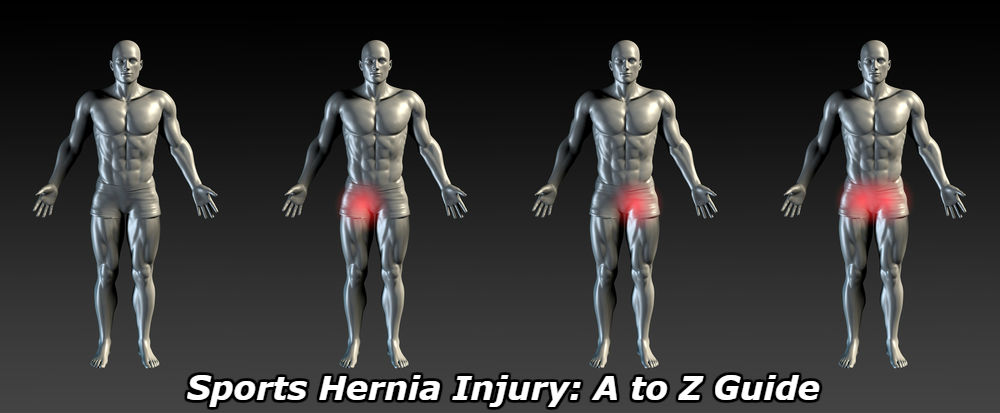
If you’re suffering from groin pain or think you might have a sports hernia, this guide has everything you need to know.
From diagnosis, treatment, rehabilitation exercises and more. If you’re serious about getting rid of the pain, we encourage you to understand what’s happening before proceeding blindly.
What is a Sports Hernia? (Athletic Pubalgia)
In simplest terms, a sports hernia is defined as an injury to the soft tissues of the groin and inner abdominal wall that does not form a visible bulge and fails to heal with rest and other traditional recovery methods. It is currently one of the least-understood sports injuries.
It plagues mostly athletes and high-level recreational and fitness enthusiasts, but can affect weekend warriors as well. The pain is often bad enough to stop all activity. In the case of competitive athletes, it can often be career-ending.
Get the ULTIMATE Sports Hernia Master Guide with 30+ included resources, an in-depth rehabilitation program, tips, tricks, and more! Successfully diagnose, treat, and cure your sports hernia with this complete master guide created by a sports hernia specialist. Note that it is still highly recommended to read this article in full to understand how to get the most out of the guide to treat and cure your sports hernia or groin pain.
Topics covered in this section:
Helpful links:
- What Is It?
- Where Is It?
- What Does It Feel Like?
- Can It Get Worse Without Treatment?
- Diagnose Yourself From Home
- Pictures
- All Articles on Sports Hernias
Sports Hernia Symptoms, Diagnosis, Surgery, Treatment, Rehabilitation, and Recovery
From a medical standpoint, the debilitation is relatively new, with first mention of the injury making its way into science publications in the 1980s. Luckily, however, the injury is now much more understood; with this increased knowledge has come more effective treatment methods that provide long-term pain relief.
The injury goes by several different names which will be referred to throughout this article. While all of these names describe the same thing, medical researchers and specialists prefer the term Athletic Pubalgia because it doesn’t have mention of the word ‘hernia’—which is often mistaken for a traditional hernia.
- Athletic Pugalgia (AP)
- Posterior Inguinal Wall Deficiency or Disruption
- Gilmore’s Groin
- Slap Shot Gut
- Groin Hernia
- Footballer’s Groin
- Hockey groin syndrome
- Pubic Inguinal Pain Syndrome
- Core Muscle Injury
- Sportsman’s Groin
- Invisible Hernia
It is very important to point out the injury differs from a normal inguinal hernia which is much more common and produces a visible bugle that can be seen and felt. In this case, the abdominal lining (peritoneum) becomes weak and allows a “sac” to form through the membranous qualities of the abdominal wall and intestines. The sac then pushes through the weakest section in the wall to produce a lump that can be seen.
An indirect hernia presents a slightly different situation. In this case, the inguinal ring becomes too large, allowing abdominal contents to enter the inguinal canal. These may be too small to feel and essentially invisible, but are still “real” hernias and fall into the category above.
In contrast, a core muscle injury occurs when the soft tissues of the abdomen and groin become structurally unstable and weak in comparison to stronger muscles of the inner thigh. This can result in tears to the soft tissues of the pelvic and inguinal floors (tendons, ligaments, and muscles) as well as external oblique muscles. Additionally, most patients will have tears and weaknesses in the fascia of the external obliques.
Interestingly, increasing research supports the conclusion that AP, persistent adductor pain, and hip issues are all related and linked—when dysfunction in one area is present, it is likely in the others as well. As athletes begin to lose range of motion in the hips, large forces are distributed unevenly against the weakened inner abdominal muscles that connect deep in the groin.
As this happens, the powerful quad and adductor muscles of the leg become too strong to be supported by the weaker surrounding tissues. Ultimately, tears result as a cause of this extreme muscular imbalance.
Given this relationship and gradual process, pain and symptoms are rarely caused by an acute injury alone. In most cases, muscular deficiencies and weaknesses develop over time until eventually the wrong twist or turn is enough to cause a tear or strain.
Ultimately, the strong linkage between hip and groin injuries suggests that the full-core rehab approach found to be effective in treating a sports hernia may also be appropriate for a range of other hip and groin problems.
While both males and females can get the injury, males make up 96% of all forms of groin hernias; furthermore, males are responsible for 85%-97% of all AP referrals.
This is likely because the deep inguinal ring creates an opening in the deep abdominal wall (fascia trasnversalis) to allow for passage of the spermatic cord and must remain open for passage of blood and nutrients to the scrotum. If formation of this opening is larger than required, it can help to set the stage for injury later in life.

The posterior inguinal wall, or transversalis fascia.
With that said, AP is still the most common form of groin hernia for women—and the amount of positive diagnoses for women are on the rise.
The lack of protrusion associated with the injury makes it especially hard to diagnose—especially for general physicians who are not trained and knowledgeable in the acute details of the injury.

Prevention
Without a doubt, following a strengthening and mobility plan focused on all areas of the core, hips, groin, and abdominal wall is a sure-fire way to prevent it from ever happening outside of uncontrollable genetic factors.
By doing so, you ensure that your pelvis remains biomechanically stable—it moves and behaves like it should. As long as this remains the case, your body is able to glide through a full, healthy range of motion without pain.
Warning Signs
The biggest warning sign for the injury is continued pain that doesn’t seem to get better with rest. If you have already tried ice, rest, and compression and still have a large amount of pain—that’s a big red flag.
Additionally, if you experience any of the symptoms and do not see a visible bulge, that is another warning sign. To help get a more full picture, take the hernia quiz to answer a few short questions.
Quiz: Do I Have a Core Muscle Injury?
While it is important to review the full list of symptoms, answering these questions will help show you how to tell if you have slap shot gut within seconds.
- Are you an athlete?
- Do you have pain that doesn’t seem to respond to rest?
- Have you made one or more unsuccessful doctor visits without a successful confirmation?
- Do you have traditional hernia symptoms but no visible bulge that can be seen?
- Do you have trouble or pain when moving about it bed?
- Are you highly active and otherwise healthy?
- Do you play a sport that involves kicking, twisting at the hip and trunk, or explosive movements?
- Do you exercise regularly but fail to perform the adequate amount of stretching and mobility exercises?
- Do you have an office job or other sedentary position that causes you to sit down for extended periods of time, causing your lower body to become tight an inhibited?
Unfortunately, if you answered yes to at least 5 out of 9 of these questions, your chances of having the injury are high. Regardless you will need to review the pain scale and pinpoint the location of your pain to be sure.
Sports Hernia Pain Location
Currently, medical experts hypothesize that excessive adduction, flexion, and extension of the hip causes large enough shearing forces across the pubic region to produce tears and other weaknesses in the aponeurosis and sometimes fascia that surrounds the underlying musculature.
In lay terms, forceful movements of the lower body are too much for the abdominal structures of the body to handle.
Fascia is the thin lining that surrounds muscles within your body; the fibrous nature of the tissue helps to protect you. On the other hand, aponeurosis is a broad tendon that is flat and attaches muscles together—specifically those that require a large surface area of attachment (abdominal muscles).
These strains and tears occur when one plane of movement is unrestricted while others are tight and highly restricted.
In most case of sportsman’s groin, the sagittal plane of movement is usually free and uninhibited while the frontal and transverse planes of movement are tight. This causes not only pain but leads to the uneven development of your muscles and pelvic musculoskeletal structure.
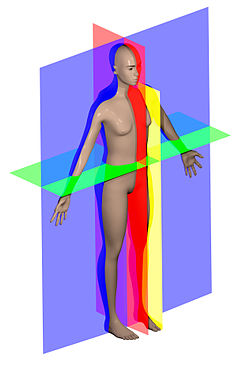
Sagittal Plane In Red, Frontal Plane In Blue, Transverse Plane In Green
In the end, this causes the hip to adopt odd compensatory biomechanics, which then lead to high stress on various sections the lower abdominal wall.
Because of its similar structure to tendons, aponeurosis has very little blood supplied to its nerves and vessels. This makes it very paper-like and causes it to peel in sections; it also means that it doesn’t receive the necessary nutrients to heal effectively on its own like a muscle or bone.
In the case of AP, the papery tendon is especially relevant—it helps to connect your abdominal muscles to your pubic bone. It’s also why pain directly above the pubic area is such a common symptom.
While this connective structure presents deficiencies in almost all cases, it can happen anywhere within the abdominal wall—the exact pain location will differ from patient to patient.
Pubic and Pelvic Pain Areas
Symptoms can be felt in different areas of the pubic and pelvic area depending on the location of the inguinal wall deficiency. It will vary from patient to patient, though in most cases weakness and symptoms can be felt across multiple areas—such as the pubic tubercle and superficial inguinal ring together.
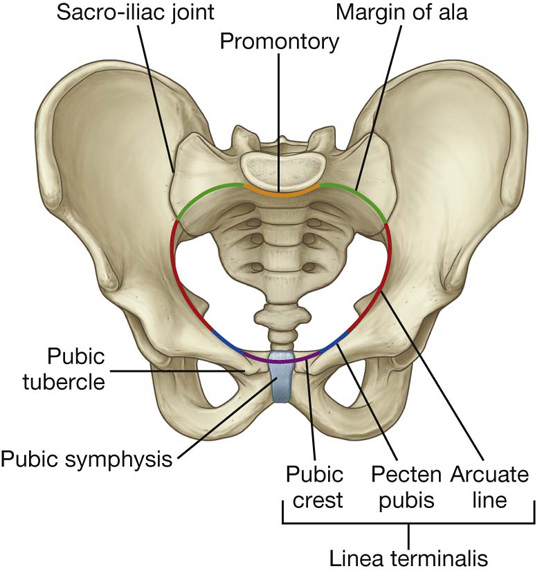
Pubic Tubercle
The pubic tubercle is the prominent, lower part of the pubis that projects forward. It provides the inguinal ligament with a place to attach and is directly below the pubic crest. During a physical examination, the pubic tubercle is a focus area for digital palpation.
Pubic Crest
The pubic crest is directly above the pubic tubercle. It provides the lower rectus abdominis and external oblique muscles with a place for attachment.
Pecten Pubis (Pectineal Line)
The pectin pubic is located just outside the pubic crest. It forms a ridge along the pubic ramus. It provides a base for the pectineal ligament—which runs below the inguinal ligament.
Inguinal Pain Areas
Pubis pain is not alone, though. Inguinal pain makes up a large portion of the pain anytime an inguinal hernia is present. And in the case of an indirect inguinal hernia, this is especially true.
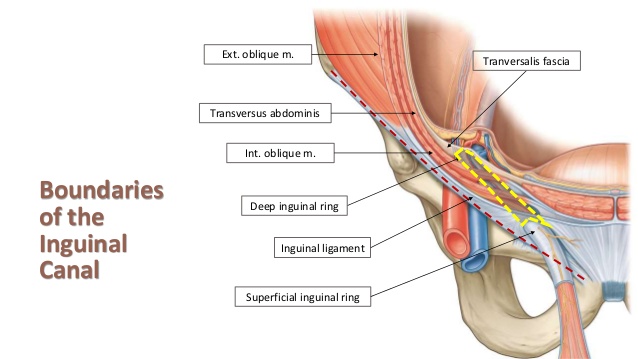
Inguinal Ligament
The inguinal ligament is a ligament that runs along the outside of your pelvis before connecting to the pubic tubercle. It is a structure that supports the connective tissues of the groin and external oblique muscles.
Superficial Inguinal Ring
The superficial ring is an opening in the abdominal wall that forms to create the exit for the inguinal canal which holds the ilioinguinal nerve, the genital branch of the genitofemoral nerve, the spermatic cord in men and the round ligament in women. It can be felt under normal circumstances.
In the case of AP, it widens and becomes dilated. When a specialist conducts your physical examination, they will do so by applying pressure to this area in the attempt to recreate intense symptoms—helping to confirm a positive diagnosis.
Common Causes
An individual’s level and style of activity also contributes in the development of the injury. Those who perform repetitive movements with high intensity (lifting weights, kicking a soccer ball, hitting a hockey puck, driving a golf ball, etc.) are much more likely to develop AP.
If large muscular development is also an aspect of the sport, the chances increase (rugby vs. golf).
Some researchers cite an imbalance between adductors that are strong and abdominals that are weak—which may cause “attenuation or avulsion of pelvic floor structures.”
According to WebMD, the injury is caused by years of weight training or sports-specific movements that are highly repetitive. Making things worse, most athletes fail to perform the proper (or any) stretching and mobility exercises. If you are an athlete this doesn’t mean that you are automatically doomed.
However, it does mean that additional emphasis should be placed on remaining flexible, mobile and strong throughout the hip and groin area through the use of core strengthening and mobility movements. On the plus side, working to increase your body’s structural integrity like this will also increase your performance on the field or court.
But even if you are more of a weekend warrior and don’t think of yourself as a competitor, if you have a desk job that requires you to sit down all day–your supporting core muscles are getting tight and inhibited. When this happens, they begin to “shut off”. But the strong and powerful muscles of your legs, your quads, don’t turn off.
And next time you step on the driving range or basketball court, the wrong explosive twist or movement could apply too much pressure to your core–resulting in a tear.
Bottom line: being proactive about your mobility will pay dividends in the form of pain relief.
Susceptible Sports
The majority of AP cases are reported for a handful of sports. These activities all include movements that require explosive hip extension coupled with a rotation or shifting of the hips.
In most sporting disciplines, athletes perform little to no core exercises–specifically lower abdominal and hip mobility exercises. Instead, training programs focus on heavy weights and hard track and field days. Coaches and trainers add to the equation further, pushing players to perform while rarely emphasizing stretching and mobility work until after an athlete is already suffering from pain.
It is worth noting that the term “core exercises” does not refer only to workouts centered around working the upper and lower abdominal muscles, but also around strengthening and engaging the glutes, adductors, abductors, and psoas major muscle.
A perfect example of this half-sided approach to training is the American football off season; massive effort is dedicated to lower body and upper body strength while almost none is given to increasing core integrity.
Football and Soccer
It then makes sense why soccer players often suffer from this injury: the action of kicking a soccer ball involves both hip adduction (bringing your leg in towards your body) and hip extension (bringing your leg forward and “up” to propel the ball forward).
According to an ongoing study of the U.S. Men’s National Soccer team being conducted by the Medical Affairs Institute of Sports Sciences, over 37% of all athletes on the team have had footballer’s groin. Furthermore, in that same time 12.5% have been diagnosed with a double sports hernia.
Golf
Golf also provides an ample opportunity for the injury to happen. The aggressive drive of a golf club requires excessive trunk rotation. If you have a muscular imbalance allowing your inner thighs to overpower your abdominal muscles, a tear can result.
In a case report on the treatment of a pro golfer with Gilmore’s groin, the athlete reported groin and lower abdominal pain. Interestingly, pain only occurred when he used his driver. The use of irons and wedges did not produce pain symptoms.
Using a rehab program focusing on restoring strength and mobility to the muscles of the core, his groin pain was alleviated.
Hockey
Hockey also provides opportunity for excessive adduction and flexion: use the muscles of the inner and upper leg to bring the femur in towards the body during powerful skating strokes on the ice.
The striking of a hockey puck also provides the opportunity for aggressive twisting throughout the trunk and hips.
As with golf, there is a reported case of successful treatment without surgery with the use of a holistic rehabilitation and physical therapy program inclusive of all soft tissues in the posterior chain.
Track and Field
It is obvious why running and sprinting would cause the injury—especially in athletes where additional abdominal and core work is neglected while explosive speed and quad strength are emphasized.
If you are a track athlete, commitment to abdominal strengthening exercises is an excellent way to prevent or mitigate pain symptoms if direct ab exercises can be done without discomfort.
Tennis
While athletes in certain sports may have a higher predisposition to developing the injury, it can occur anytime cutting, quick pivoting, sharp turns, or explosive kicks are required—like in the case of martial arts or even dancing. The common denominator is a combination of rapid adduction and hip flexion or trunk rotation—bringing your leg up and across your body aggressively or rotating your core too quickly and forcefully, or both.
Weightlifting
Lifting weights can be dangerous in two forms when it comes to AP.
- The injury occurs suddenly during a heavy or explosive weightlifting movement where a distinct popping or tearing sensation can be heard following intense heat and pain
- Strength and power is developed in the quads and adductors—if direct abdominal exercises are not done consistently this can develop into a large imbalance to set the stage for injury
The first scenario is relatively straightforward. The second, however, is much more insidious and is likely to make up for most of hernia-related weightlifting issues.
While olympic lifts such as the power clean and snatch are more likely to contribute to an abrupt tear, powerlifting movements like the squat and deadlift can also lead tears—though they fall more consistently into the second category.
As muscular imbalance continues to grow, weak abdominal muscles cannot provide enough antagonistic support to the large muscles of the lower body. With enough pressure or an aggressive twist, tears result.
If you are a strength athlete, tread carefully with introducing explosive sporting movements or sprints into your training program abruptly. If such training adjustments are necessary, do so by progressing gradually to the full desired activity level over several weeks.
Running
Can you get a sports hernia from running?
As in the case of weightlifting, running can either cause an unexpected and sudden tear or lead to long-term imbalances that then set the stage for injury.
The treatment suggestions are also the same: ensure ample time and consideration is given to fully strengthening and developing all muscles of the core and lower body.
Sports Hernia Symptoms: What Does Athletic Pubalgia Feel Like?
Due to the complexity of the pelvis and its surrounding soft tissue structures, the injury comes in many different flavors and can produce a range of pain symptoms.
- Searing pain in the upper, inner thigh and groin
- Seemingly constant, never ending discomfort and pain in the groin and hip areas
- Tenderness around any of the pubic and lower pelvic regions
- Discomfort when rising from bed, and a tendency to brace your legs with your hands when moving positions while lying down
- Sharp pain in your pubic region, aggravated by quick movements
- Underlying dull pain that gets progressively worse as the day goes on
- Increased pain whenever you flex your abs or upon abdominal exertion
- Pain just above the pubic bone and around your lower abdominal area
- Long-standing pain that lingers all day despite low activity and fails to respond to rest, ice, compression, and elevation alone
- Multiple doctor visits that fail to properly identify the injury
- Physical therapy visits sessions that are unfruitful and provide no pain relief
- Negative and inconclusive radiographs and MRIs
- Pain along the inguinal ligament and surrounding areas
- Pain and tightness in the adductors
- Groin and abdominal pain when sneezing and using the rest room
The symptoms of a re-injured indirect groin hernia will be largely the same, but pain may shift laterally to other areas.
Topics covered in this section:
- AP vs. pulled groin
- AP vs. pulled abdomen
- AP vs. traditional hernia
- Lower ab pain
- Pubic pain
- Hip pain (FAI)
- Inguinal ligament pain
- Psoas muscle pain
- Male symptoms
- Female symptoms
Helpful links:
- What does it feel like?
- Is it just a pulled groin?
- Can it worsen?
- Male symptoms (testicular pain)
- Abdominal pain
In many cases, diagnosis is done by the exclusion of other conditions such as osteitis pubis or avulsion fractures. This is especially true if a general doctor provides the consultation.
- Osteitis pubis occurs when the pubic symphysis and the surrounding soft tissues become inflamed and widen. The Pubic Symphasis is the piece of cartilage that sits in the very front of your pelvis and connects the left and right pubic bones.
- Avulsion fractures occur when your tendons or ligaments produced enough force to break bone; it most commonly affects teenage soccer and track and field athletes.
If these alternative conditions are ruled out and symptoms still match, additional physical exams by a specialist can successfully confirm and identify the injury.
The pain is almost always localized to only one side of the body, and bilateral AP is rare. However, discomfort can spread to the other side of the body, caused by compensatory biomechanics that happen as your body attempts to adapt around the pain.
But does this mean you have it on both sides? Probably not. “Double” cases are very rare. If you are feeling pain on both sides, it’s probably for the reason described above: your strong and healthy side is forced to pick up the slack of your weak, injured side.
When it does develop on both sides, it is likely because a proper diagnosis was failed to be reached over a long period of time. This allows further musculoskeletal issues to form resulting in more soft tissue damage and disruption. This can even cause other hip and lower back injuries.
Hernia or Just a Pulled Groin?
It is important to take the time and confirm that you don’t have a much less serious . But how can you know if you have a pulled groin or a hernia which is much more serious?
The symptoms of a hernia vs. a groin pull are very similar, making it easy to confuse the two issues. However, understanding the differences can help you to differentiate between them.
- Level 1 groin pull: little pain with no effect on your ability to move
- Level 2 groin pull: moderate pain and discomfort while walking, sometimes accompanies by swelling and bruising
- Level 3 groin pull: severe pain, muscular spasms, bruising, and swelling
Perhaps the most telling way to compare the two injuries, however, is by comparing the effectiveness of rest.
If you rest, apply ice and compression, and elevate the injury site—and pain symptoms begin to decrease and alleviate—you more than likely have a groin strain and not a hernia.
On the flip side, if resting and icing the injury does nothing for your pain or recovery, AP is much more likely.
Abdominal Strain vs Hernia: Torn Ligament in Groin
What about telling the different between an abdominal strain vs. AP? If your pain is coming from a completely torn ligament in the groin, it will display distinct symptoms that differ from a simple abdominal pull.
If you feel a burning sensation that can be described as warm running water along the front of your thigh, that is a bad sign. Additionally, if you experience pain while using the restroom, that is also a sign that you may have a more serious hernia.
As with a pulled groin though, the most conclusive piece of evidence revolves around the success or failure of traditional rest and ice physical therapy methods. If your injury doesn’t seem to get any better with rest, and the rest of your symptoms match with AP, there is a good chance you may have it.
Sports Hernia vs. Inguinal Hernia Symptoms: No Bulge
If you do not see a bulge on the outside of your abdomen, you likely have AP vs. an inguinal hernia where pain symptoms can be very similar but there is also a bulge in the groin that can be seen on the outside of the body.
You may also have an indirect inguinal hernia that is a “real” hernia but too small to feel.
If you have AP, it is almost impossible to receive successful treatment from a general practitioner because of this lack of bulge that provides an easy-to-spot diagnosis. Many of these doctors are unaware that not all hernias produce a visible lump—you should avoid them in your search for a .
On the flip side, if your symptoms match but you also have a lump in your lower pubic area off to one side of your body, you may have a femoral hernia. This rare type of groin injury happens in only 1 out of every 20 groin hernia cases—the rest are direct and indirect inguinal hernias.
Lower Abdominal Muscle Pain
Without a doubt, pain in the lower abdomen is a common theme amount those with an indirect hernia. This pain can affect the lower rectus abdominis (8 pack muscle) as well as the internal and external obliques.
Together, these muscles allow your trunk to rotate freely about the base of your pelvis. It makes sense, then, that a sports hernia would cause this pain as they are both triggered by excessive trunk rotation and abdominal flexion.
What Does a Low Abdominal Strain Feel Like?
While narrowing down your pain symptoms, it is helpful to review those of a strained lower abdominal muscle as well.
- Grade 1 abdominal strain: pain does not present itself until activity is over; may include cramping, tightness, and slight pain when the muscle is stretched or contracted
- Grade 2 abdominal strain: immediate pain following the injury event; usually sore to the touch and significantly more painful than a grade 1 strain or pull
- Grade 3 abdominal strain: large levels of immediate burning or sharp pain that ends activity; tears in the abdominal wall are likely and bruising is common
As with a pulled groin or torn ligament, the only true way to make sure you have a sports hernia over a lower abdominal strain is to follow the rehabilitation protocol. If you experience relief with the outlined program, your chances of having the more serious injury low—and your chances of a successful non-surgical recovery high.
Pubic Muscle and Soft Tissue Pain
Pain may also form around the pubic symphasis area. In these cases, it usually radiates outwards into the adductors or lower abdominal muscles. It is made worse by running, sprinting, quick agility movement, pivoting off of one leg, and lying down on the side of your body.
It may also come with a popping or snapping sensation when standing from a seated position, turning in bed, or walking up stairs or a sharp incline.
Discomfort and tenderness around the pubic ramus will undoubtedly be present as well. Patients with uneven functional leg lengths (one leg shorter than the other) may also experience hip pain.
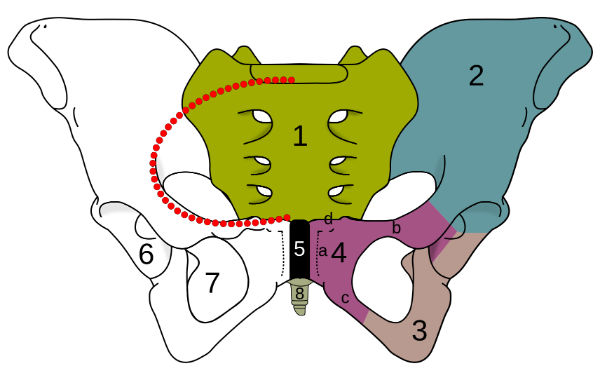
4c denotes the pubic ramus
Hip Pain (FAI)
Hip pain is a common theme for those with the injury, but it is critical to make sure your hip pain is not being caused by Femoroacetabular impingement (FAI). When this happens, extra bone forms along one or both sides of the hip. This irregular shape then causes bones to rub against one another while moving. Given a long enough time period, this friction can lead to physical damage of the pelvis.
Interestingly, FAI doesn’t always cause problems—some people live long, active lives without ever knowing they have it. It is largely based on genetic predisposition. This means that while FIA not be the original source of your pain symptoms, you may now be experiencing hip pain as well as the soft tissues and structures of the groin begin to break down following an indirect hernia.
Inguinal Ligament and Ring Pain
Described already, the inguinal ligament is a band of connective tissue that provides support to various soft structures in the groin. When pain is experienced in the inguinal ring or ligament directly, it can be a sign that nerve entrapment is also playing an issue in your pain. This is because one of the nerves often associated with footballer’s groin pain passes through the inguinal canal (genital branch of the genitofemoral nerve).

Genital branch of the genitofemoral nerve.
Psoas Major Muscle Pain
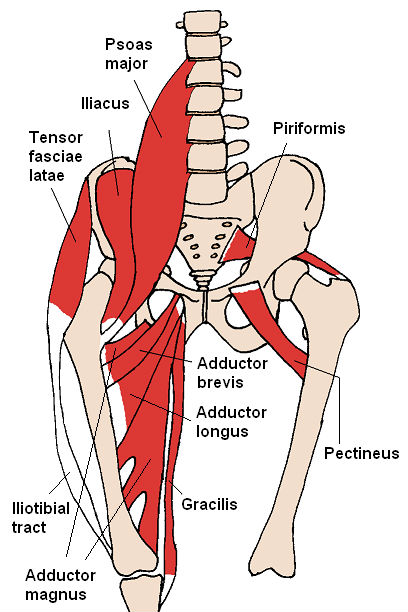
Because the genitofemoral nerve runs along the front of the psoas major muscle, it also makes sense why pain is experienced here. The psoas major muscle attaches at the base of your spinal lumbar, runs through your groin, and connects at the top of the femur. It aids in hip flexion and provides support and structural stability to the pelvic region.
A tight a painful psoas muscle alone can elicit many of the pain symptoms commonly associated with a sports hernia, but also has distinct flavors of its own.
- Lower back pain
- Upper back pain
- Pain in the front of the hip
- Pain that radiates down the leg
If any of these additional factors align with the symptoms experienced, additional management of the psoas muscle is encouraged.
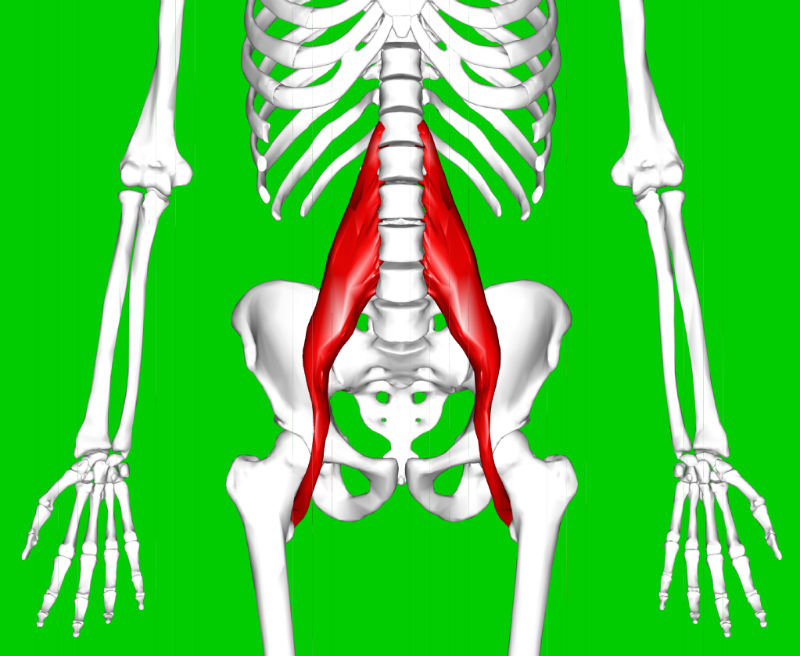
Psoas major muscle shown in red.
Male Symptoms
While males have a higher predisposition to acquiring the injury, they are also susceptible to testicular problems females are obviously safe from. Pain in the testicles with a sports hernia affects a small but sizeable portion of all patients who undergo treatment. In most cases, nerve entrapment issues are suspected about the superficial inguinal ring.
Additionally, males are susceptible to the surgery risk of lower genital temperature following insertion of mesh. This complication can be avoided by opting to receive the minimal repair technique.
A check for direct testicular herniation will be performed at the time of physical examination to rule out further issues.
Female Symptoms
Though males make up a large majority of affected patients and sports hernias in girls are still relatively rare, an increasingly large number of females have begun to receive treatment—suggesting current widespread diagnostic methods by general physicians are not effective. For this reason and many others, consulting a specialist highly trained in the specific treatment of the injury is encouraged.
While females do not possess additional symptoms as in the case of males, women are more likely to experience accompanying hip and FAI issues which will produce distinct symptoms of their own.
Sports Hernia Diagnosis
In the best scenarios, mostly in cases including professional athletes, diagnosis can occur as quickly as 1-6 weeks.
The average duration before proper diagnosis, however, is 20 months. That is an extremely long time to be in such restrictive and mentally-destructive pain. On the extreme side, in the worst case documented the patient had a pre-diagnosis timeline of 5 years.
Topics covered in this section:
Comparing these times with those of other injuries is a testament to the fact that the medical community still has a long way to go in the adoption of proper diagnosis and treatment modalities.
But if you are injured, in constant pain, and looking for a solution, you don’t have the luxury of time.
Therefore, successful diagnosis currently relies almost entirely on clinical visits to professionals who are trained in treating soft tissue debilitations. They will be able to spot the symptoms immediately and confirm using the correct physical examination method.
Physical Check and Ultrasound Exam by a Specialist
When it comes to the right examination, an ultrasound appears to be the winner in terms of accuracy during discovery. In a longitudinal study conducted, out of 59 consecutive patients there was only 1 false negative (failure to approve a diagnosis when the injury was indeed present).
The inguinal canal and surrounding pubic structures are analyzed for any unusual defects or weaknesses. This can help to provide a clue into how large the structural deficiency may be prior to examination under the knife.
Pain Scale
Additionally, a physical examination is performed to test pain in the adductors and pelvic floor of the affected side.
This includes several movements:
- Resisted adduction: attempting to close your legs against pressure)
- Resisted abduction: attempting to open your legs against pressure)
- Resisted sit-up: attempting to perform a sit-up against pressure)
- Leg raise: raising the legs 6 inches off of the ground and holding)
Resisted abduction should not cause any pain, though the other three likely will. If one movement does not produce your pain while another does, you may still have AP–though clearly experiencing pain for all of them (minus abduction) paints a more positive diagnosis.
The tenderness of each is rated on a scale from 1-5.
- 0 = no pain
- 1 = slight pain
- 2 = mild but distinct pain
- 3 = moderate pain that hurts
- 4 = severe pain that really hurts
- 5 = pain so severe that you cannot stand the area being touched
If pain felt in the pubic area is rated a 3 or greater, and is rated distinctly higher than pain felt in the adductor, sports hernia surgery should be considered if rehabilitation and physical therapy efforts fail to provide relief in 6 weeks.
If the pelvic pain felt is rated 2 or lower, or if the adductors show a larger level of pain than the pelvic floor, AP may not be present. In either case, conservative treatment is always encouraged before moving forward with an operation.
Check Yourself for a Sports Hernia: Self-Test
While it is important to receive a confirmed diagnosis from a specialist or surgeon, if you require an immediate diagnosis you can perform the pubic probe test from the comfort and privacy of your own home—for free.
Even as you prepare to visit a specialist, self-diagnosis is a great preliminary option and requires no special tools or expensive resources.
- Lie down on a bed or the floor
- Perform the valsalva maneuver by drawing in a big breath of air and using it to brace the stomach
- Take your index finger and apply pressure to the pubic tubercle and superficial inguinal ring (on and around your pubic crest bone)
Use the same scale (1-5) and pain criteria listed above.
MRI Protocol and Radiographics
Ultrasound is largely the preferred imaging technique; this is because diagnostic confusion following an MRI may arise for a variety of reasons.
- Complex anatomy, structure, and biomechanics of the pubic symphysis area and surrounding tissues
- Large number of potential groin pain sources
- Similarity of symptoms across a range of possible diagnoses
- Expertise required to use MRIs effectively in pinpointing AP
Those diagnosed with AP often times have a spectrum of debilitating pathological conditions as a result of developing deficiencies and instability in the muscles and soft tissues of the pubis. To the general physician, it may be very difficult to pinpoint AP.
However, an MRI with a large field of view surveying the pelvis, coupled with a second high-resolution MRI of the pubic symphysis can be used to make a more complete assessment towards the location, severity, and cause of the deficiency if a radiology expert is involved. In this case, doctors specializing in pubic anatomy and MRI findings of the pubis can make an accurate diagnosis to help in the planning of surgical treatment.
Magnetic resonance imaging along with the injection of corticosteroid into the muscle-tendon junction can be useful in the diagnosis of adductor tendinopathy to determine if an adductor release may be appropriate.
Sports Hernia Surgery
Knowing whether to move forward with groin hernia surgery or not can be a tough decision to make.
Topics covered in this section:
- Surgery options
- Adductor release
- Complications
- Cost
- Will insurance cover it?
- Success Rates
- Recovery Times
- Surgeons, Specialists, and Doctors
- After surgery can I workout immediately?
Helpful links:
- Successful treatment without surgery
- Surgery cost
- MRI protocol
- Approved sports hernia surgeons and specialists
When is surgery an appropriate option to begin considering?
In scientific literature, there are currently two reported cases of successful non-surgical treatment for a professional hockey player and a professional golfer. However, it is important to look at the additional factors that almost certainly contributed to their success.
- Both individuals were pro athletes with extremely high levels of activity—their general fitness level and recovery abilities are far outside of the normal range
- They both received a speedy diagnosis which then allowed them to begin the proper rehabilitation immediately focusing on complete core muscle re-strengthening
- In both scenarios, they were required to complete the rehab—they didn’t skip physical therapy sessions
When trying to make the decision on surgery, there are personal factors to be aware of as well.
- How long have you had the injury? The chances of success using non-surgical intervention drops exponentially as time increases.
- What is your age and recovery ability? While rest, nutrition, and intelligent supplementation all play a role in beating footballer’s groin, younger and healthier bodies simply recover faster, better, and easier.
- What activity led to the injury? If it is the result of a training “incident” where the patient can pinpoint the specific moment in time a tear happened, surgery is likely the only solution that will lead to a fully-recovered groin.
- What is your level of pain and tenderness? Anything higher than a 3/5 on the pain scale likely means there are significant weaknesses requiring direct operational intervention.
Using these guidelines, the worst case scenario is that the individual has had the injury for several months, is possibly older or unable to recover adequately for other reasons (lack of sleep, poor nutrition, high stress, line of work, etc.), sustained it in an abrupt tear that can be singled out to a specific date and time, and experiences a high amount of pain and tenderness.
On the flip side, if you have high fitness, are experiencing low levels of pain, and get the injury properly diagnosed in a quick fashion, your chances of recovering with conservative treatment and rehabilitation are considerable.
However, a physical examination by a specialist can also provide insight into whether surgical intervention should be considered. During the exam, the tenderness of your adductor tendon, pubic symphysis, and inguinal floors will be graded on a scale of one through five.
Note: this is the same scale and process outlined in the diagnosis section earlier in the article.
- 0 = no tenderness
- 1 = small amount of tenderness
- 2 = mild but distinct tenderness that can be reproduced
- 3 = moderate degree of tenderness (“That hurts.”)
- 4 = severe level of tenderness (“That really hurts.”)
- 5 = pain so severe that touching and palpating the area cannot be tolerated
If tenderness of the inguinal floor and superficial inguinal ring is rated 3 or above, and the adductor tenderness on the same side is rated lower, surgery is recommended.
If the level of pain is a 2 or lower, either on one or both sides, conservative treatment is encouraged first before surgical intervention. Additionally, if the adductors show a clear dominance of tenderness over the other areas, conservative treatment is also encouraged before surgery.
To know if you are a candidate for successful pain management and relief without surgery, begin the treatment plan immediately. If you reach week 6 of the 10-week prescribed physical therapy plan, surgical intervention is likely the only option for long-term relief from symptoms.
Surgery Options
Currently, there are 2 schools of thought surrounding the repair approach needed:
- Insertion of mesh through laparoscopic or endoscopic surgery in an attempt to rebuild the pelvic floor
- Minimal suture approach that focuses on using surrounding tissue to strengthen the posterior wall deficiency
Mesh: Laparoscopic and Endoscopic Surgery
A large amount of AP surgeries are still performed with the use of mesh. It is generally performed by doctors who do not specialize in the injury or are not trained in the minimal repair procedure. It can be done with the use of a small incision through the way of laparoscopic surgery, or no incision with endoscopic surgery.
However, some specialists who are trained in the injury may still prefer the use of mesh. One such doctor is John T. Preskitt, MD at the Baylor Medical Center. In a report published in the Baylor Medical Journal, Preskitt reported a 98% success rate for returning athletes to sport when used in conjunction with the proper rehabilitation program, though the same size is relatively small (listed as >100 in published reports; the exact number is unknown).
However, all patients were high-level athletes with access to experienced and motivated spots physical therapy professionals following surgery.
Many doctors are against using mesh as recent findings suggest it can bind to nerve endings and cause life-long pain that is nearly untreatable. Additionally, it can restrict soft tissues and blood vessels, as well as surrounding organs. Even worse, mesh can harder over time and cause more damage in the area it was originally meant to protect. These specialists advise against using mesh at all costs unless absolutely required.
If mesh is used, endoscopic surgery may be a more suitable choice for women over laparoscopic, though only 47% of women report a complete reduction of pain one year following surgery.
In some cases, a second surgery may be required to remove mesh if additional complications develop.
Minimal Repair Technique: Best Option for Athletes
The minimal repair technique utilizing sutures invented by Dr. Ulrike Muschaweck in Germany, however, is a suitable surgical approach that boasts much higher success rates. Amazingly, some of her patients return to high activity levels within days.
Treating over 27,000 patients, she worked to develop the technique specifically for professional athletes to avoid the insertion of mesh and known issues.
The procedure utilizes a suture to fix the defect in the posterior inguinal wall—Muschaweck describes it as “nearly tension-free and the patient can, therefore, return to full training and athletic activity within the shortest time.”
Pain relief is achieved by decompressing a nerve deep in the groin: the genital branch of the Genito-femoral Nerve which is situated along the inguinal canal. While it may be effective for umbilical and direct inguinal hernias where it is utilized in single-dimensional placements, mesh is never used because athletes must retain full elasticity in the fibrous tissues of the abdominal structure.
To understand this better, contrast mesh placed over your belly button vs. your groin—the former is much more suited for the job where it will not be constantly disrupted multi-dimensional forces in the groin.
According to clinical statistics published by Muschaweck and Berger in 2010, 96.1% of patients who undergo the minimal suture approach resume training within just four weeks. The best cases even report pain relief at just 14 days post-surgery. From a realistic standpoint, even four weeks is highly ambitious—non-professional athletes should aim for a full recovery timeline that is closer to 10-12 weeks post-surgery.
In a long-standing case report by Muschaweck, out of 2,000 minimal suture repairs, only 3 were unsuccessful at alleviating symptoms. Minimal suture treatment appeared to work slightly by noticeably better in athletes vs. non-athletes.
Adductor Tenotomy (Release Surgery)
In recent years, knowledge on adductor dysfunction has grown significant, especially in regards to treating an inner thigh hernia that produces no visible bulge. In almost most cases, the adductor longus tendon is the cause for concern, though the adductor mangus tendon is sometimes involved as well.
After standard radiographs rule out any serious degenerative issues of the bone, an MRI can be used to narrow down on adductor issues.
Following the 10-week conservative treatment plan of sports hernia exercises and stretches, if a drop in symptoms is not felt and issues are consistent with adductor tenotomy alone, release surgery becomes a suitable option. A trained specialist will help determine which procedure is right for you: the traditional minimal repair technique vs. an adductor release.
However, it is worth noting that where possible, opting to receive just one surgical intervention at a time is the more conservative choice to make. If you do not receive a drop in symptoms following AP surgery, a follow-up procedure focused on the adductors is recommended.
Surgery Complications
Most complications are caused by the use of mesh during surgery. The main cause for concern is that it binds to your nerves and causes painful, often permanent entrapment. On the flip side, the minimal repair technique aims specifically to decompress the susceptible genital nerve.
Additionally, mesh becomes hard over time. While this can cause pain, it can also lead to immobility and loss of flexibility and elasticity in the groin. In the worst cases, it can even puncture nearby tissues and organs.
There are also general considerations that should be made for infection when introducing mesh to the body; in males, the foreign material can also lead to a drop in testicular temperature.
Costs
Beyond the differing price tags of any given surgeon, the costs of a sports hernia operation can vary depending on where it is done; operating and recovery room costs can differ from hospital to hospital. The extent of the damage present will also differ from patient to patient, with more significant deficiencies requiring extended surgery times and considerations. Additionally, the cost of a minimal suture repair will vary from that of mesh.
However, as a general rule expect to pay between $4,000 and $7,000 out of pocket to cover all surgery costs and associated hospital fees if insurance is not used.
If you do pay for the surgery out of pocket, make sure to ask the hospital for the negotiated insurance rate which will likely be considerably lower.
Will Insurance Cover the Costs?
Does insurance cover the costs of AP surgery? Unfortunately, in many cases it may only be partially covered or not at all. Several insurance providers consider the procedure “investigational” in nature with the argument that surgical effectiveness is unproven. As knowledge of the injury is still relatively new, this is likely to remain the case until treatment methodologies are widely adopted.
There are two generally-accepted current procedural terminology (CPT) surgery classification numbers.
- 49659: Unlisted laparoscopy procedure, hernioplasty, herniorrhaphy,herniotomy
- 49999: Unlisted procedure, abdomen, peritoneum and omentum
When these codes are used, additional supporting documents such as the procedure report should be submitted along with the insurance claim to provide a detailed description of the nature and extent of surgery, along with the time, effort, and surgical equipment used.
The list of insurance providers who consider it investigational is not exhaustive. Regardless, you should consult directly with your HMO.
- Blue Cross of Idaho
- Blue Cross Blue Shield of Rhode Island
- Aetna
- United Healthcare
No Insurance to Cover Your Surgery?
Some core muscle injury surgeons will use an inguinal hernia surgery classification to aid the chances of insurance covering a portion of the costs. In any case, ask your physician if this may be an option. If this is the case, expect to pay between $2,500 and $5,000 depending on your healthcare provider.
- 49505: Repair Inguinal hernia
- 49520: Repair Recurrent Inguinal hernia
Surgery Success Rate
The reported success rates of AP surgery are limited to a handful of case reports. Out of this available evidence the minimal repair approach without the use of mesh may boast the highest success rates.
Out of a long-term case study covering 2,000 patients who underwent the minimal suture repair, only 3 reported a failure to alleviate all pain symptoms. The additional surgery complications associated with mesh are also avoided with this approach, increasing its appeal further.
However, it should be further noted that European research tends to be less scientifically rigorous than studies conducted within the USA and lack controls as well as randomization.
We had the privilege to intercourse with Dr. Steven Goldstein who provided a very insightful perspective into his own experiences in dealing with the injury. Over the course of the past two decades he has operated on numerous patients presenting chronic groin pain. In almost all of these cases, he found a small indirect inguinal hernia; furthermore, he has performed laparoscopic mesh repair almost exclusively and reports a very strong 95% rate of pain resolution.
In any case, the message is clear: find a doctor who specializes in the treatment of hernias.
Surgery Recovery Time
Exact recovery times will vary depending on the patients, but most who undergo surgery are able to leave the hospital a few hours following the surgical procedure. However, your surgeon will provide that call based on your individual circumstances.
Immediately following the procedure, most patients report an immediate drop in pain. However, in some cases post-operative pain in the groin may be significant and require additional medication.
Many patients also report significant discomfort in the first three to five days following surgery. Such pain will depend on the extent of a patient’s surgical procedure where larger deficiencies will require a more extensive repair and cause higher levels of post-surgery trauma.
While there are reported cases of patients returning to sport after just a handful of days following surgery, their results lie several standard deviations away from the mean (it shouldn’t be viewed as “normal”).
Completion of the full 10-week treatment and physiotherapy plan provides a much more realistic timeline for recovery.
Surgeons, Specialists, Doctors
If you are speaking with your general practitioner and they are unfamiliar with the injury, providing them with the surgery cpt code can help point them in the right direction. From there, it is likely they may be able to refer you to a specialist.
However, it is also recommended that you do your research into finding the best surgeons in your area—it will be well worth your time and efforts and pay dividends in the form of pain relief and a successful recovery without complications.
The directory of approved doctors is a good place to start.
What Kind of Doctor Do You See for a Sports Hernia?
AP surgeons and specialists come in a variety of different flavors. Some like to perform the operation laparoscopically using small pin-point incisions while others prefer open surgery.
Some choose to opt for the use of mesh while others argue that simply leads to a host of complications and demand the minimal repair technique is the best solution.
Additionally, some physicians like to include an adductor release regardless of specific symptoms while others reserve a conservative stance and believe that less is more when it comes to surgical trauma.
Your options can largely be broken down into three options:
- Laparoscopic vs. open surgery
- Mesh vs. minimal repair technique
- Optional adductor release vs. opting not to touch the adductors
The current consensus holds that the likely best option for most is the minimal repair technique through open surgery with the lack of mesh and no adductor release.
In a case study of over 2,000 patients who took this advice and opted for the minimal suture approach, only three failed to receive permanent pain-relief. That’s a 99.9% success rate.
But as we thoroughly explained above, the largest factor behind a successful operation is finding an AP expert who understands and can account for the intricate, complex aspects of the injury.
After Surgery Can I Workout Immediately?
Shortly after surgery you will experience sharp post-operative pain in your groin and inner-thigh area. This extreme pain subsides during the first week after surgery, however working out after hernia surgery is not recommended until the third week following the procedure.
Following the rehabilitation protocol provides the correct activity ramp-up period.
Sports Hernia Treatment and Rehabilitation Program
Unfortunately, money doesn’t grow on trees and AP can’t heal itself—although according to an un-cited source on Wikipedia, sleeping on your back with your affected hip externally rotated is a quick cure.
More realistically, you have to proactively follow the correct treatment plan that includes a rehabilitation program focused on complete restoration of strength and mobility to all areas of the core. Long-term recovery relies on adherence to this program which contains the proper treatment exercises to address and correct deep-set muscular imbalances largely responsible for causing the injury.
Topics covered in this section:
- Is it dangerous to leave AP untreated?
- Is successful rehab without surgery possible?
- Rehabilitation Program
- Rehabilitation Timeline
- Myofascial Release
- Stretches and Mobility Exercises
- Strengthening Exercises
- Slide Board Training
- Agility Ladder Drills
- Amazing Prevention Exercises to Perform After Surgery
- Soft Tissue Mobilization
- PRP Therapy
- ART
- Graston Technique (IASTM)
Helpful links:
- Full Treatment Overview
- 3 Fundamental Physical Therapy Aspects for AP
- Powerful Treatment Exercises
- 7 Stretches to Relieve Pain
Evidence suggests those who require surgery and begin physical therapy treatment before their operation fare much better in recovery and return to full post-injury performance.
Bottom line: the sooner you start the rehab plan, the better off you will be.
Throughout the plan you will find various exercise and physical therapy items necessary for a successful recovery. Many of these needs can be met by a large commercial gym with a large selection of equipment.
However, it is recommended that you acquire them where possible as a long-term investment towards your health and freedom from pain.
Considering the costs of health insurance and the price of medical and surgical care, it’s a smart move to acquire them when you can. Even one doctor visit or additional sports injury would surpass the costs associated with getting the items you need. And unfortunately, after getting injured you become more susceptible to further serious issues down the road.
Lastly, patients with full access to rehab resources at home have a higher rate of treatment success—physical therapy sessions are more consistent and of higher quality.
Dangerous if Left Untreated?
If treatment is ignored, the possibility for bilateral or double AP to develop increases as the body’s strong side is forced to compensate for the weak, injured side. Additional serious complications may also become an issue as the weakness in the inguinal floor grows.
How long you can go untreated before these problems begin to happen is widely situation dependent. If the extent of your injury is more severe, the rate of further degeneration will be higher.
Running, weightlifting, and playing sports with AP should all be done with extreme caution.
In any case, athletes should begin treatment as soon as possible, especially if non-surgical treatment is preferred; as treatment is delayed, the chance for a conservative recovery diminishes.
Is Rehab Without Surgery Possible? (Conservative Treatment)
Yes, but not for everyone. For a more complete answer, read this.
In almost every case, those with AP develop significant and pronounced muscular deficiencies and imbalances over years of improper movement. In the most basic sense, improper movement leads to pain and injuries.
Alternatively, correct movement is corrective. It is a foundation principle of physical therapy.
Restoring proper movement patterns and working to balance out uneven muscular development will not just relieve pain in the short term. If done properly and consistently, the structural issues of the musculoskeletal system (tight, uneven muscles and surrounding tissues) that helped to contribute or cause the injury can also be corrected.
In a study published in the IJSPT physical therapy journal, therapists found non-surgical treatment was successful when it included a focused strengthening and mobility approach tailored for all areas of the core:
- Transverse abdominis (deep inner abdominal wall)
- Adductors (inner thigh)
- Abductors (outer hip)
- Hip flexors
- Psoas major muscle (deep groin muscle connecting your lower spine and femur)
- Glutes
- Hamstrings
- Lower rectus abdominis (lower abs)
Simply put, by strengthening all muscles involved in pelvic function and working to fix underlying muscular imbalances, pressure is lifted from the lower abdominal region. With this new lack of stress, the area can begin to heal and remodel itself.
Immediate pain relief following a physical therapy session of completing the program comes from the rehabilitation exercises and movements that work by engaging muscles that are inhibited and weak. When this happens, the odd compensatory movement patterns causing further pain are corrected and you can begin to move in a full, healthy range of motion.
For long-term benefits and changes to your muscular system and posture consistent dedication to completing the program is required.
Rehabilitation Program
The treatment and rehabilitation program is comprised of 10 weeks. Initial weeks are dedicated to developing strength and mobility in the sagittal plane. Gradually, exercises in the frontal and transverse plane are added to complete the physical therapy process.
- Sagittal Plane: Movement that occurs in front of, or behind the body
- Frontal Plane: Movement that occurs along either side (left or right) of the body
- Transverse Plane: Movement that occurs at the “trunk” of the body (twisting at the hips)

Sagittal Plane In Red, Frontal Plane In Blue, Transverse Plane In Green
The general concept is centered around baby-stepping the injured posterior chain back to full health by addressing each weak link one step at a time—beginning with the most fundamental of movement patterns.
Beginning too aggressive of a physical therapy approach too soon will apply excessive pressure to new muscular and connective tissues forming as part of the healing process, only extending recovery further.
Rehabilitation Timeline
The rehabilitation timeline gives an overview of the different physical therapy modalities to be completed throughout the 10-week process.
- Week 1: walking—minimize all pressure around the abdominal region (focus on not bracing your core).
- Week 2: walking longer distances + light elliptical work; the purpose of the elliptical machine is to move the body through a more full range of motion, while still avoiding all medium-high impact activities.
- Week 3 (Strength Phase 1): initial strengthening and mobility exercises are introduced. The athlete should still be focusing on minimizing abdominal pressure as much as possible. By now they should also be walking 2+ miles on the elliptical pain free.
- Week 4: continue to progress in the core strengthening exercises. Additionally, the athlete is encouraged to increase elliptical intensity.
- Week 5 (Strength Phase 2): lower body strength and activation; old movement patterns begin to dissolve as emphasis is now placed on achieving proper abduction and adduction. Additionally, the first lateral movement is added, reintroducing the body to the frontal plane of movement.
- Week 6: athlete continues to progress in all previously-introduced modalities. No new exercises or techniques are introduced, but it is imperative that progression continues in the form of additional sets and repetitions added to movements from the previous weeks. It is also worthwhile to note that this is point at which someone should consider surgery if no progress has been made towards alleviating pain.
- Week 7 (Strength Phase 3): unilateral strengthening exercises are introduced; all other modalities continue.
- Week 8: by now the athlete has undergone almost 2 months of an extensive rehabilitation and it is time to retest the pain threshold. To do so, the test is performed.
- Week 9 (Strength Phase 4): athlete continues to become more comfortable through all planes and ranges of motion. Light ladder drills and slide board exercises are added.
- Week 10: The athlete should “feel” 90% or better when compared to their pre-injury condition. More aggressive ladder drills are introduced as long as zero pain is created in the hip and groin region. Most importantly, the athlete can begin their return to sport-specific activities!
If you have just undergone surgical treatment, start at week one and do not attempt to jump ahead. If you are attempting conservative treatment, however, you can skip to the week that is most appropriate. For example, if you can already walk and use the elliptical machine pain free, skipping ahead to week 3 is appropriate.
To reiterate, as you advance from one strength phase to the next, you should still perform all of the movements and exercises of the previous phase(s) as much as possible. This will obviously lead to time constraint issues, so at the very least attempt to complete 1 session per week including the movements from all previous strength phases.
For example, if you are on the third strength phase, make sure to complete at least 1 session that week that includes the exercises for the first and second strength phases.
When completing the exercises contained within the program, start with 3 sets of 10 repetitions and progress gradually to 4 sets of 20 repetitions. On the same note, start with two days per week and progress to a maximum of four.
For example, on day 1 you would complete 3 sets of 10 repetitions for two sessions. But as you get stronger, you might work up to 4 sets of 20 repetitions for all four sessions by week 7. Make sure to move at a pace you are comfortable with. You don’t want to re-aggravate the injury.
Each week of the rehab process also has two rest days–space them out based on personal preference.
As always, you should never attempt to complete any exercise or stretch if it produces pain. “Working through the pain” will almost undoubtedly leave you in worse condition than when you started. Discomfort is acceptable and unavoidable while completing rehab—pain is not.
If you are seeking the assistance of a physical therapist to help with the completion of exercises, the CPT insurance classification may be useful. The previously-used PT evaluation code was CPT-97001. However, as of 2017 three new codes have been created to replace this single code. Selection of the correct code is based on injury complexity.
- 97161 = low complexity
- 97162 = moderate complexity
- 97163 = high complexity
If you pursue the help of a physical therapy clinic, your chosen therapist will be able to assistant in selecting the appropriate code if insurance coverage is utilized.
However, such in-person help is strictly optional; all outlined steps of the rehab process can be performed from home without the need of outside assistance.
Following the timeline below are detailed descriptions of all stretches, mobility movements, and exercises referred to throughout the sports rehab and treatment plan.
After reading the explained timeline, refer there for full instructions on how to actually complete the various exercises and movements.
Week 1: Starting Out
Immediately following surgery or initial injury, the first step is to relieve pressure surrounding the pubic area and affected soft tissues. If you have undergone operative treatment, the surgical area will be extremely tender and painful—be particularly careful not to cause undue stress on the region while moving about your bed or during daily activity.
While RICE is not an appropriate stand-alone solution, it is helpful following surgery or initial injury and may provide additional relief and recovery. It is worth noting, however, that applying heat prematurely will only make pain worse and extend recovery.
The first rehabilitation milestone is being able to walk pain free.
Increase distance gradually each day until you reach 2 miles. Different individuals have radically different rehabilitation potentials. Some may experience terrible pain during the week following surgery, while others may be able to walk 2 miles daily. It is important to only do as much as you can within your personal pain threshold.
2 rest days during the first week (and all other weeks) are advisable—space them out among the other days.
Week 2: Laying The Foundation
If you aren’t yet walking 2 miles, aim to complete that milestone and restart week 1.
If you are, it’s time to introduce the elliptical machine. This will allow for increased exercise intensity while avoiding high-impact activities like jogging which are likely to aggravate the injury.
Begin with zero incline and gradually increase it as your workout progresses while staying in a pain-free range. The goal is simply to move through a full range of motion–do not run hard or push yourself.
The milestone for the elliptical machine mirrors walking; aim to reach a distance of two miles. Once that milestone is reached, walking and elliptical machine running should be alternated daily.
As with the first week and all other weeks, two rest days are recommended. Space them out so that they are placed among your active days.
Week 3: Fixing The Problem
If you have reached week three and still lack the previous weeks’ milestones, continue to work on them.
If you can walk or elliptical a distance of two miles without experiencing a flare-up of symptoms, you are ready to begin week three and enter the first strengthening phase.
As a side note, for those who underwent surgery, a majority of post-operative pain will be gone by week three.
You will begin with movements that take place only in the frontal plane. However, before beginning any exercises, you must first perform the “ABCs” of injury prevention.
- Myofascial release with the aid of a foam roller, lacrosse ball, or other physiotherapy device
- Static stretching and mobility exercises
- Warm-up
The exact myofascial release and stretching routine to follow is outlined below.
To complete the warm-up, use the elliptical machine at a low setting and gradually increase it. Alternatively, you can substitute an elliptical machine with brisk walking.
Warming up increases your body and muscle temperature and prepares your cardiovascular system for exertion. It also increases blood flow for increases delivery of oxygen to working muscles.
Once you have finished with myofascial release, static stretching, and warming up it is time to move on to the actual exercises.
All exercises must undergo systematic progression. In practice, this is an increase in the amount of sets and repetitions over time. Where weight is involved in the later stages of rehabilitation, it is also uses as a metric for progression.
- Week one: 2 sets of 10 repetitions
- Week two: 3 sets of 12 repetitions
- Week three: 3 sets of 20 repetitions
With each rehab session, aim to increase the amount of sets and repetitions you complete. In the end, your goal is to work up to 4 sets of 20 repetitions for each movement.
The physical therapy exercises are grouped by the respective planes of movement they treat, forming 3 sections.
- 1st Strengthening Phase (Sagittal Plane): Movement occurring in a straight line in front of and behind the body
- 2nd Strengthening Phase (Frontal Plane): Movements or shifts from side to side
- 3rd Strengthening Phase (Transverse Plane—perpendicular to the sagittal plane): Movements involving flexion and extension of the hips mixed with rotational forces
Once you have mastered exercises of the first phase, move to the second. Once you have mastered both the first and second, move on to the third. Take note of the provided timeline and make sure to follow all additional physical therapy and recovery modalities.
While completing each strengthening phase, continue to progress in distance and incline on the elliptical.
Strengthening – Phase 1
The beginning strength phase is comprised of 10 movements.
- Light vacuums
- Bosu crunches
- Exercise ball rollouts
- Hip bridges with maximum dorsiflexion
- Dog legs
- Dirty Dog Legs
- Supine short-lever
- Supine Psoas hold
- Light supine adduction
- Bodyweight squats
- Bodyweight reaching one-legged deadlifts
Week 4: Structured Review
By week four, if you received surgery you should be largely free of pubic pain. If you are attempting conservative treatment, you should begin to experience a notable drop in symptoms.
Adherence to the rehabilitation program becomes especially important at this point as initial pain relief may encourage athletes and patients to return to play too soon.
Week 5: Remodeling Healing Tissue With Progressive Resistance
By week five, almost all of the sharp pain and tenderness surrounding the pubis area should be gone. A general feeling of awkwardness or discomfort may still remain and shouldn’t be a cause for worry.
As weights are introduced into the program during the second strength phase, it becomes especially important to adhere to the physiotherapy fundamentals of foam rolling, stretching, and getting warmed up that should be completed immediately before the exercises (the “ABCs”).
During the healing process, as new muscle tissue is formed, strengthening and correcting movement and pelvic posture will help to remodel old, dysfunctional movement patterns.
Strengthening – Phase 2
Performing weighted squats and deadlifts require a high level of fitness and kinesthetic awareness. As the ankles, hips, and knees flex throughout squats and deadlifts, the core must work to provide stability to the pelvic region. Weighted squats and deadlifts can be performed with a barbell, a dumbbell, or a kettle bell.
Wearing deadlift shoes is highly preferred, but if you do not have them wear a flat-soled shoe (no running shoes).
While completing squats, make sure not to perform a half or quarter squats—ensure that your hip crease travels below your knees. Studies confirm that squats performed with a knee flexion of 15-30 degrees produces dangerous forces across the ligaments of the knee. Doing them properly will ensure proper muscular development and protect you from developing another injury.
The second strengthening phase also includes a last, third exercise to ensure functional strength in the frontal plane is improved.
- Weighted Squats
- Weighted Deadlifts
- Lateral Bodyweight Squats (static side lunges)
Week 6: The Turning Point
If you’ve made it to week 6, good job—you’re now officially at the half way point of a full recovery. The reverse, however, could also be true. If you still haven’t found relief from the debilitating pubic pain, it is time to move forward with finding a surgeon to perform your operation.
Hopefully though, you are feeling great and ready to start another week of rehab towards the goal of a new life without nagging groin pain.
Continue to progress with all exercises, movements, and modalities included in the beginning 5 weeks of rehab. This includes all exercises from previous strengthening phases.
Progression is defined as an increase in the amount of sets done, repetitions completed, or weight used and will prepare you for week 7—where unilateral movement patterns are introduced.
Week 7: Introducing Unilateral Training
Up until now, all movements and exercises have taken place bilaterally, or on both sides of the body in a symmetrical fashion. An easy example of this is bodyweight squats: both legs are moving synchronously to complete the full range of motion.
One-sided movements, on the other hand, train your body’s ability to fire asynchronously, which is important in the role of healthy pelvic function and stability.
Strengthening – Phase 3
As with the second strengthening phase, three new movements are now added.
- Split Squats
- Lateral Step-Ups
- Pistol Squats
Week 8: The Test
Now that you’ve made it to week 8—and hopefully successfully with large reductions in pain—it’s time to test the waters and determine how far you’ve progressed.
There is a wrong and a right way to do so though, and taking the incorrect steps could set you back in your rehab process, or even worse, re-disturb the injury site in a serious way. A controlled test, however, is an effective way to evaluate your recovery status.
To do so, find a flat running surface. Any amount of incline or decline can cause too much hip flexion and extension. While running at an incline is worse, running downhill is still a bad idea considering the increased force of impact from a slightly longer “hang-time” in the air between steps.
Once you’ve found a suitable location, the goal is to run four 400m intervals at an 8:00 mile pace, which comes out to 2 minutes for each lap on the track—this is purposefully slow with excessive recovery time in between laps.
Don’t attempt to increase intensity if you feel good, as it would negate the point of a conservative assessment entirely.
“Awkward discomfort” is likely to be felt, but is okay as long as it is not accompanied by pain. If at any point in time during the run you feel pain, stop immediately and complete an additional 4 weeks of the first three strengthening phases and accompanying elliptical work before returning to test. Multiple failed tests following conservative treatment are a strong call to action to move forward with surgery.
Lastly, if you are a strength athlete and compete in sports like powerlifting or crossfit, it is now acceptable to begin working with heavier weights. Tread carefully and progress with caution, as always.
Hopefully though, everything goes well and you can continue on to the final 2 weeks of rehabilitation.
Week 9: Introduction of Rotational Exercises
Until now, rotational movement through the transverse plane has been avoided. However, establishing rotational strength and stability will be absolutely essential for a complete, long-lasting recovery. While performing rotational exercises, ensure that you are bracing with your core at all times.
As always, complete the physical therapy ABCs at the start of your session before performing any exercises.
Strengthening – Phase 4
As with the first three strengthening phases, the fourth phase sees the addition of 2 more exercises.
- Standing Trunk Rotation
- Rotational Deadlift to press (rotating landmine deadlift)
Week 10: Slide board, Agility Ladder Drills, and Return to Sport
During the last week of rehab, two new physical therapy drills are added.
- Slide board drills
- Agility Ladder drills
This will begin to address the areas we have avoided thus far: the adductors and pelvic floor. During the initial 9 weeks, all exercises have focused on re-strengthening and mobilizing surrounding, adjacent areas.
However, final return to play and full activity will require complete groin mobility and full restoration of strength and stability to the inguinal floors.
Along with the additional drills, stretching of the adductors is now acceptable but should be done only lightly and for short periods of time to start.
Lastly, on the final week of rehab, begin the process of gradually reintroducing sport-specific modalities.
If you play soccer, get out there and start practicing your footwork drills again. If you play tennis, it’s time to start working on your serve again. If you play golf, get out to the driving range and hit some golf balls. It’s time to be an athlete again.
Myofascial Release: Foam Roller Exercises and Lacrosse Ball Massage
Extended periods of time sitting at a desk, driving a car, and lounging on the couch are unfortunate consequences of modern life. This contributes to poor pelvic posture and less functional movement which leads to increased pain.
But it isn’t a lost cause. By working to remedy tightness and inhibition, healthy movement patterns can be restored and promote long-term positive muscular and structural development—a cornerstone of long-lasting rehab success.
Myofascial release is a physical therapy technique that involves applying gentle, sustained pressure to myofascial connective tissues.
According to physical therapy circles, the long, slow application of pressure is necessitated by the pziozoelectric phenomenon: a small load (pressure) applied slowly will allow viscoelastic media such as fascia tissue to elongate. However, this is based on the assumption that fascia behaves as a crystalline structure, likely taken from Juhun’s physiotherapy handbook Job’s Body that proposes connective tissue might behave as a form of “liquid crystal”.
A contradictory study published by Chaundry et al. shows that fascia is far too tough to be “released.” Even thin layers of fascia are sough tough that they would require vice grips to alter (stretch or loosen). This alone buries many physical therapy approaches.
Closer to reality, it more closely works by providing a neuromuscular or neurophysiological stimulation to tight and inhibited soft tissues, allowing them to experience transient pain relief and range of motion benefits. If you have ever stubbed your finger or ripped a hangnail off, and proceeded to shake or blow on your hand—you were doing the same thing: providing an additional outside stimulation to override the more painful sensation.
Then, using this gained range of motion and lack of discomfort, subsequent physical therapy exercises can be performed with correct movement (remember: correct movement is corrective).
To actually perform myofascial release, complete the foam roller exercises and lacrosse ball massage; you will need two physiotherapy devices.
- Foam Roller
- Lacrosse Ball
An optional third device is the rumble roller which provides an uneven surface area compared to the smooth surface of a normal foam roller. It can be used in the later stages of therapy after a patient becomes comfortable using a flat-surfaced foam roller.
Lastly, a tiger tail can be used to target the adductors without placing too much pressure on them if they are especially tender. It can also be used to pin-point the hip flexors effectively.
There are a total of 10 myofascial release movements that target all areas of the hip and groin: 6 are done using a foam roller and 4 are performed with the help of a lacrosse ball.
While performing foam roller exercises, always roll towards your heart to go with the flow of blood. For example, while targeting the quads and Illiotibial band you should first place the foam roller just above your knee, roll up towards your hip, and then reset to the starting point—do not roll back down towards your knee (as that would be away towards the heart).
While performing the movements, once you find a tender area stop there and breathe deeply while allowing the tension to gradually dissipate. This may take anywhere from 30 seconds to several minutes depending on the level of tightness and inhibition present.
Your first session of myofascial release is likely to be unpleasant; finish through to completion and evaluate how you feel after—likely much better. The more you perform the movements, however, the easier they will become.
Foam roller exercises are always done before lacrosse ball movements.
As a word of caution, make sure to avoid foam rolling behind the knee.
- Foam Roll Quads
Set the foam roller on the floor and place it directly above your knee. Roll up your leg towards your hip slowly, making sure to stop anytime a tight spot is felt and allowing it to gradually dissipate with pressure before moving on.
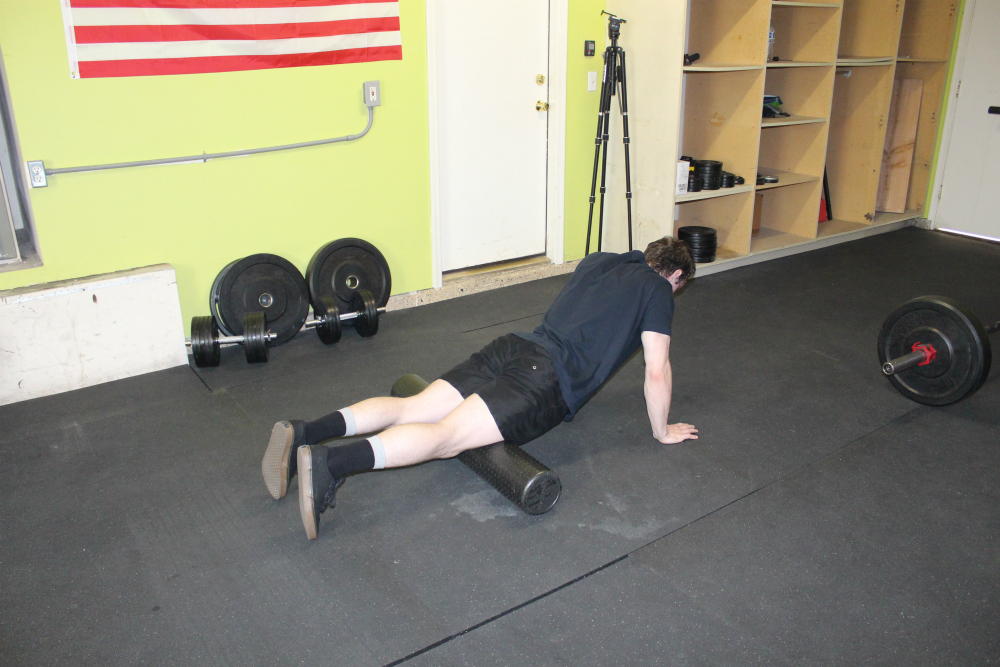
- Foam Roll IT bands
While lying on your side, place the foam roller underneath your bottom leg just above the knee. Slowly roll up towards your hip while also rocking back and forth on the foam roller.
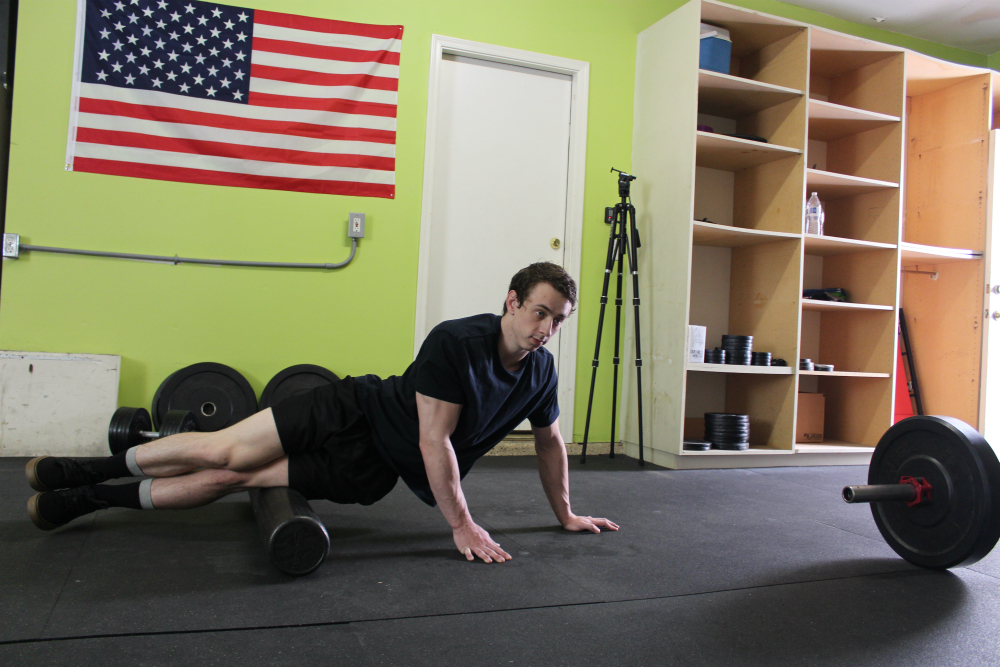
- Foam Roll Glutes
Place the foam roller on the ground and sit on one side of your glutes. Rock back and forth along the roller to massage the muscle and alleviate any tight spots.
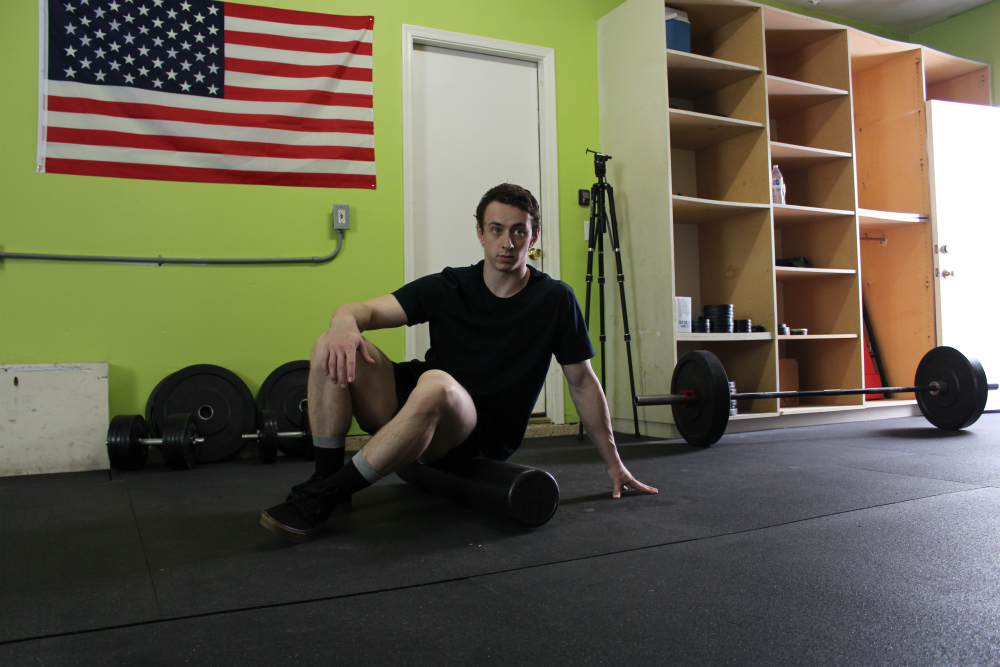
- Foam Roll Hamstrings
Sit on the ground with your legs extended in front of you and place the foam roller under your leg just above your knee. Roll towards your glutes. You can also perform this foam roller exercise with both legs on the roller at the same time.
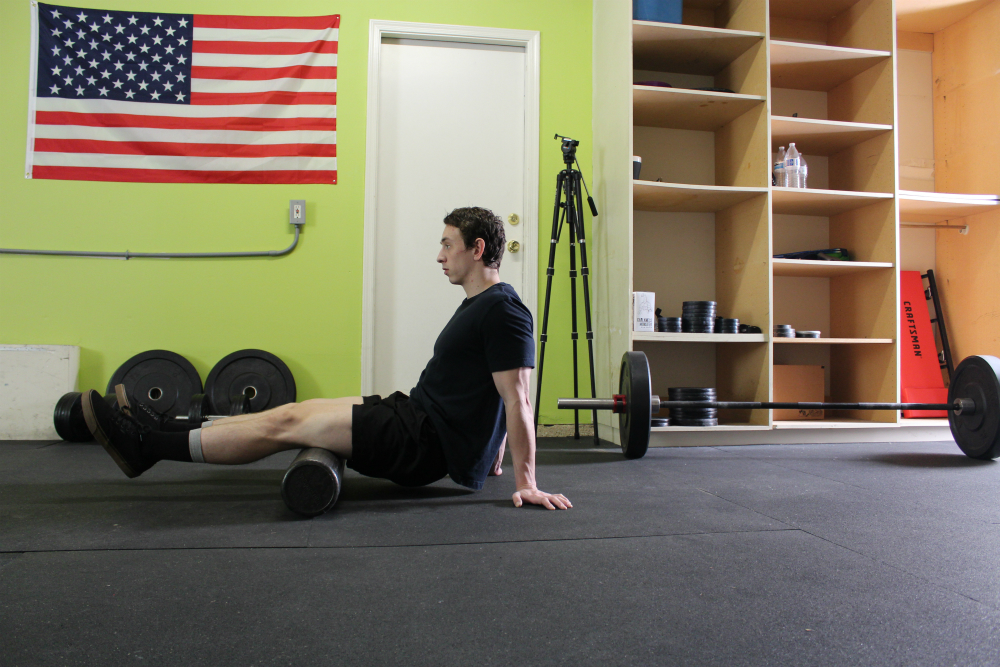
- Foam Roll Calves
While sitting on the ground with your feet extended out in front, place the foam roller under your right calf. Roll back and forth while also rocking from side to side. Repeat for the left calf as well.
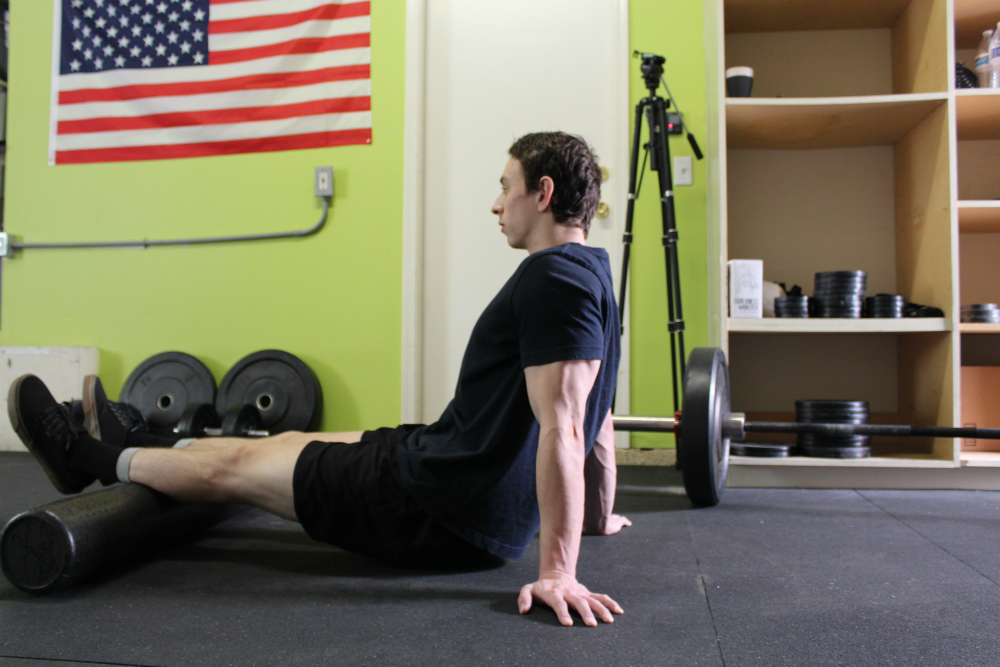
- Foam Roll Adductors (With Caution)
Foam rolling the adductors (inner thigh) should be done with caution. Start with light pressure to gauge how the area responds to stimulation. Start just above the knee and roll towards the groin. The tiger tail is an excellent tool to use for this as you can very easily control the amount of pressure being applied.
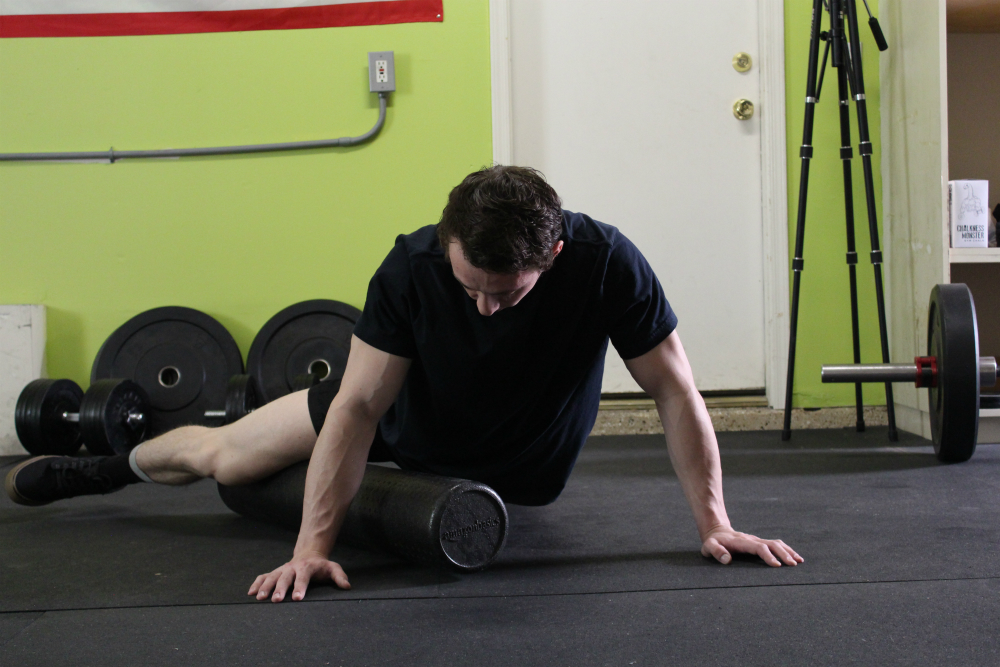
- Lacrosse Ball on Glutes
While sitting on the ground with your hands behind you and your knees bent, place the lacrosse ball under your left glute. Bend your left knee and cross your legs to place your ankle in top of your right thigh. Roll the glute while stopping at any tight areas to alleviate the tension. This lacrosse ball massage exercise will likely be unpleasant the first time it is performed—a tennis ball can be used instead for less pressure.
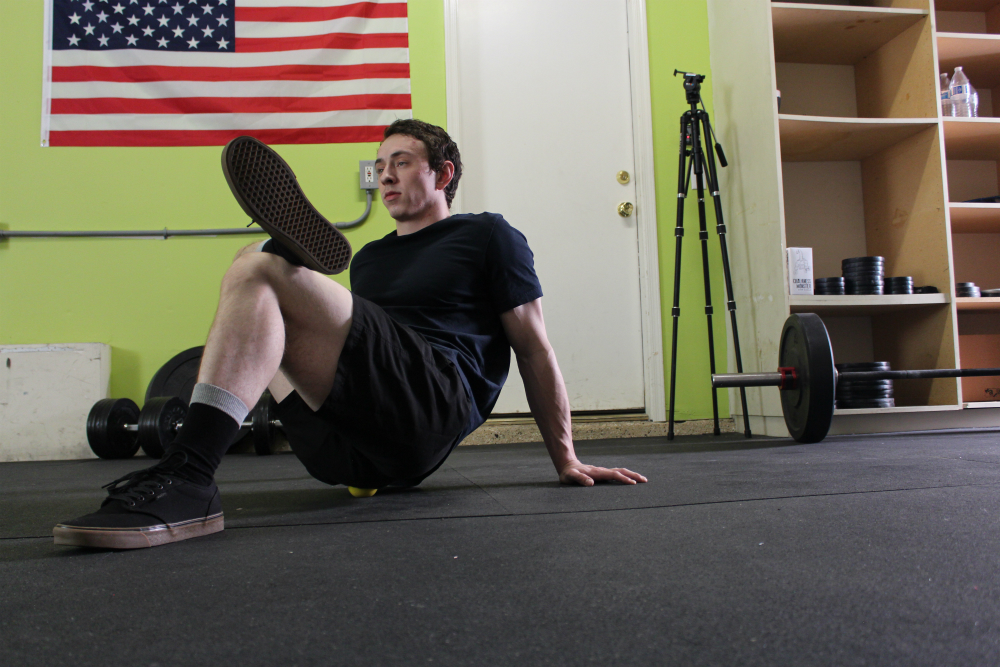
- Lacrosse Ball on Hamstrings
While crouching down on both knees, place the lacrosse ball in between your calf and your hamstring, just behind your knee. Sit back and allow the ball to apply pressure to your hamstring and calf. Alternatively, the movement can be done by sitting on a bench or chair with the ball placed under the hamstring.
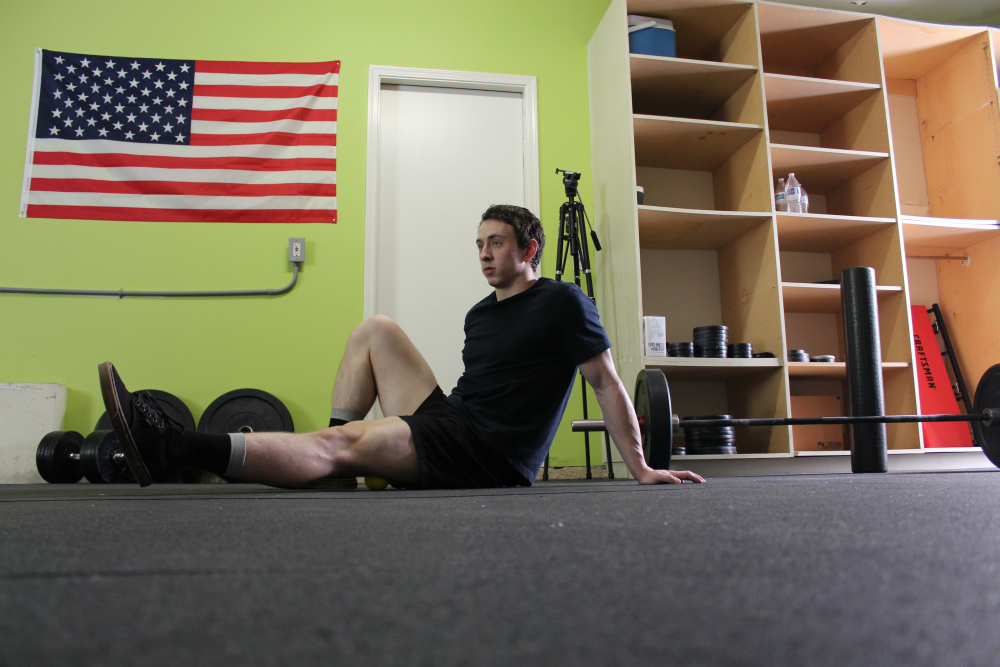
- Lacrosse Ball on Calves
Place the lacrosse ball between your calf and your hamstring while squatting down.
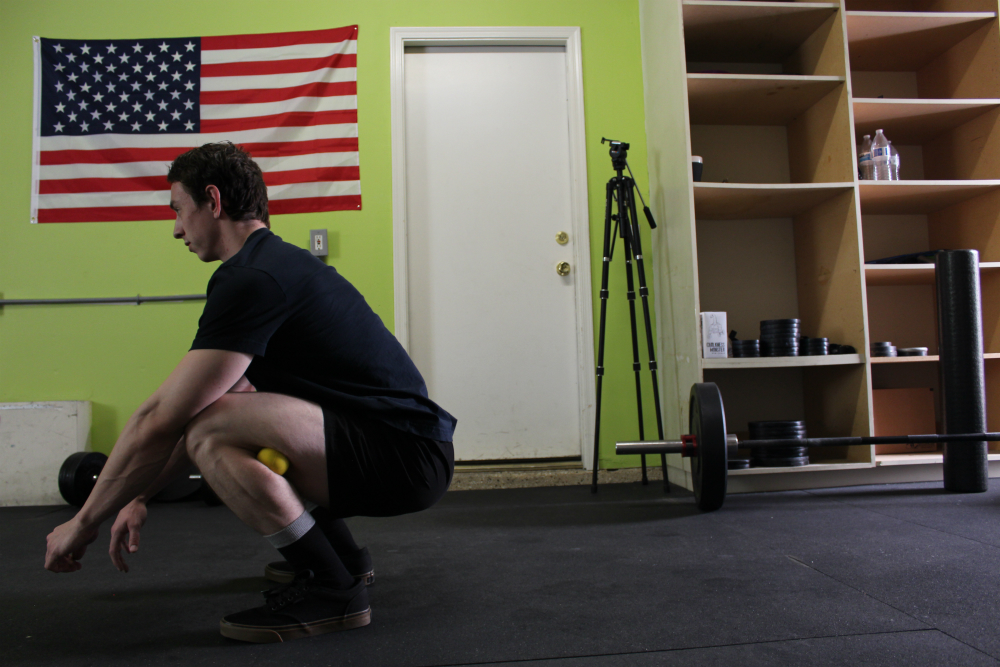
- Lacrosse Ball on Hip Flexors and Abductors
While lying on your stomach, place the ball under your right hip flexor. While lying against the ball, rotate your torso so that the ball rolls back towards your glutes, massaging the side of your hip where your abductor muscle is. Rock back and forth on the ball to alleviate any tightness and inhibition. Repeat on your left side.
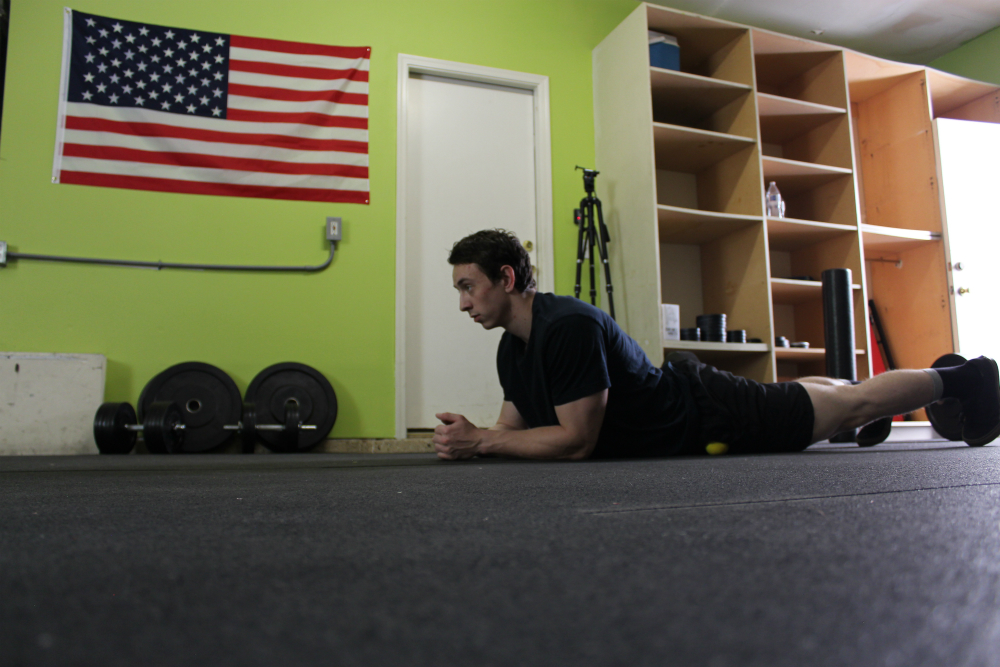
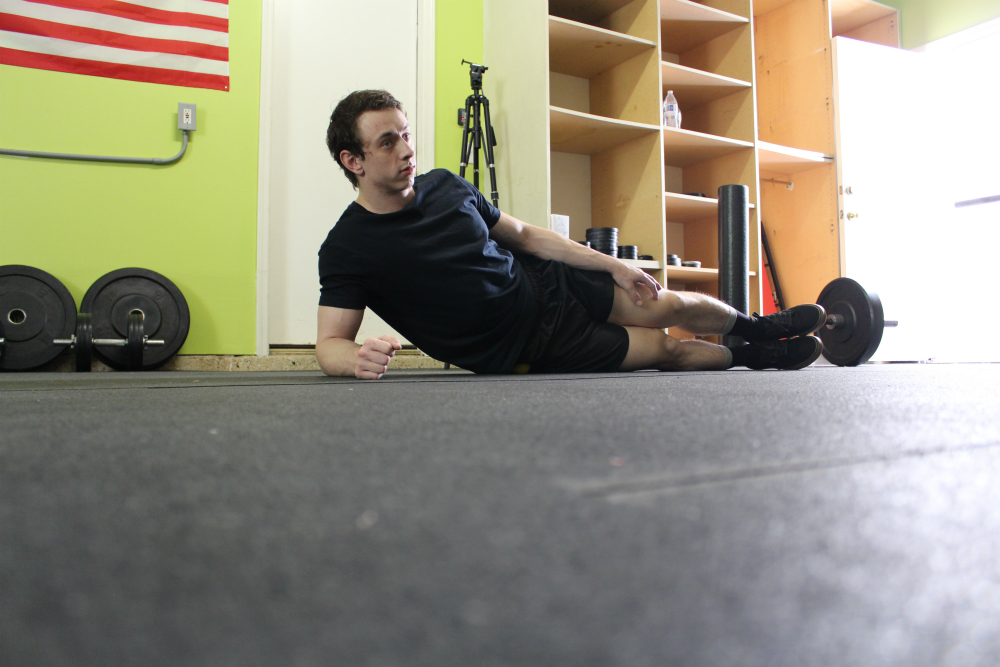
- Lacrosse Ball on Feet
While standing or sitting in a chair, place the lacrosse ball under your feet. Apply pressure while massaging the soles of your feet to relieve tension.
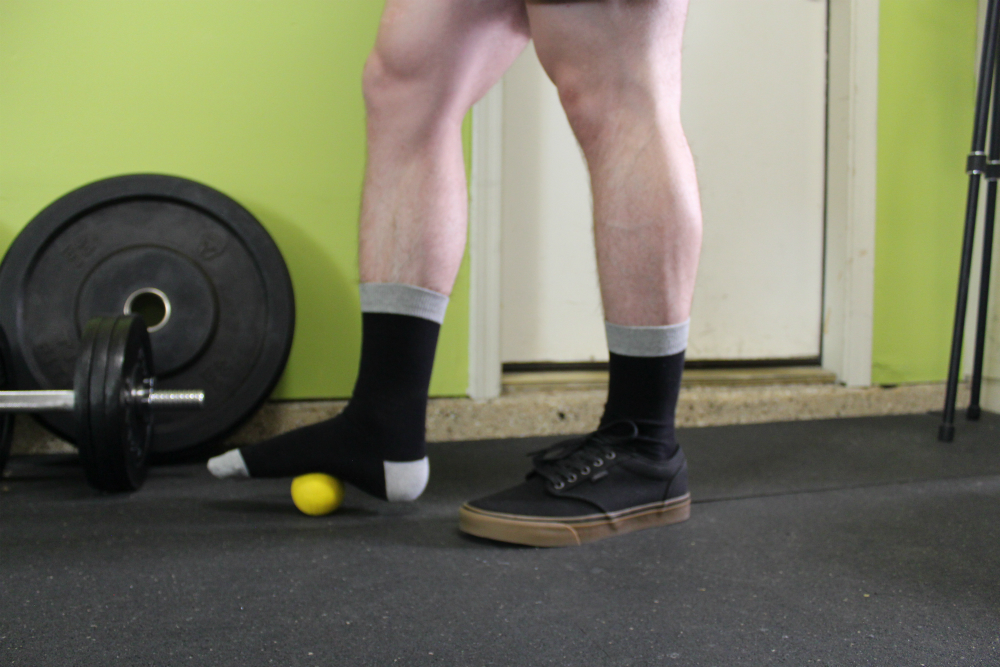
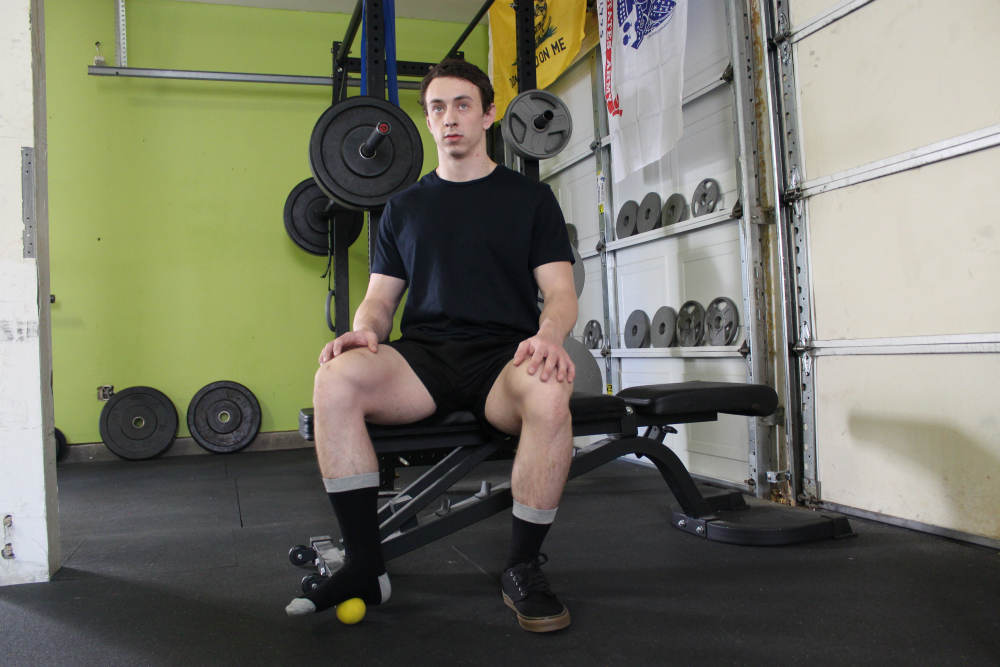
Sports Hernia Stretches and Mobility Exercises
Static stretching is a well-known solution for relieving tightness in muscles and connective tissues. While it also provides pain relief and increases to range of motion, it acts through different neurophysiological mechanisms than myofascial release—you should be doing both to maximize flexibility and alleviation of tightness.
Additionally, mobility exercises are designed to develop free and uninhibited movement throughout full, healthy ranges of motion.
It is worth noting that stretching the adductors often encourages a flare-up of symptoms and is therefore avoided during the 10-week rehab timeline.
All stretches should be held for 30-60 seconds and performed 1-3 times depending on the tightness of the area.
- Seated Hip External Rotator Stretch
While sitting on the edge of a chain with both feet flat on the ground in front of you, cross your right leg over your left so that your right ankle is sitting above your left knee. While keeping an upright torso, apply external pressure to your hip by pushing down on your right knee. Leaning forward is acceptable as long as the chest and spine are upright. Repeat for the left leg.
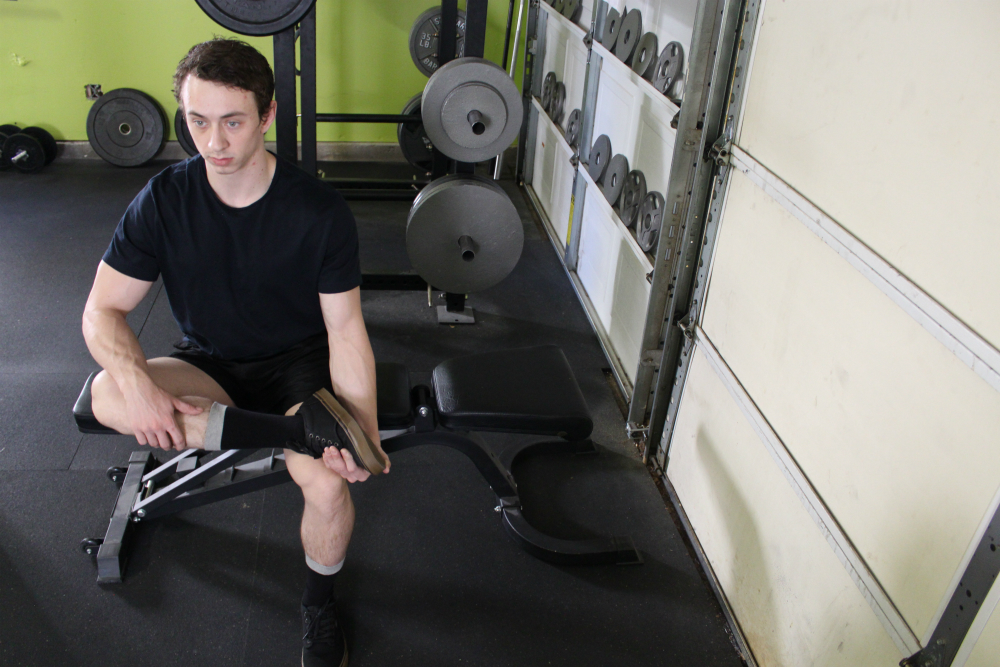
- Bench Hip External Rotator Stretch
With the same approach as the seated version, make a 90-degree angle with your knee and place your shin along the bench so that it is parallel with the ground. Lean forward while keeping the back heel planted on the ground. Repeat for the left leg.
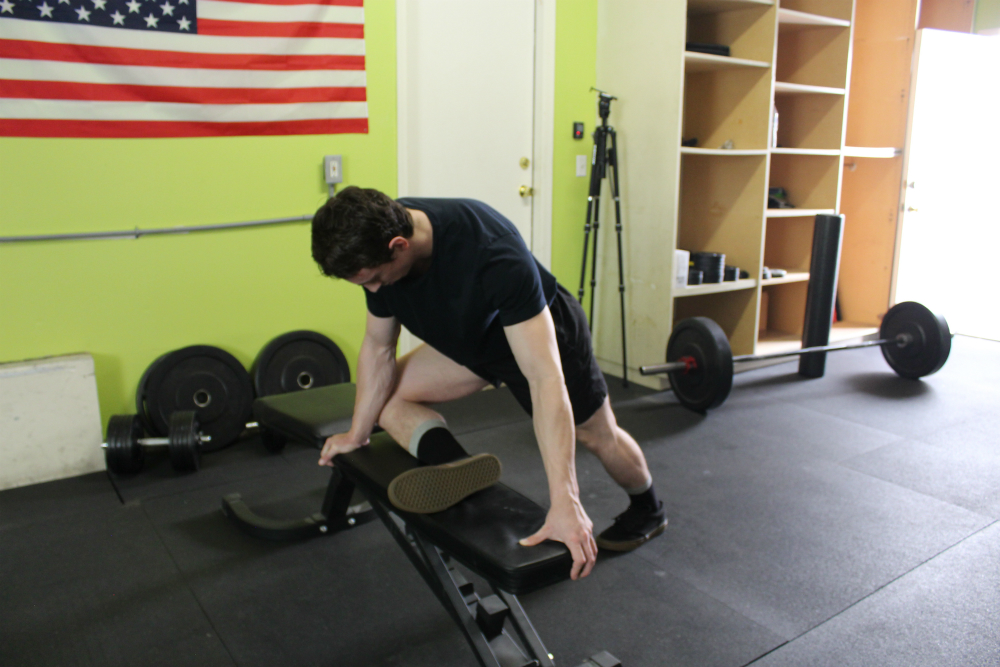
- Standing Calf Stretch
Stand with one foot behind the other while your hands are placed in front of you on the wall. Lean forward to feel a deep stretch in the back calf. Alternate your stance and complete the movement for the other calf.
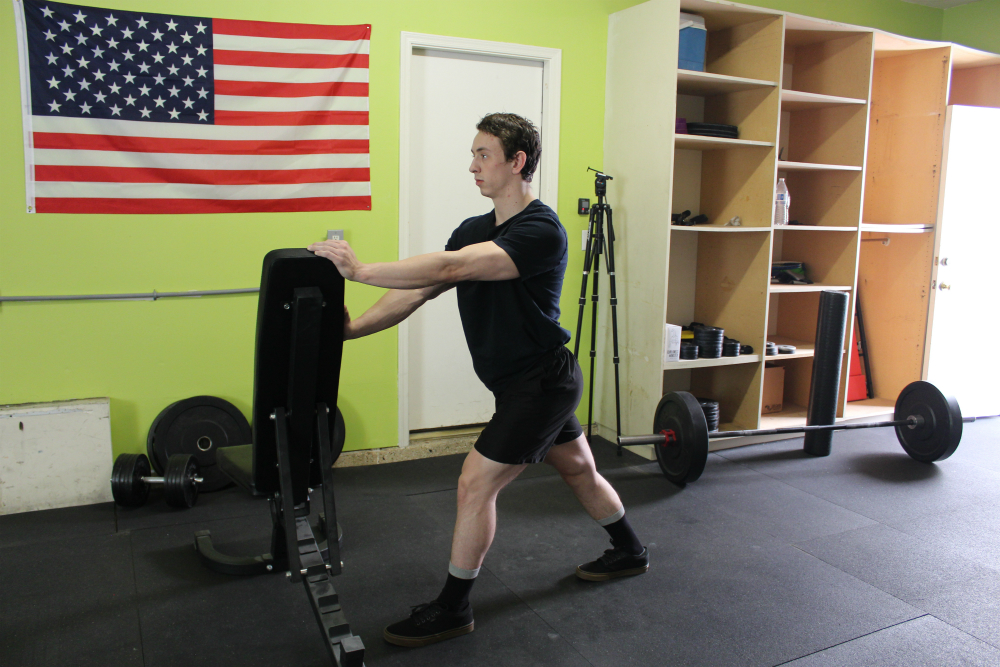
- Table Hip Flexor and Psoas Stretch
While standing next to a table, place your leg on the table so that your quad is facing down. Your hands should be placed in front of you on the table for support. While making sure to brace and keep your core tight, lean back to feel a deep stretch in the hip flexor and psoas major muscle.
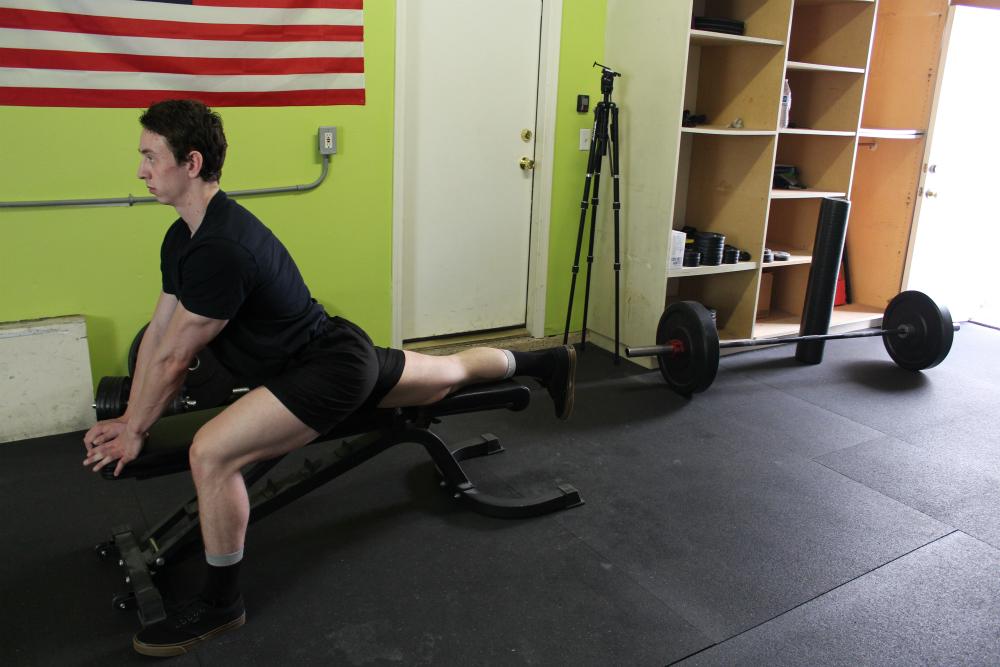
- Seated Groin Stretch
While seated on the ground with both feet placed together, pull your ankles in towards your groin while using your elbows to push down against your knees for a deep stretch. Leaning forward is acceptable as long as the torso is kept upright.
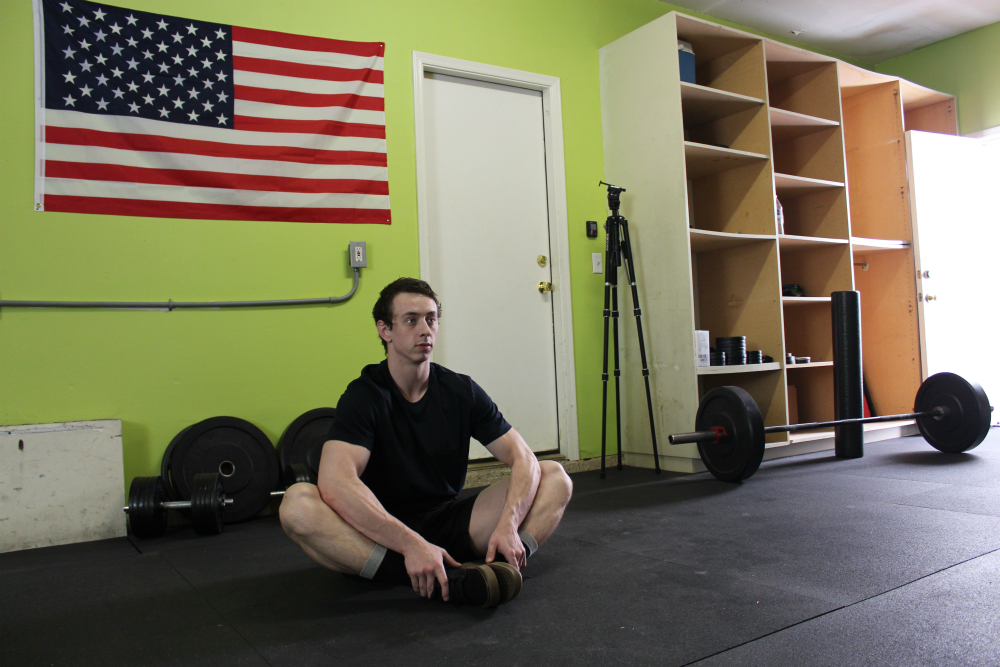
- Frog Stretch
While on all fours, slowly open your hips up so that your knees slide to either side of your body. With your hands in front of you for support, slowly rock back into the frog position to feel an intense stretch in the hip flexors and groin.
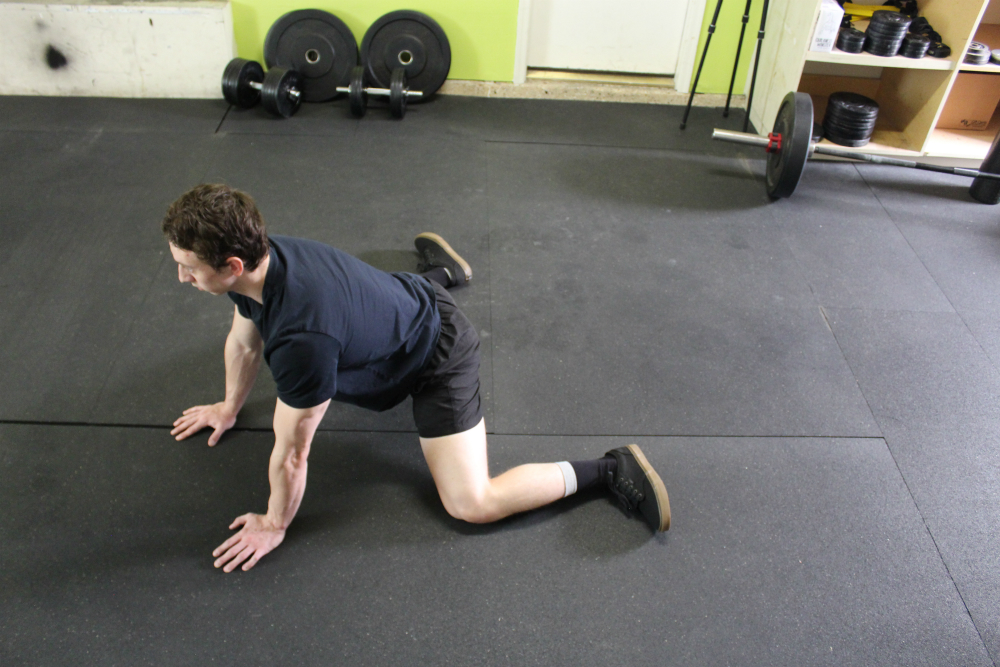
- Lying Quad Stretch
While lying on your stomach, flex your knee and pull your leg back so that you can grab your ankle with your hand. Pull your ankle towards your glutes to feel a deep stretch. A towel can be used to pull the ankle if mobility is an issue.
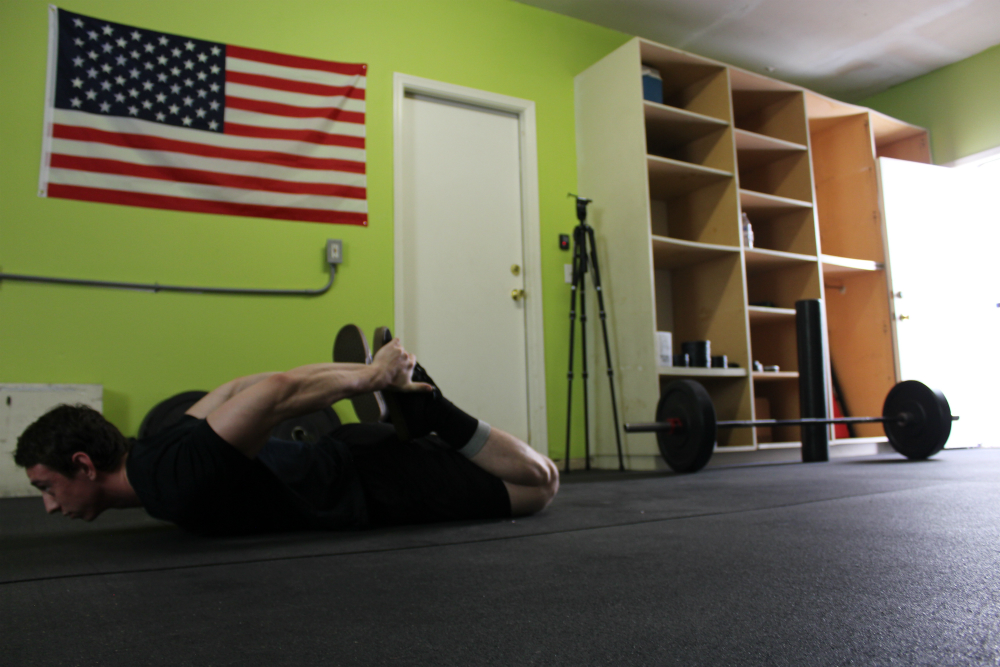
- Standing Hamstring Reach
While standing with your feet together or slightly narrower than shoulder width, push your hips back and allow your torso to lean forward to produce a stretch in the hamstrings. Reach for your toes but do not slouch your back—remain upright at all times and sit back with your hips to feel the stretch.
Sports Hernia Strengthening Exercises
While myofascial release, stretching, and mobility exercises provide pain relief by allowing proper pelvic function—the results are only short-term. True, long-term structural changes are only made through performing strengthening exercises.
Because the sports hernia is caused by strong leg muscles but a weak core, working to fix the imbalance will also fix the pain and provide lasting recovery. With that said, myofascial release and stretching are purposely performed before strengthening movements to increase your effective range of motion, allowing for better uninhibited form—and thus better results towards alleviating pain and causing positive postural changes.
Phase 1:
- Light Abdominal Vacuums
Targeting the transverse abdominis (deep, inner abdominal wall), ab vacuums are essential for abdominal structural integrity and play a critical role in long-term recovery. This is because the transverse abdominal wall and the fascia surrounding it is where the injury actually develops—at the surficial inguinal ring.
While standing, place your hands at your hips or behind your back and exhale until all of the air is gone from your stomach. While doing this, pull your stomach in—think about trying to touch your spine with your bellybutton. Squeeze and hold for 2-3 seconds before exhaling and returning to the starting position.
As you progress, you can perform the movement in a seating, lying, and kneeling position to make it more challenging.
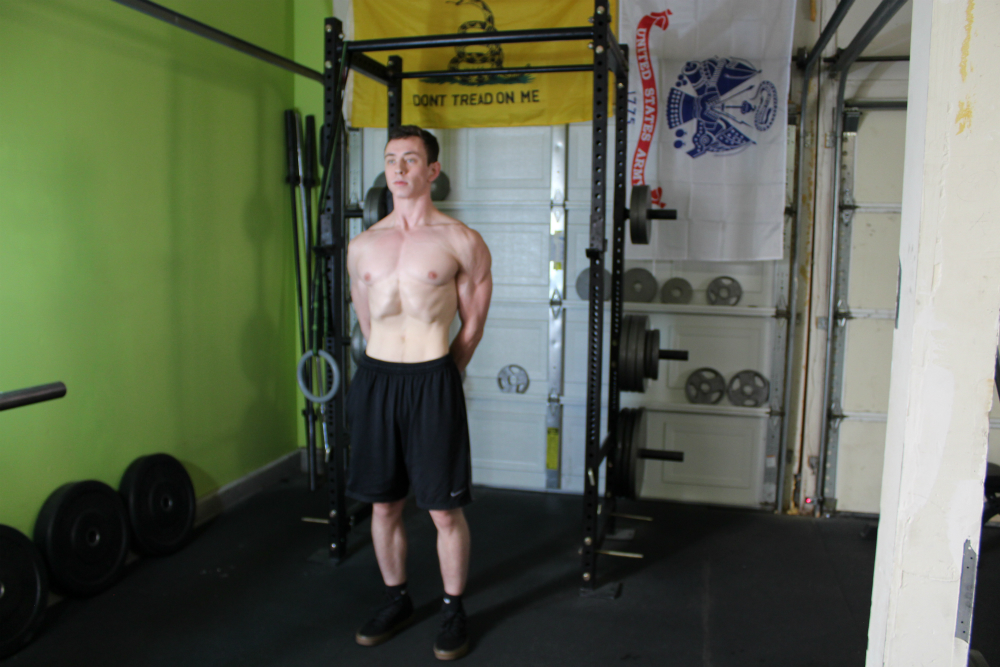
- Bosu Crunches
You will need a bosu ball to complete this exercise. Alternatively you can use a stack of towels or even a bean bag chair like in the example below.
The half-sided exercise ball is a great tool to use for injuries to the groin and lower abdomen, because it allows for a much smaller, less intrusive range of motion and works to target the upper abs instead.
While lying on the bosu ball with your hips at the base of it, complete a half sit-up while contracting and squeezing your upper abs. Do not attempt to perform aggressive, full sit-ups—only the upper area of the abdomen should be felt.
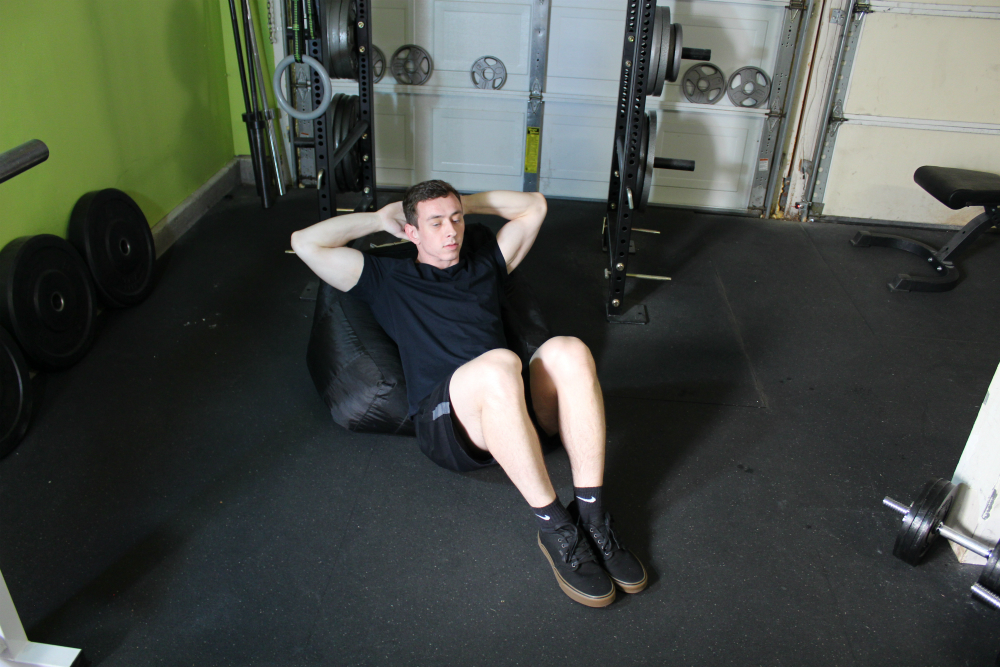
- Exercise Ball Rollouts
To complete this exercise you will need an exercise ball. As you progress you can graduate to smaller exercise balls like the one in the demonstration below.
Ball rollouts performed on an exercise ball are an excellent introductory ab exercise that targets the lower abdomen conservatively without placing excessive pressure on your pubic area during early stages of rehab and recovery.
While on your knees with the exercise ball in front of you, clasp your hands together and place your forearms on the ball. Push the ball away from you by extending your arms—be sure to keep your core tight and flexed. Hold the top position for 1-2 seconds before returning to the movement start spot.
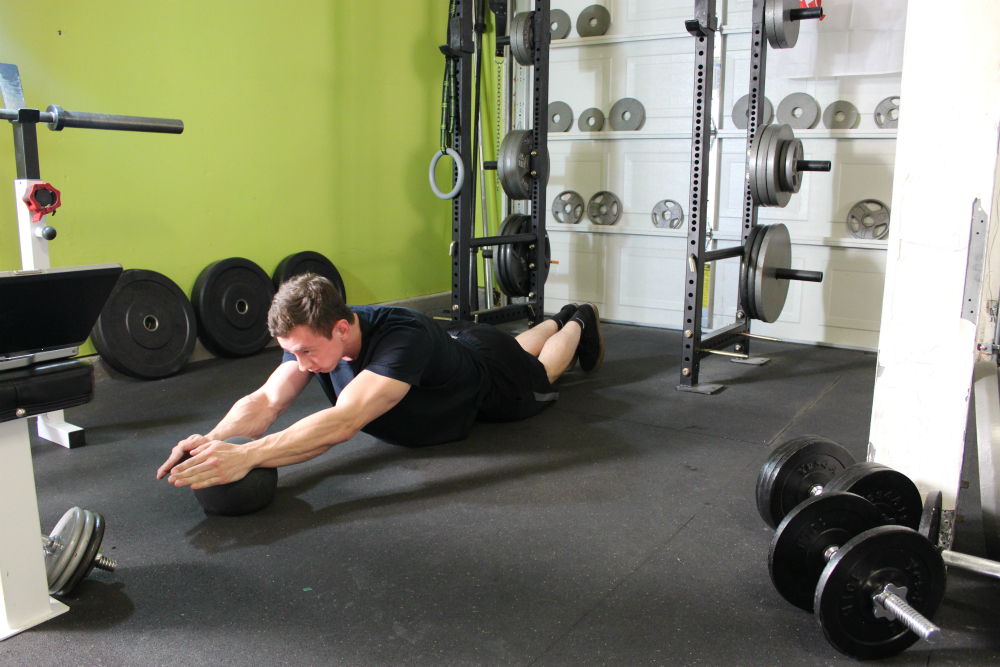
- Hip bridges with maximum dorsiflexion
Glute activation—or the lack thereof—is also a main cause for concern when looking at poor pelvic posture and movement pattern; many people are tight and inhibited in this area in particular due to office jobs that include hours of sitting hunched over at a desk. This exercise aims to fix that.
While lying on your back with your knees bent at an acute angle and your hands at your side, squeeze and contract your glutes while lifting your hips off of the ground in a slow and controlled thrusting motion. Pause for 1-2 seconds before returning to the starting position. Additionally, you should endure that your ankles are dorsiflexed.
Dorsiflexion is the act of flexing your toes towards your shin bones, so that only your heels are on the ground while performing the movement.
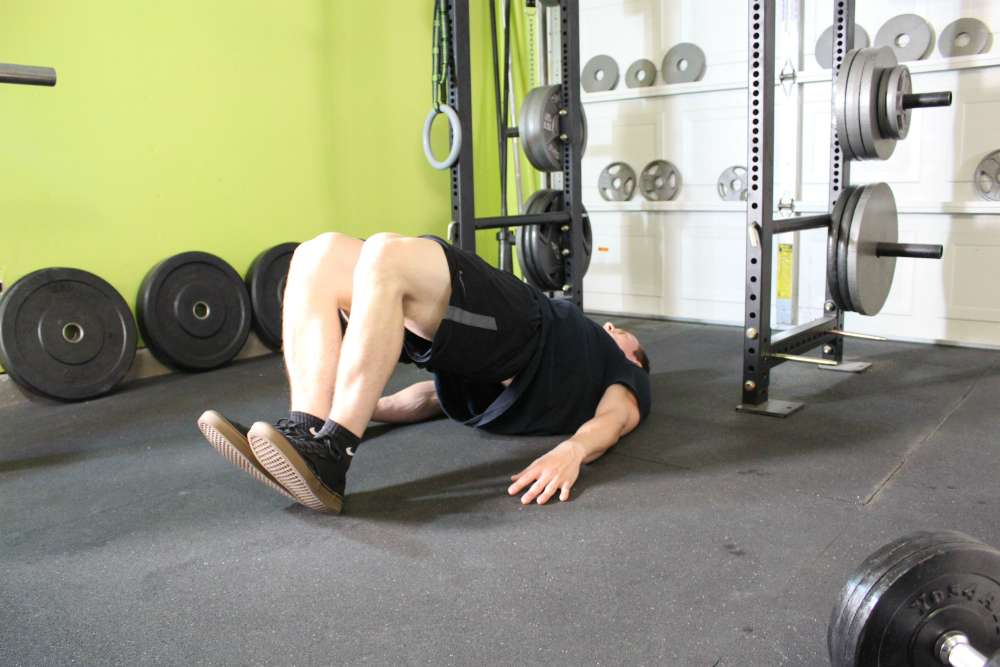
- Bird Dogs
The bird dog exercise also works primarily on glute activation, except unilaterally (one side at a time).
While on the ground on all fours, reach forward with left arm and back with your right leg. As this is happening, make sure to stabilize your core so that your pelvis does not rotate. Attempt to keep a strong, neutral spinal position during the entire movement—do not let your rib cage sag. Return to the starting position before repeating on the other side.
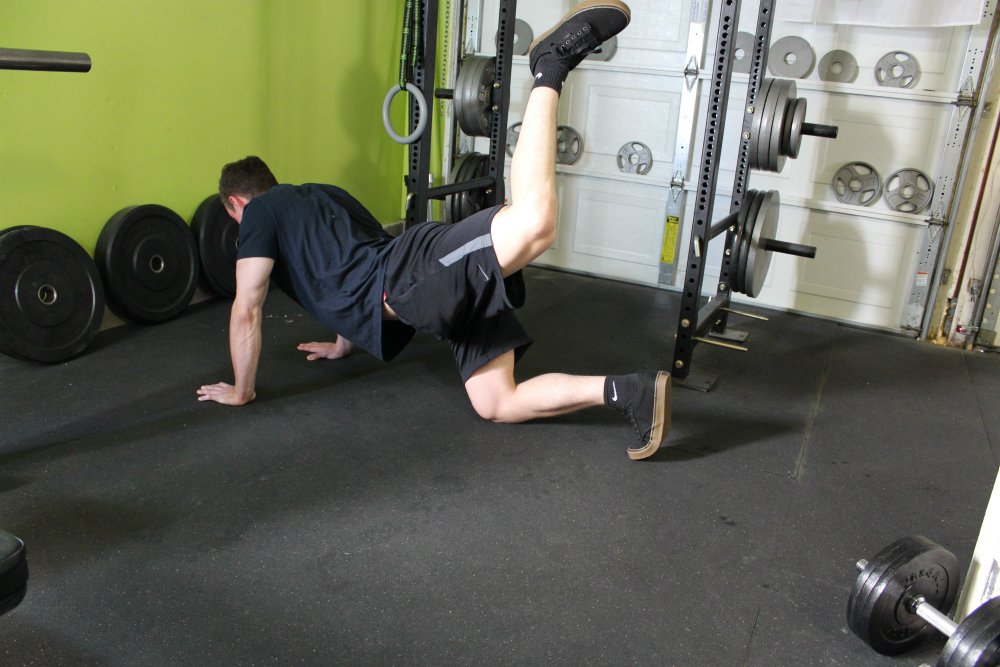
- Dirty Dogs
The dirty dog exercise is a variation of bird dogs that also includes abduction to target the outer muscles of the pelvis.
While in the same starting position on all fours, externally rotate your hip so that one leg comes off of the ground. Ensure your torso remains stationary at all times–it will feel like you are fighting against torso rotation. Squeeze at the top for one to two seconds before returning to the starting position. Repeat for the other side.
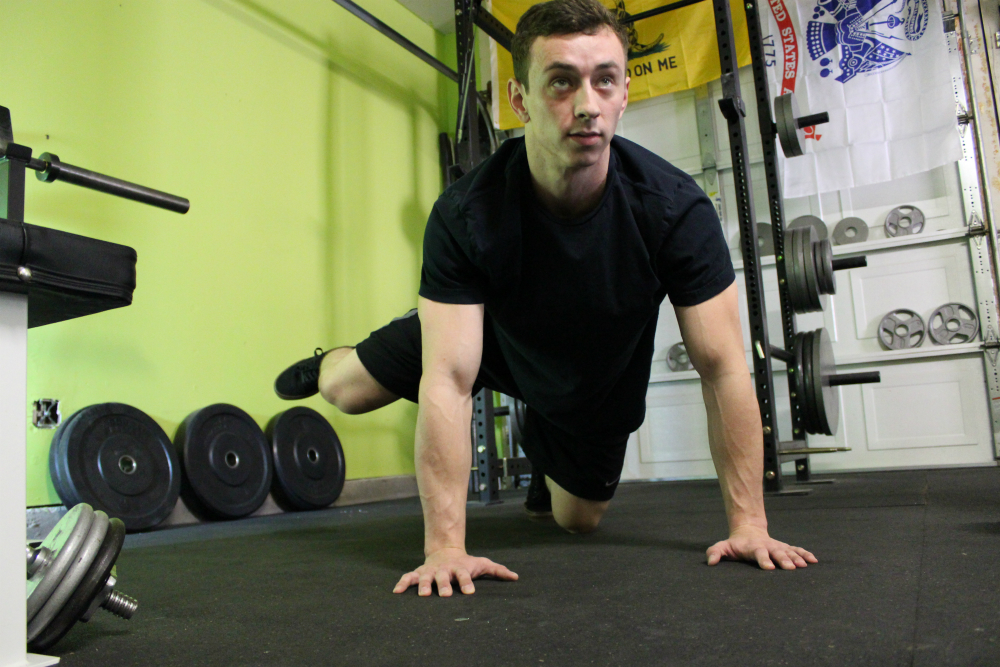
- Supine Short-Lever
This exercise also targets the outer hip abductor muscle, which is extremely important for hip stability while moving from side to side or rotating. It is often extremely inhibited and tight in those affected by groin injuries.
While lying on your side, form a 90-degree angle with your knees so that your feet at behind your hips—creating an ‘L’ shape. Slowly raise your top leg while contracting your abductor muscle. External rotation of the hips (letting your ankle sink below your knee) will make the movement less effective, so make sure to keep your shin parallel to the ground at all times.
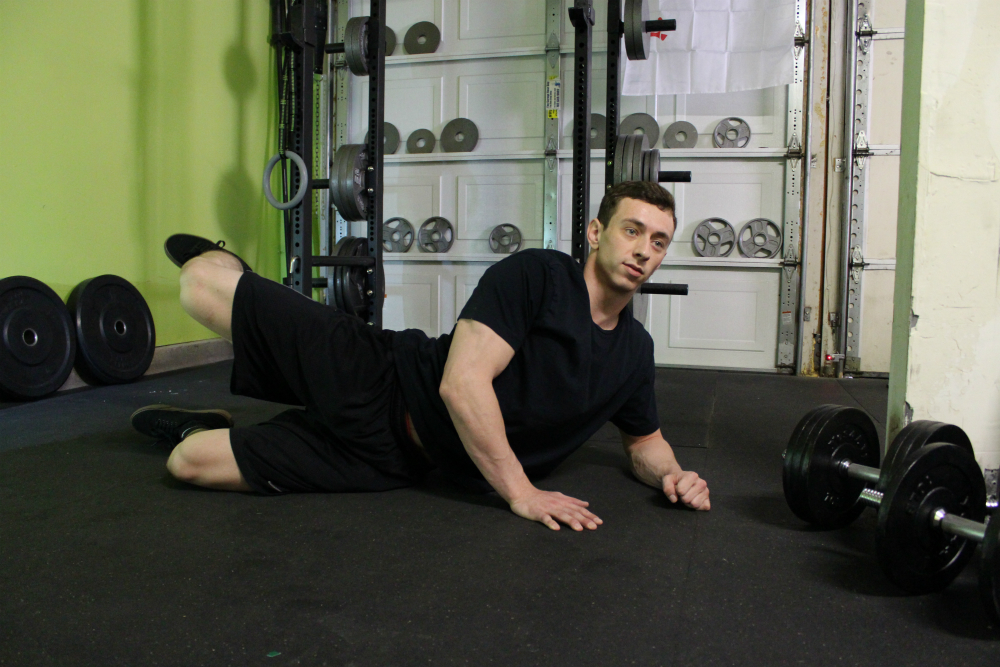
- Supine Psoas Hold
This exercise targets the psoas major muscle which is responsible for proper pelvic function and stability.
While lying on your back with your legs fully extended and your arms at your side, bring one leg up towards your chest while keeping your back and spine flat against the floor. Squeeze forcefully for 3-5 seconds before relaxing to return to the starting position. Make sure to perform the movement on both legs, not just your affected side.
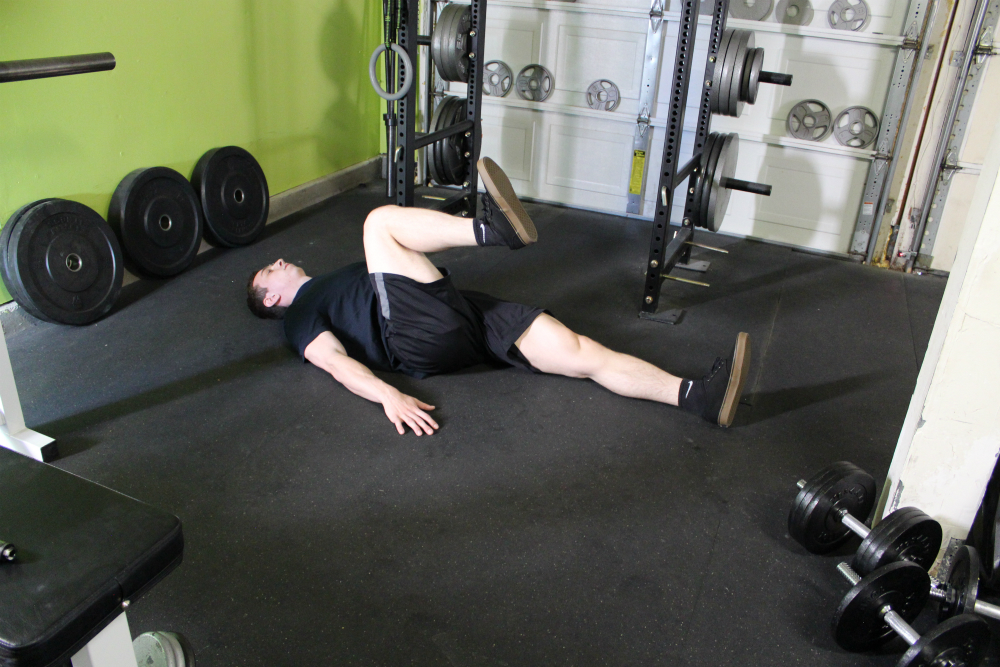
Light Supine Adduction
This movement requires a small exercise ball.
When strengthening adduction it is crucial to start light and progress slowly, as the adductors and muscles of the inner groin will likely still be tender. Opting to select a smaller exercise ball will allow for a less aggressive hip angle and thus less stretch on the groin.
Lie on the ground with your knees at a 90-degree angle. Place the exercise ball between your knees and apply slight, gradual pressure for 3-5 seconds before relaxing your legs. Only perform two or three repetitions the first time to gauge how you feel after.
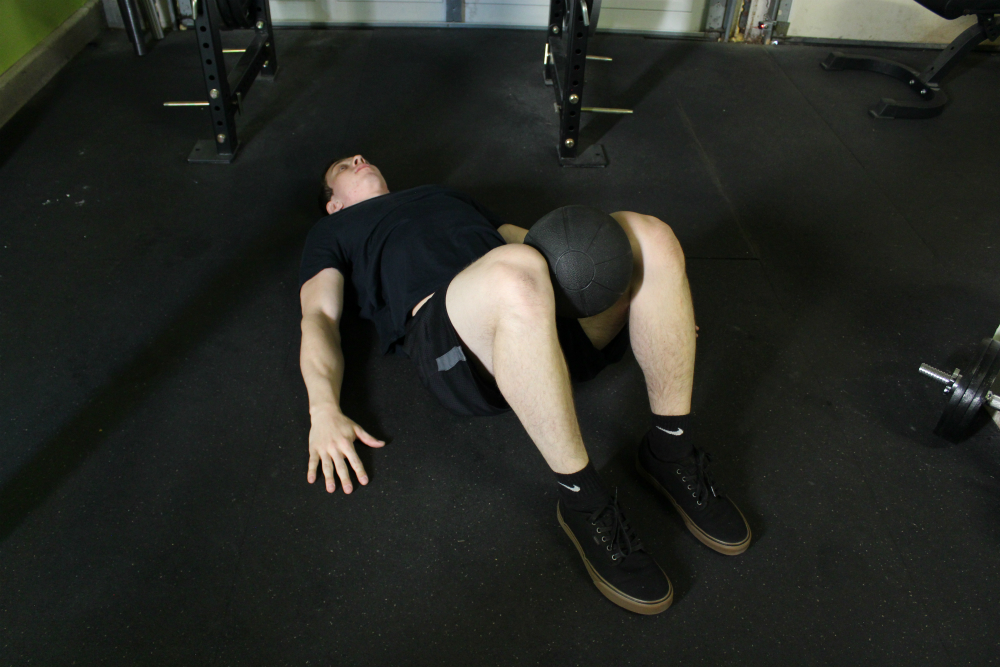
- Bodyweight Squats
Stand with your feet shoulder width apart; clasp your hands together behind your head. This is the starting position. Begin to flex your knees and hinge at the hip at the same time while descending into a full, deep squat. Make sure to keep your knees aligned and tracking over your toes. Stand up while maintaining a strong extended spinal position (don’t hunch over).
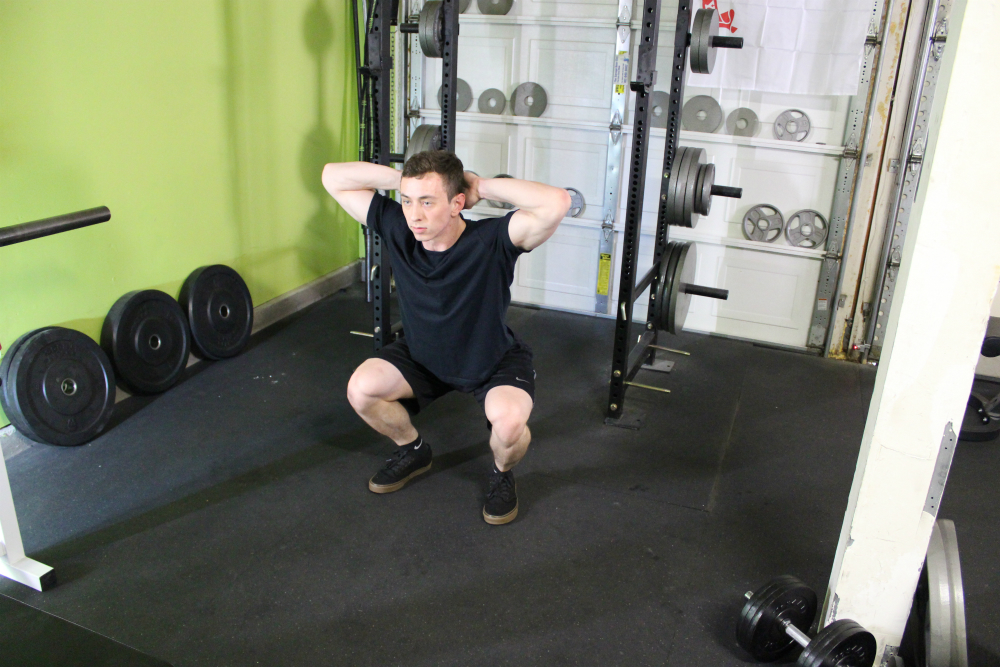
- Bodyweight Reaching One-Legged Deadlifts
This exercise helps to promote balance, build hip strength, and improve core stability. It also targets the hamstrings directly which are often weak and tight for those with this injury.
Stand with your feet together and your hands at your side. Begin to slide one leg back while lowering your chest towards the ground; extend your hands forward and keep a strong, neutral spinal position. Pause at the bottom briefly before using your hamstrings and glutes to pull yourself back up into the starting position.
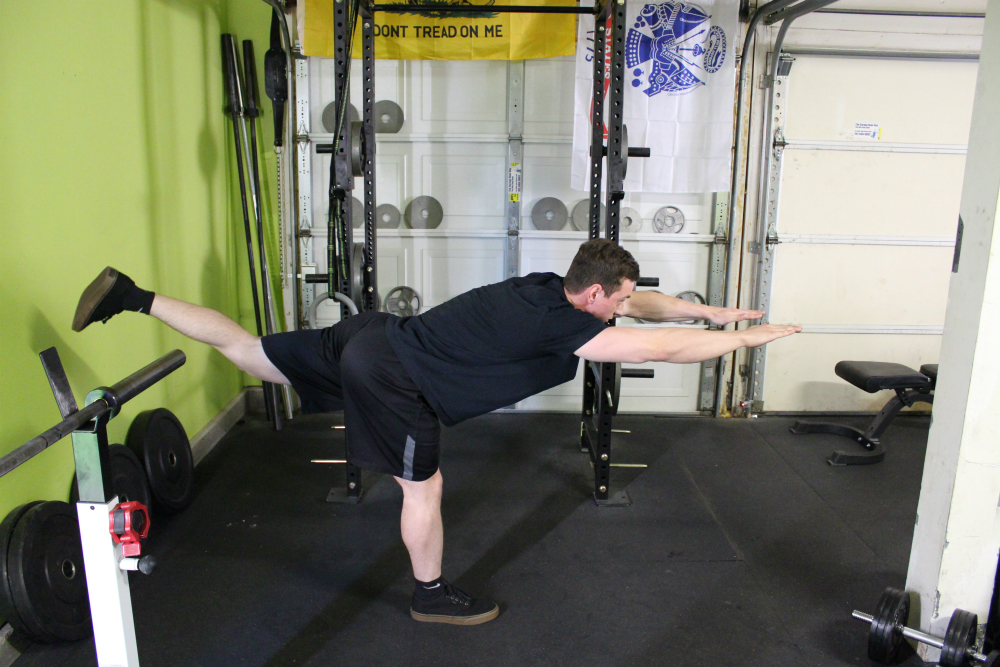
Phase 2:
- Weighted Squats
To perform weighted squats, you will preferably need a barbell. However, dumbbells, kettle bells, and even a loaded backpack can be used to add weight for progression.
If using a dumbbell or kettle bell, hold it with both hands between your legs as you squat down. Break at the knees and the hips at the same time. Always make sure to keep your chest upright and maintain a flat back—do not allow yourself to round forward.
If using a barbell, grip the bar slightly wider than shoulder width and squeeze your back to provide a stable base for the weight. Un-rack the weight slowly and assume a shoulder width stance. While breaking at the knees and hips simultaneously, descend into a deep squat. Always maintain an upright posture while performing weighted movements such as the squat and deadlift.
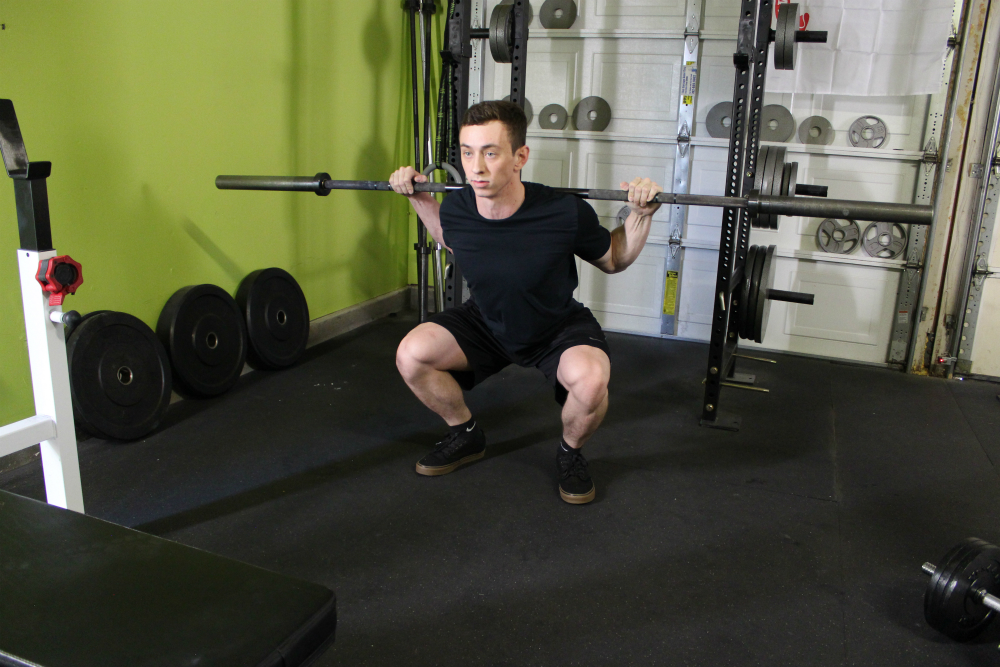
- Weighted Deadlifts
As with weighted squats, you will need some form of weight that you can use to progress and build strength.
If using a dumbbell or kettle bell, hold the weight between your legs. If using a barbell, assume a shoulder width stance, pull your shoulders back in alignment with the bar, and stand up while keeping your chest up and expanded.
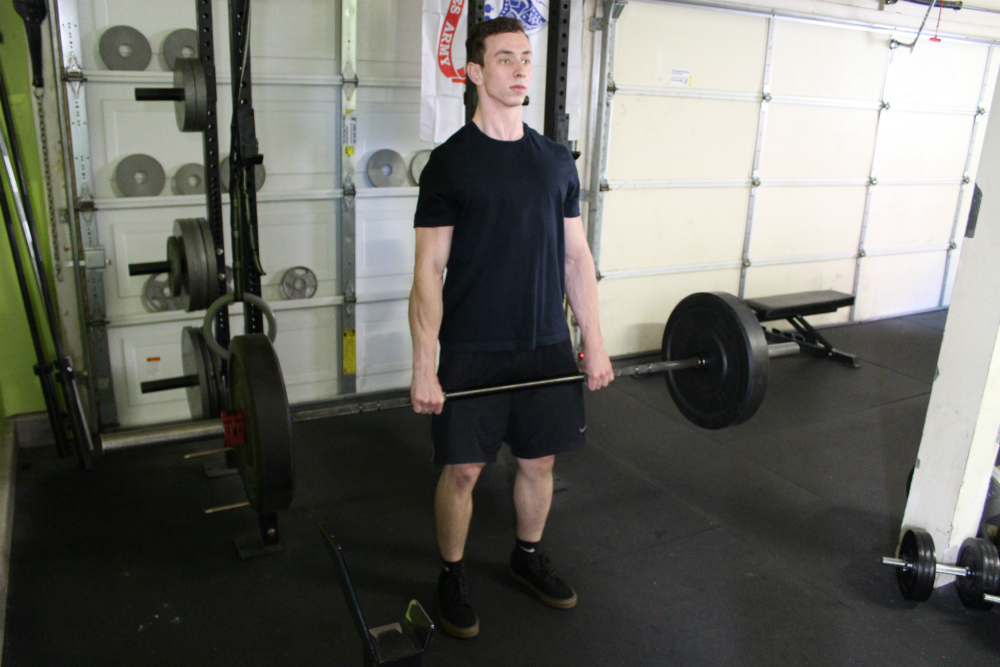
- Lateral Bodyweight Squats (Standing Side Lunges)
This exercise takes place in the frontal plane to build strength and stability in lateral movement.
While standing with your feet shoulder width distance apart and hands extended in front of you, lunge by taking a step to the side. As you lunge, make sure your tibia forms an imaginary perpendicular line with the floor in the bottom position. Return to the starting point before lunging to the other side.
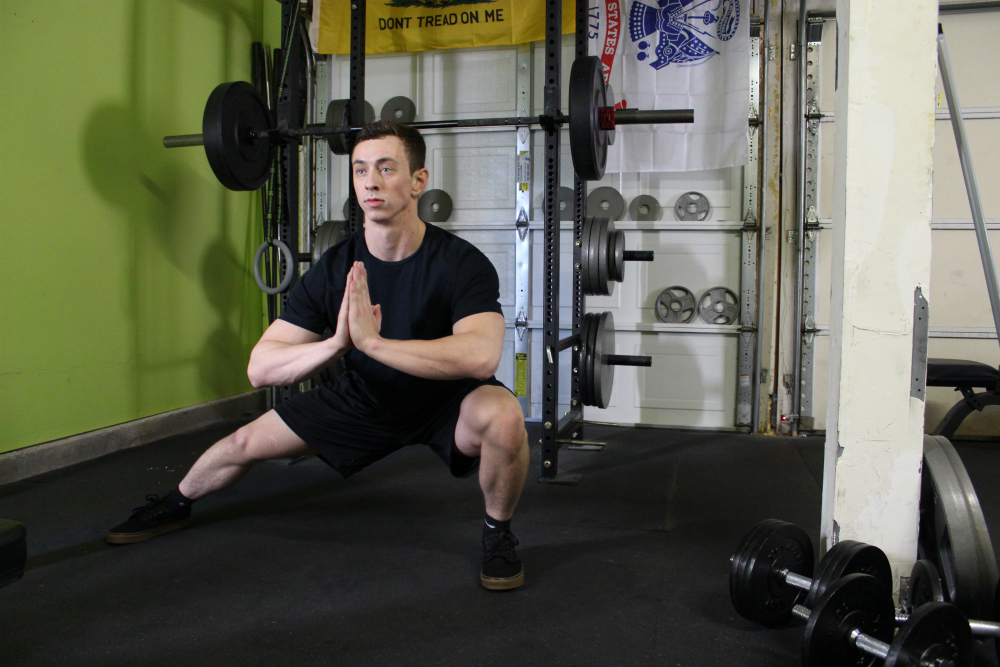
Phase 3:
- Bulgarian Split Squats (Rear-Foot Elevated Split Squats)
Find a bench or something of similar height. While standing facing away from the bench, place your back foot on it and squat down into a full split squat—maintain a strong, upright spinal position.
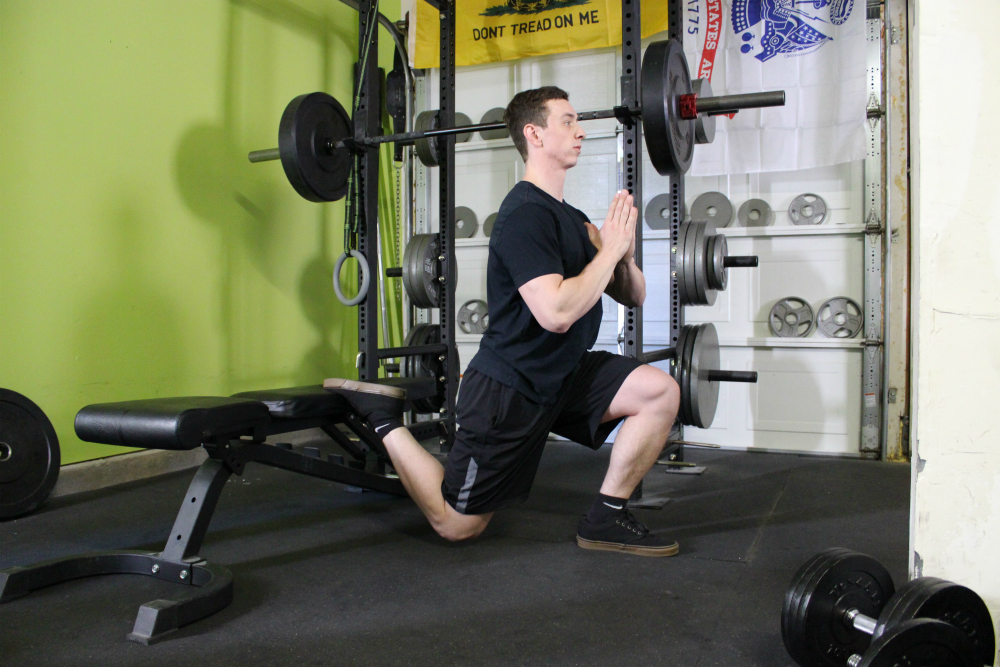
- Lateral Step-Ups
Lateral step-ups are used to build unilateral strength while moving in the frontal plane.
While standing with your right side next to a bench, place your hands on your hips. Lift your right leg and place your foot on the bench. Stand up on the bench by lifting yourself up with your right leg. Keep your torso in an upright position. When finished, complete an even amount of repetitions with your left leg.
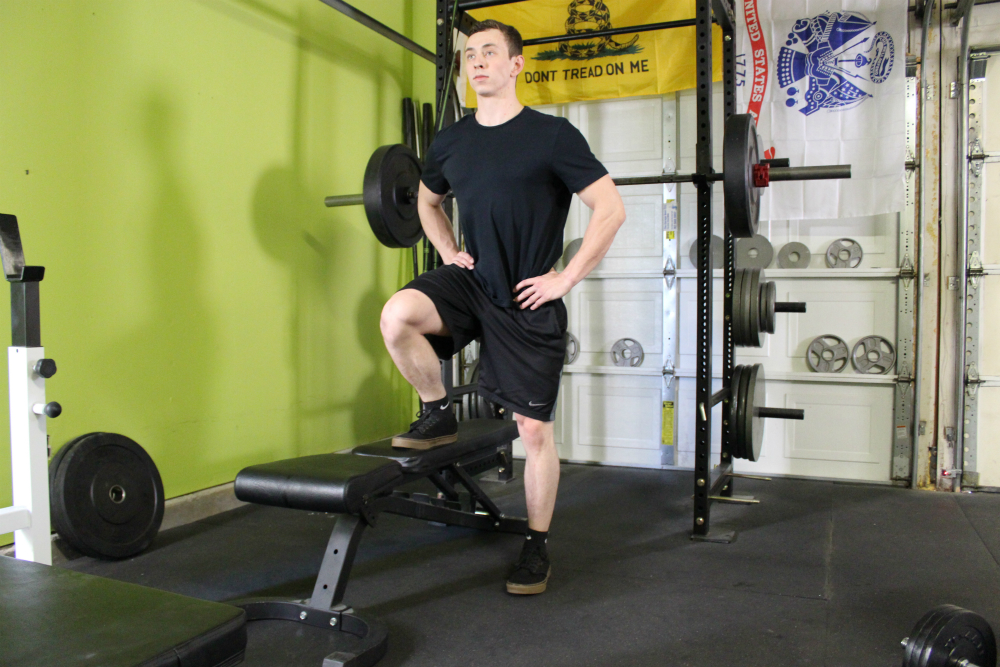
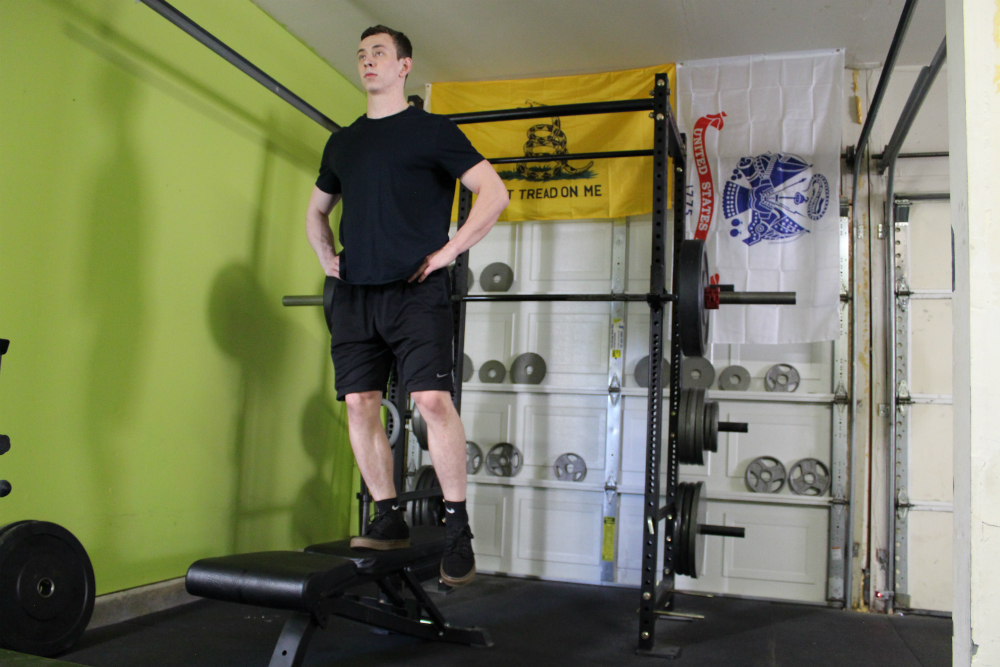
- Pistol Squats
Pistol squats are an advanced unilateral movement that requires strength and mobility to complete. When first progressing with them, you are encouraged to find a railing or similar structure to hold onto for balance and assistance.
While standing with your feet shoulder width apart, raise one foot off of the floor. Extend your arms out in front of you (or hold onto a rail for support) and maintain an upright torso while descending into a squat on one leg. Pause briefly at the bottom before pushing off and returning to the starting position.
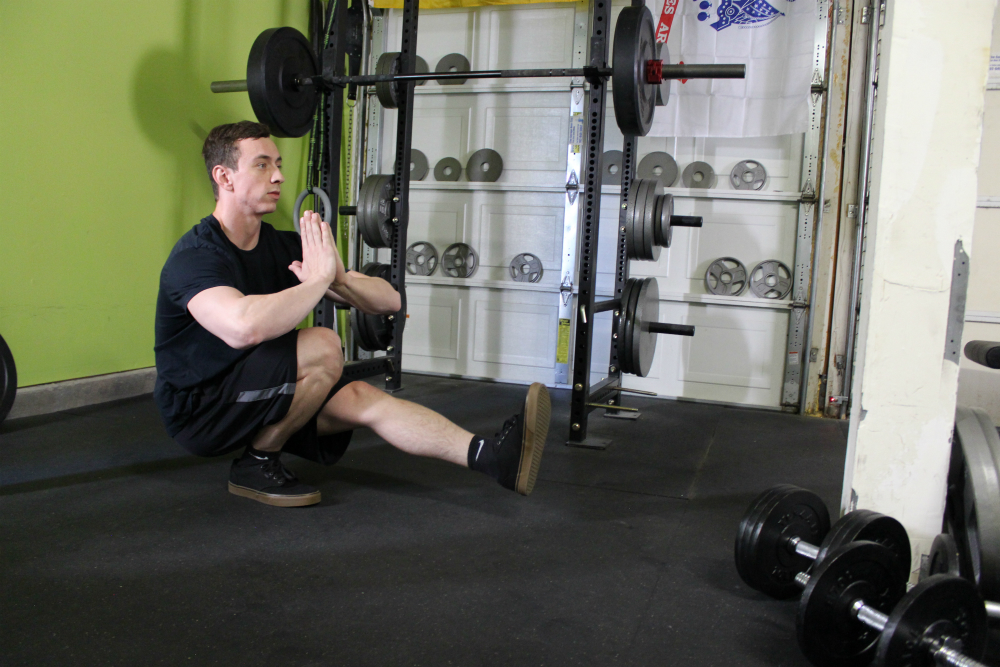
Phase 4:
- Standing Trunk Rotation
This exercise requires the use of a resistance band.
After anchoring the resistance band, step away from the wall. While bracing your core pull the hook across your body by rotating your trunk. Upon reaching full rotation, hold the position for two seconds before slowly returning to the starting position. Make sure your abdominal area stays tight and braced while completing all repetitions.
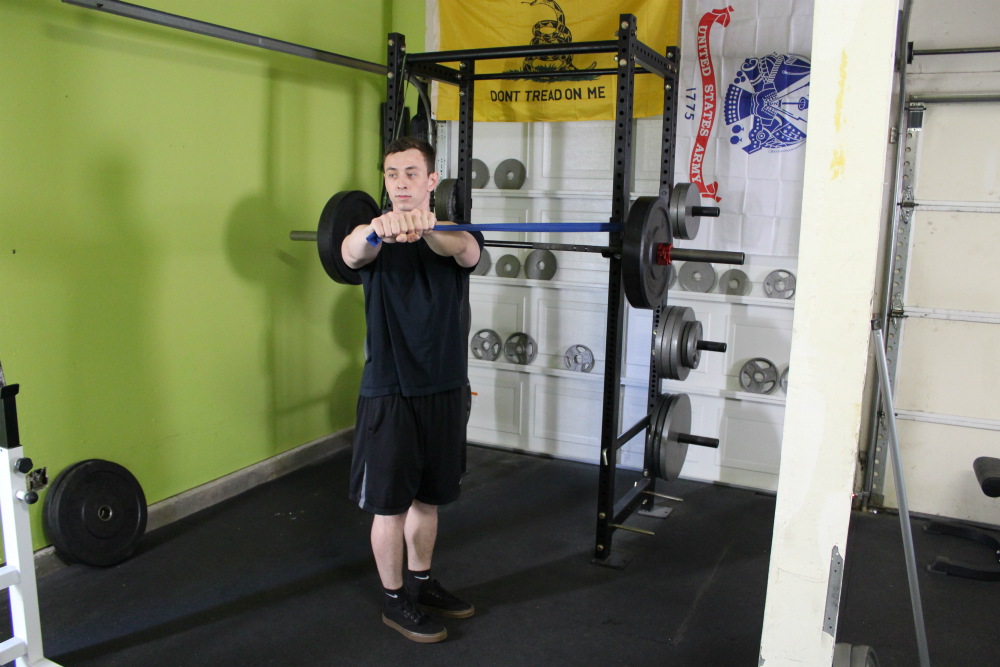
- Rotational Deadlift to Press (Rotating Landmine Deadlift)
This exercise required the use of a barbell and landmine attachment. Most large commercial gyms will have this. Alternatively a barbell weight set and landmine can be obtained for an affordable price and provide a great long-term investment for general strength and fitness that can be used from the comfort of one’s home.
After loading the open end of the barbell, assume a mixed grip position while making sure that your outside hand is supinated. While performing a proper deadlift, begin to lift the bar. As you stand up, rotate towards the landmine while pressing the bar overhead to complete the movement. Your feet should pivot during the exercise. Return to the starting position in a slow and controlled manner.
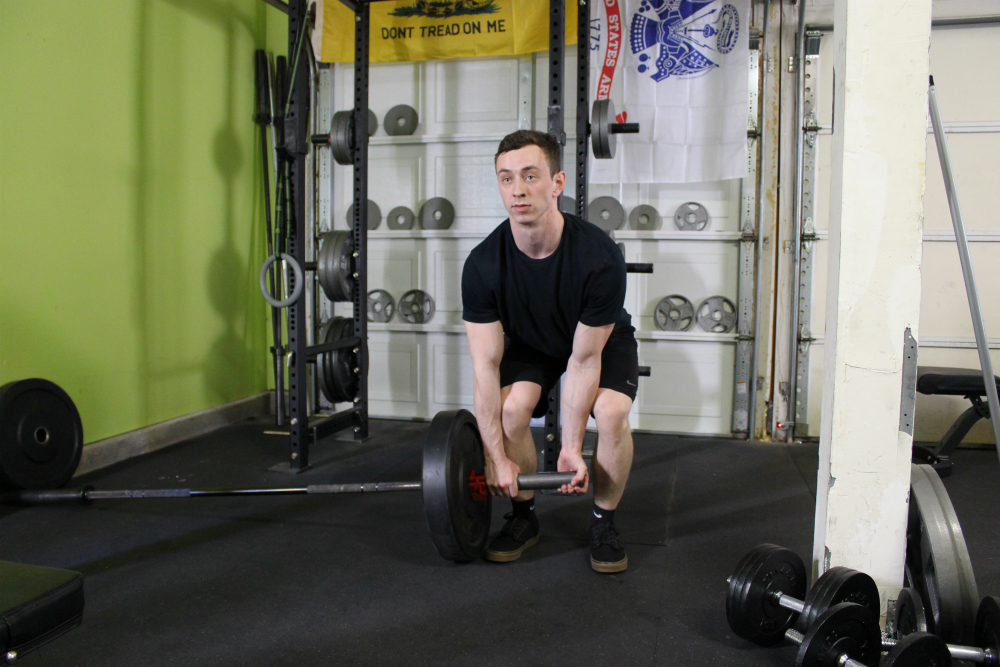

Slide Board Training Exercises
Beyond a shadow of a doubt, the slide board may be the answer to a successful long-term recovery. Slide board exercises demand stability of not only the core, but the pelvic floor as well. The exercises target your deep inner thigh, as your pubic muscles are forced to isometrically contract to provide stability for your groin as you slide across the board.
To complete the exercises you will need a slide board, but it is well worth the investment towards lifelong pain relief.
While standing at either end of the slide board, push off with one leg to slide sideways across the board while keeping your core tight. As you reach the other side, retract your legs together and return to the starting point before pushing off again with the opposite leg.
When first starting, perform only 2-3 repetitions per leg to gauge any possible tenderness in the area.
If you do not possess a slide board, you can use towels and a slick surface.
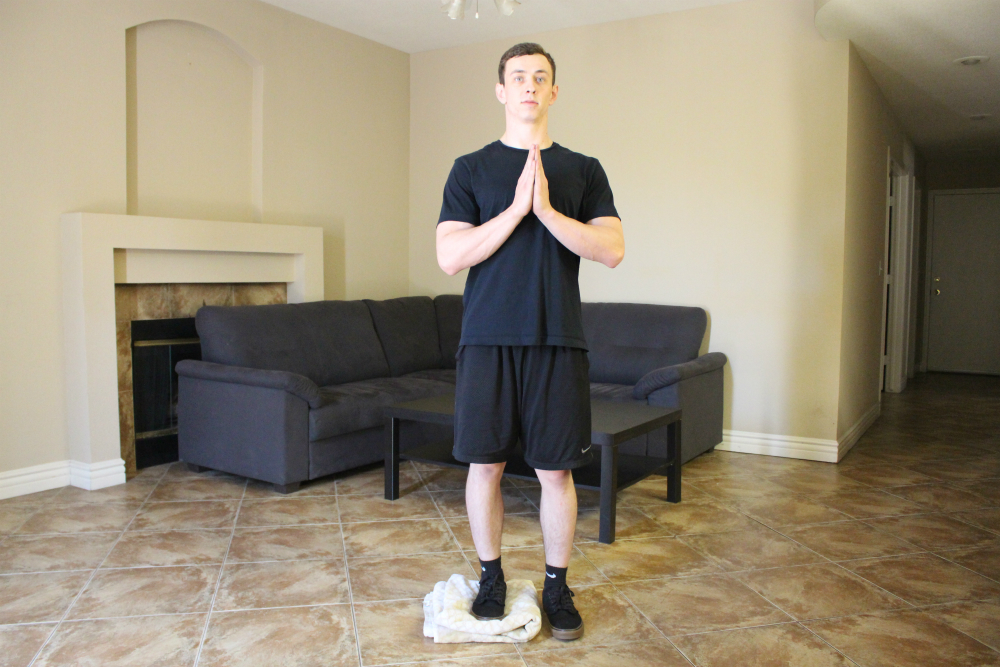
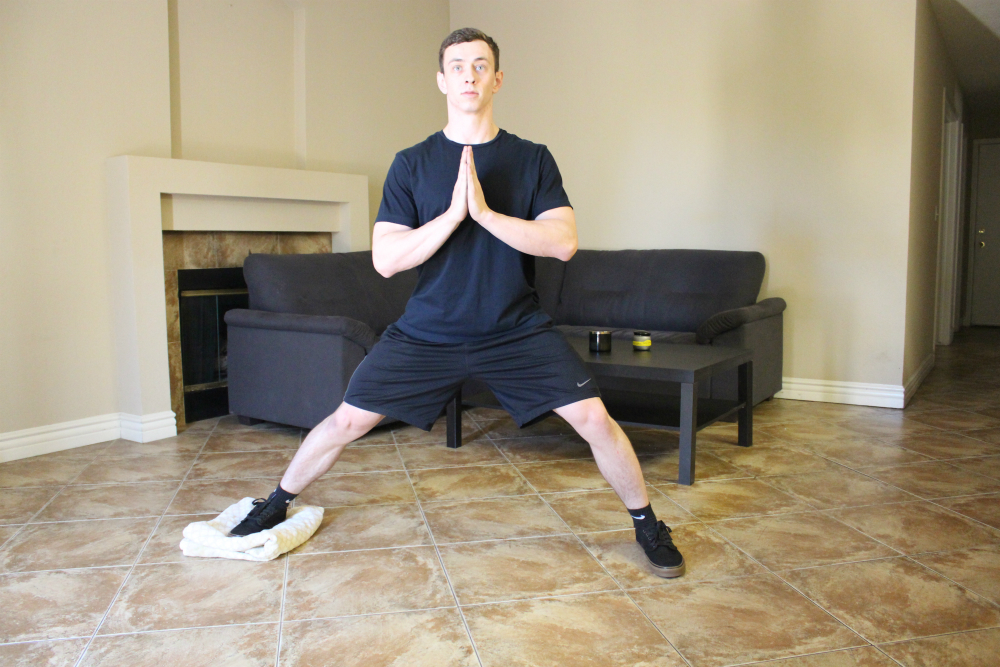
Agility Ladder Drills
An agility ladder is an excellent addition to the slide board. Agility drills help to train strength abilities in all planes of movement. Along with the slide board drill, agility ladder movements should be performed as long as you remain physically active to ensure your pelvis and pubic area remains functionally stable.
- Single-Leg Hops
While facing the ladder on one leg, hop through each square until you reach the other side. Switch legs and return to the initial starting point.
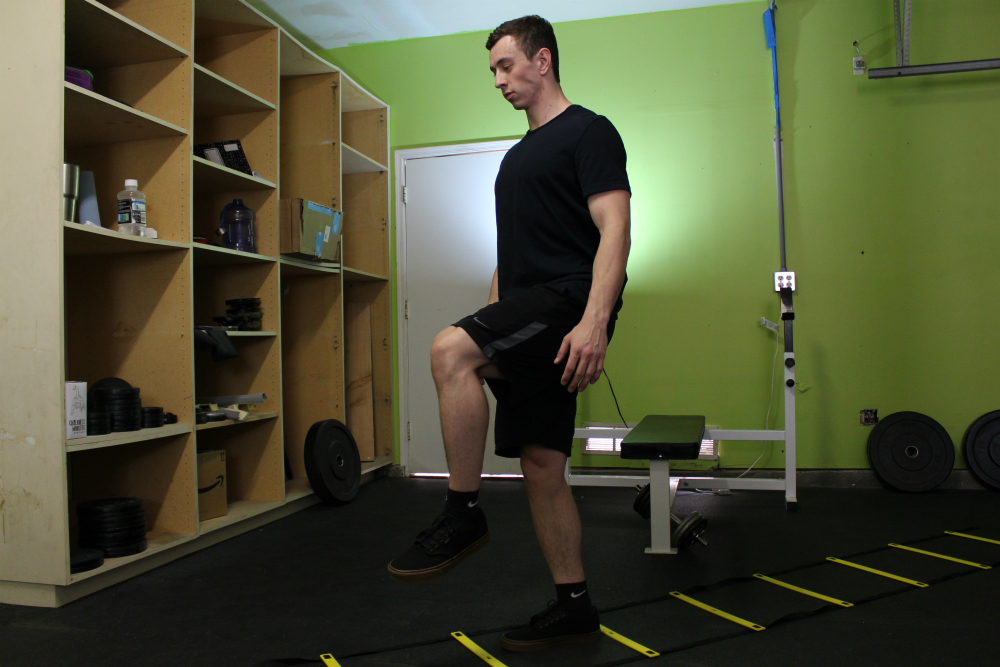
- Lateral Hops
While standing with both feet together and your right side to the ladder, hop laterally with both feet into each square until you reach the other side. Upon reaching the end, remain facing the same direction and return to make sure the movement is performed evenly in both directions.
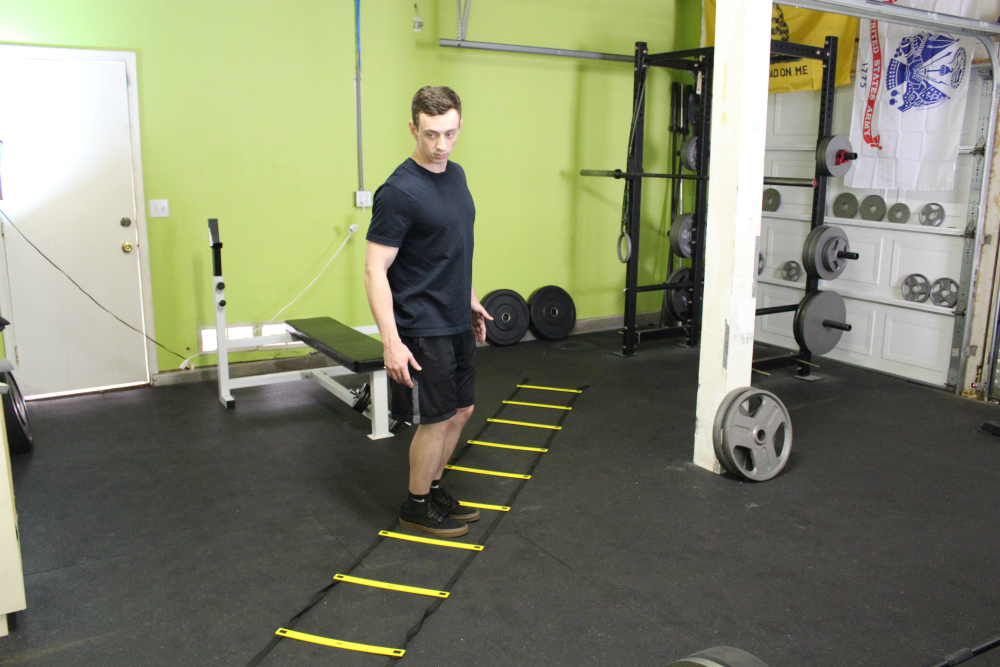
- Both Feet in Each Square
While standing in front of the ladder, quickly run through the ladder making sure each foot touches every square once.
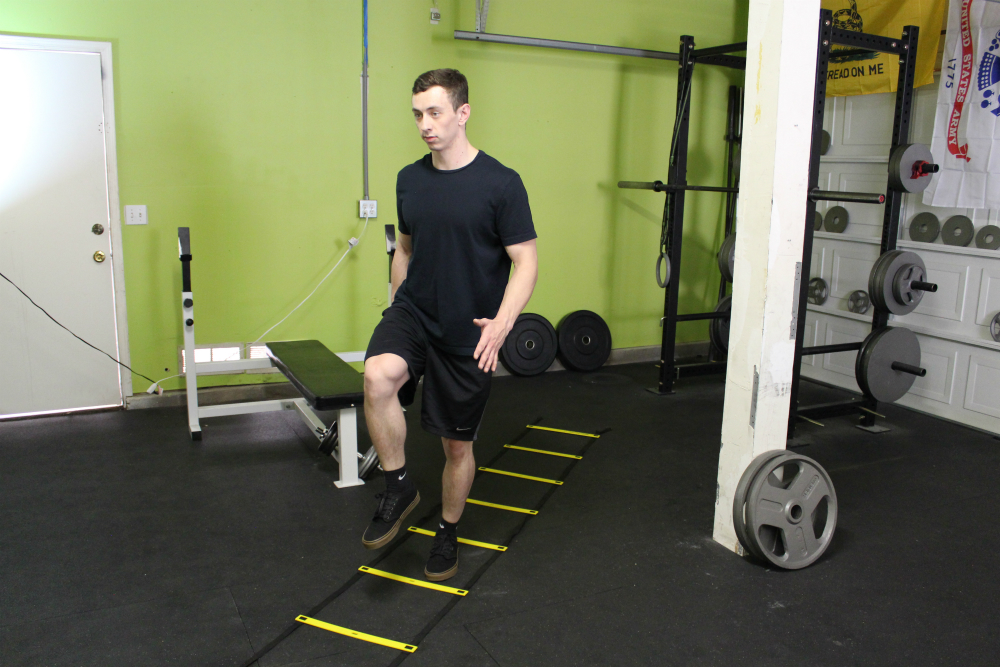
- Lateral Movement with Both Feet in Each Square
With the same concept as the drill above, move laterally as quickly as possible across the ladder while making sure both feet step in each ladder one time only. Upon reaching the end, remain facing the same direction and work back through the ladder to return to the starting spot.
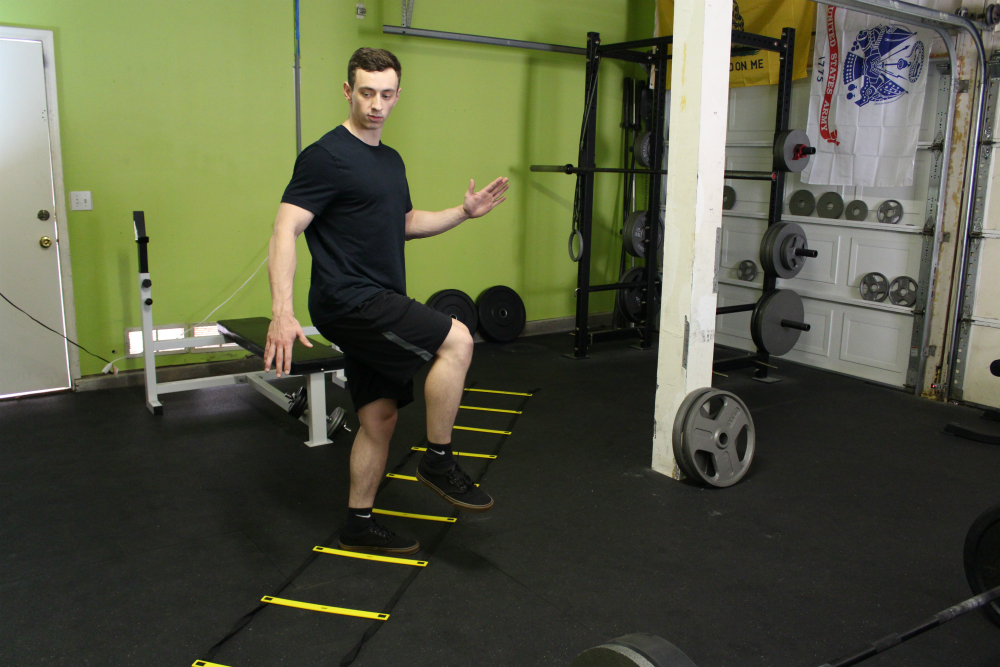
Is it Safe to Exercise After Surgery and Repair with Mesh?
If mesh is used in the surgical treatment of the injury, exercise is safe and patients should follow the same recovery timeline as those who opt to undergo the minimal repair technique. As always, if pain is felt while performing any of the physical therapy movements, remove those them from the treatment plan until they can be safely re-added.
What About Exercising After Inguinal Hernia Surgery?
Explained in the opening paragraphs, evidence suggests a strong causational link between sports hernias, adductor problems, and hip injuries. Because of this, treatment for all forms of inner thigh, groin, and pubic pain rely on the same treatment: restoring strength and stability to the all muscles of the abdominal wall and posterior chain. The treatment plan is the same for a direct inguinal hernia—as such the same rehabilitation exercises and approach can be used.
Sports Hernia Prevention Exercises After Surgery That Work Really Well
To remain fully healed from Gilmore’s groin long term and ovoid future inguinal tears, returning to occasionally complete the entire physical therapy routine even after you are free of pain is a good idea to make sure things remain that way.
With that said, there are two specific exercises that are non-negotiable and must be performed as long as you maintain a high level of fitness or activity.
- Slide board drill
- Abdominal vacuums
The slide board drills work to strengthen the pubic and inguinal floors. Synergistically, abdominal vacuums strengthen the fascia transversalis which connects deep in the groin with the pubic floor on either side of the body.
Staying consistent with these two physical therapy modalities will ensure the insidious groin pain is unable to return.
Soft Tissue Mobilization
The tendinous tissue of the groin takes 21-30 days to remodel itself, solidify the initial healing process, and in general “stabilize” the region enough to hold abdominal pressure again.
During this time period, it is absolutely critical to focus on breaking up the tissue in that region. This can be done by professionals trained in soft tissue debilitations. However, if you do not have access to physical therapy resources, you can perform soft tissue mobilization yourself. And in the case of pubic and groin injuries in particular, it may be more effective to do it yourself.
Immediately following surgery, the body begins to deposit scar tissue within the wound—a natural healing process that takes place.
During this time period, digital stimulation of the incision area helps to promote blood flow. Not only that, it helps to remodel the collagen by providing pressure to the scar site. Last but not least, it gives the area flexibility—something that becomes hyper-important as the rehabilitation program is completed.
Apply only as much pressure as possible without pain. It’s always best to begin light and slowly build up to a “deeper” massage.
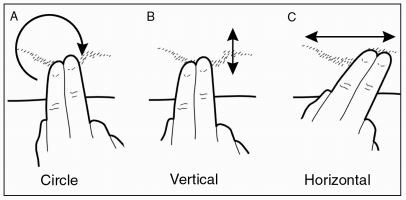
Massage Techniques
It is important to provide stimulation in three distinct movement patterns.
- Circles
- Vertical
- Horizontal
When performing soft tissue mobilization, creams and lotions are encouraged to provide additional moisture.
PRP Therapy
Platelet-rich plasma is a derivative of blood that contains plasma high in protein. Because of this, the blood has larger concentrations of growth factors and cytokines (small proteins) that can help to stimulate the process of healing soft tissues. In sports medicine, its uses are centered on the treatment of muscle strains, tendinopathy, and muscle-fascia related injuries—sounds like something perfect for a sports hernia.
While further research needs to be done into its clinical effectiveness, one study published in 2014 by the American Journal of Sports Medicine reported significant improvements in the alleviation of symptoms in athletes. It should be noted that all participants of the study were semiprofessional or professional athletes with high underlying levels of fitness (above-average recovery capabilities) and full access to a range of sports physical therapy professionals.
In any case, it may serve as one effective aspect of the entire treatment and recovery process.
Active Release Techniques (ART)
ART is a patented soft-tissue mobilization technique that focuses on treating soft tissue problems. It aims to provide relief by breaking down dense scar tissue that entraps nerves and causes pain symptoms. Using a range of over 500 massage movements, a physical therapist trained in ART can provide precise relief to tight and painful areas while completing rehab.
In a 2015 study published in the Journal of Physical Therapy Science, researchers concluded that ART was an effective addition in the treatment of soft tissue injuries. Along with PRP therapy, it can help to increase recovery success.
Graston Technique (Instrument-Assisted Soft Tissue Mobilization – IASTM)
The Graston Technique is patented a form of soft-tissue physical therapy that utilizes a number of special massage tools to alleviate restrictions and scar tissue. It is most often practiced by chiropractors, physical therapists, and sports trainers. By working to reduce inhibition and tightness in soft tissues, it can promote healing and lead to shorter overall treatment and recovery times.
In a 2018 study conducted by the Louisiana State University Health Sciences Physical Therapy department, moderate evidence confirmed that while IASTM is not an effective treatment alone, along with the proper stretching, strengthening, and mobility program it can help to improve recovery outcomes. More clinical research is needed to determine its long-term effectiveness.
Along with PRP injections and ART, instrument-assisted soft tissue mobilization is a suitable protocol as part of a complete rehab program.
Sports Hernia Recovery
Effective sports hernia recovery relies on adherence to the rehabilitation and treatment plan. However, to increase the chances of a successful recovery even further, several additional steps should be taken.
Topics covered in this section:
- Recovery Timeline
- Post Hernia Surgery Recovery Diet
- Hernia Surgery Recovery Supplements
- Support Devices
Helpful Links:
- Recovery time without surgery and with (in-depth article)
- Compression shorts, braces, belts, and wraps
Recovery Timeline
When trying to determine how long it will take you to heal, several basic physical therapy considerations should be made.
- Weak, inhibited and atrophied muscles are more susceptible to injury than strong and elastic muscles—if you possess high levels of strength and fitness, you can expect your total recovery time to be decreased.
- Higher fat levels can behave as a catalyst for high inflammatory responses in the body—even if you are naturally low in body fat, de-conditioning following injury can become a serious concern: if you were once active but are now sidelined and have developed high fat levels, it is likely aggravating the injury’s inflammation and causing a higher level of pain and poor, dysfunctional movement.
- Failing to receive adequate levels of sleep may also contribute to higher levels of inflammation as weakened muscles and ligaments become easy to aggravate.
- Do you continue to work a physically demanding job or play a competitive sport despite being injured? If so, how long have you done so? Damaging already compromised muscles, tendons, and ligaments can lead to further tears.
- Is your age a factor in your recovery ability? The younger you are, the easier it will be to recover.
Recovery times are largely person-dependent, but as a general idea expect to be free of pain after 6 weeks and fully return to sports and high-intensity activities after 10 weeks.
The rehabilitation program caters to these time frames and ensures you are always performing the correct physical therapy activities at any given time throughout the full recovery timeline.
With Surgery
How long your precise surgery recover time is will be affected by a range of factors that take into account the complexity and extent of the inguinal weakness that was corrected.
The larger the injury or weakness, the longer recovery times will be. This makes the exact time vary from person to person.
With that said, most pain from the surgery itself will be gone after the first week.
Without Surgery
Recovery times from conservative treatment alone also vary tremendously. For any athlete suffering, the goal is to initiate the rehab and treatment plan as soon as possible.
Post Hernia Surgery Recovery Diet
As you progress through the timeline, diet and supplementation play a front-seat role.
One of the most important aspects to a full and speedy recovery is ensuring your body is supplied with the full range of nutrients, vitamins, and minerals it requires. Deficiencies in these areas only work to delay and retard the rehabilitation process.
Following the correct nutrition guidelines will see to it that your body is supplied with a plentiful amount of amino acids from protein, glucose, carbohydrates, and critical acids from fats.
A large part of meeting your dietary needs relies on eating the correct amount of macronutrients each day. Macronutrients are the building blocks of the body’s dietary needs and are found in any number of food items available for consumption.
- Protein
- Carbohydrates
- Fats
While you should always consult your nutritionist before making changes to your diet, the basic structure of a healthy diet is well documented.
- Protein Intake: Eat at least 1 gram of protein per kilogram of bodyweight. For example, if you weigh 170 pounds, eat 170 grams of protein per day. Some studies suggest that eating roughly 1 gram of protein per pound instead may be beneficial for athletes and those involved in strength training.
- Fat Intake: Eat .4 grams of quality fats per pound of bodyweight. Red meat, eggs, dairy products, and fish are all excellent sources. If it’s processed and packaged on the frozen food isle, you should probably avoid it.
- Carbohydrate Intake: Eat the rest of your daily calories in good carbohydrates like pasta, rice, oatmeal, vegetables, beans, and fruits.
In practice what does this look like?
First you must be aware of the caloric value of any given macronutrient.
- 1 gram of protein = 4 calories
- 1 gram of carbohydrates = 4 calories
- 1 gram of fat = 9 calories
If your daily estimated caloric intake then is 2,000 calories and you are an athlete weighing 150 pounds, a suitable recovery diet would consist of the following:
- 150 grams of protein (one gram per pound of bodyweight) = 600 calories
- 60 grams of fat (.4 multiplied times a bodyweight of 150 pounds) = 540 calories
- 215 grams of carbohydrates = 860 calories
Beyond those guidelines, always attempt to choose from foods that are high in micronutrient value; make sure to stay away from processed foods, specifically sugars.
Along with the correct diet, proper and strategic supplementation plays an important role in the complete treatment process.
Hernia Surgery Recovery Supplements
Vitamins and supplements work by providing your body with vital micronutrients and vitamins scarcely found in food. They aren’t innovative or revolutionary, but they help to provide your body with essential resources needed for recovery that aren’t found in much of today’s hyper-processed food.
As with any nutritional or supplementation changes, you should consult with your general doctor to ensure any current medications or conditions are not a cause for concern.
Zinc and ZMA
Zinc may be the most important supplement when it comes to improving recovery times dramatically. In the case of any trauma, the immune system is depleted. Zinc works to prevent this by giving it a large boost.
By providing support to the immune system, it provides a host of benefits.
- Reduces swelling and inflammation
- Stunts the growth of harmful bacteria
- Reduces scar tissue
While zinc, like many supplements, can be found in a complete and balanced eating plan, if you do not follow proper nutritional considerations it will be much easier for you to receive the effective dosage by supplementation.
It is often taken in the form of ZMA where it is combined with magnesium aspartate and vitamin B6 to produce additional benefits.
- Improved immune system response
- Improved metabolism and muscle health
- Improved sleep
Some advocates of ZMA claim it also helps to boost muscle strength and stamina, but current research does not currently support these claims.
Fish Oil
Fish oil is a very common supplement. It is a general term that refers to the omega-3 fatty acids (EPA and DHA). These fats are found naturally in fish. From a price standpoint, however, fish oil is much cheaper when taken as a supplement. Those who dislike fish may also find it to be a more pleasant and convenient way of obtaining these essential fats.
The goal with supplementation is stabilization of the body’s internal ratio of omega-3 to omega-6. This ratio signals bodily eicosanoids–signaling molecules that have several physical therapy and recovery benefits:
- Inhibiting Inflammation
- Improved Immune Response
- Reduction Of Perceived Pain
- Regulation Of Cell Growth
- Improved Flow Of Blood To Tissues (especially important when you’re trying to heal!)
Additionally, when this ratio is met through supplementation several general health benefits can be seen as well.
- Healthier Blood Passages
- Reduced Lipid Count
- Much Lower Risk For Plaque Stoppage
- Reduced Risk Of Diabetes
- Reduces Risk Of Several Types Of Cancer
- Reduction Of Excess Triglycerides
When using fish oil as a supplement, make sure to account for it in your dietary intake—one serving is usually a single gram which contains 9 calories as fish oil is a fat.
Glucosamine
Glucosamine is a natural chemical that aids in the creation of cartilage. Studies suggest that taking 500mg of glucosamine sulfate three times a day can combat joint pain and help to protect your body’s internal bone-lubricating material.
Chondroitin
Like glucosamine, chondroitin is found in cartilage as well as bone. In a significant study published in 2006, combined supplementation of glucosamine and chondroitin led to a significant reduction of pain in some.
Coenzyme Q10 (CoQ10)
Found in every cell in the body, CoQ10 is used for energy production and cell growth. Additionally, it behaves as an antioxidant to protect the body from harmful outside molecules and is a smart choice for early stages of rehab.
L-cysteine
Along with CoQ10, L-cysteine helps to boost the body’s immunity system. It has been dubbed the most important of all available antioxidants.
L-lysine
An essential building block of new protein, L-Lysine helps to propel many internal bodily functions. More importantly, it aids in the creation of collagen to be used for the development of new scar tissue as the healing process takes place.
Vitamins
Select vitamins may also help you to bounce back faster. In most cases, a vitamin deficiency can be corrected safely and effectively with the use of a supplement. This can also be accomplished with changes to one’s diet, though such alterations must be dramatic—it is often easier and more convenient to supplement.
While you may not have a long-standing vitamin deficiency, trauma can cause the body to be temporarily depleted of its natural supply of nutrients.
It is important to note that not all vitamins are created equal. The phrase “you get what you pay for” holds true and seems to be especially true in the case of vitamins and minerals. Cheap vitamins rely on cheap sources that your body is unable to utilize. If choosing supplements other than those recommended, take the time to do proper research on each substance to ensure you are consuming something your body can make use of.
Vitamin C
Vitamin C is a popular nutritional supplement that works by boosting the body’s production of elastin and collagen, which both contribute to the natural healing process. A lack of these two essential resources will lead to slower healing times.
Vitamin A
Cell growth is a vital part of the recovery and healing process, and vitamin A helps to make cells experience growth and maturity by providing nourishment to soft tissues as they form. Additionally, it can help to stimulate new connective tissue and augment the health of blood vessels.
Vitamin D
Vitamin D is a fat soluble substance that increases bone health and density—it is absolutely necessary for basic human survival. The main source of vitamin D comes from the sun—a 30 minute walk on a sunny day can fulfill your daily requirement. It is also contained naturally in eggs, fish, and dairy products.
What are the benefits?
- Increased Cognition
- Better Immune Health
- Improved Bone Density
- Healthier, Stronger Bones & Structural Tissues
- Enhanced Mood
Vitamin E
Vitamin E is well known for its effects on treating scars. To help reduce scarring, it can be taken in oral form and also applied topically a maximum of 3 times per day.
Creatine
Probably the most-researched fitness supplement available, creatine works to provide augmented cellular function. It is a naturally-occurring substance within the body, where its job is to behave as the storehouse for powerful phosphate groups that provide phosphocreatine to fuel essential high-energy processes within the body, specifically during periods of high cellular stress. It does this by aiding in the production of ATP (adenosine triphosphate).
In other words, it helps fuel the high-energy processes involved in cellular processes such as healing.
When your body needs to perform a critical cellular function, it relies on some form of metabolic process to make that happen: it needs energy.
Creatine works by transforming largely useless ADP (adenosine diphosphate), a byproduct of metabolic processes, into usable ATP–the powerful energy “houses” your body loves. Those ATP molecules in turn transport chemical energy throughout your body’s cells, helping along metabolism and healing.
When supplementing with creatine it is important to drink at least 1 liquid ounce per pound of bodyweight per day. As an example, if you weigh 128 pounds you should consume 1 gallon of water, or 128 fluid ounces. From a physical therapy standpoint, high water intake is also encouraged as a necessary factor in proper recovery.
The importance of proper supplementation along with a complete diet cannot be overstated.
Support Devices
Support devices are can be worn to provide additional recovery efforts. Supporting your groin, hip flexors, adductors, abductors, quadriceps, and hamstrings, they provide continued pressure that promotes structural integrity, increased blood circulation, and faster healing.
Additionally, they can be used to allow athletes to return to their sport sooner following treatment. Caution is advised, however, as relying on a support device to act as an injury-prevention method can lead to poor judgment in proper return to activity—causing the athlete to become re-injured and require further rehab or even a second surgery.
When choosing from a range of options, you have four choices: braces, belts, compression shorts, and wraps.
Class 1: Braces and Belts. Belts are perfect for normal day-to-day activities, including work and school. They fit discretely under clothing and provide all of the benefits described above. Braces are much more supportive and thicker. There are two issues, however, with these options.
First, the fit can sometimes be off–braces and belts aren’t nearly as form-fitting as compression shorts and wraps.
Secondly, they can’t be used during sports, running, lifting weights, or even stretching/mobility. This creates an issue for someone looking to reap the benefits of compression at all times.
Given their negatives, braces and belts can provide more sustained pressure than shorts and wraps and should be considered at night or when high activity is not required.
Class 2: Special Compression Shorts and Wraps. If you are looking to relieve pain and pressure while performing a specific sport, shorts and wraps can be worn during high levels of activity without slipping or riding up.
Additionally, they are especially useful when completing the rehabilitation exercises, stretches, and mobility movements.
However, they may not be able to provide the same level of pin-point pressure as an inguinal hernia belt or brace.
Brace
The most supportive of all options, a brace provides complete compression for all areas of the hip and groin. On the downside, it is not appropriate when a large amount of activity is required.
Belt
Providing support with the use of a single strap running along the inguinal ligament, a belt provides consistent compression for pain relief and increased blood flow. Additionally, some belts include two straps in case pain or discomfort is felt on both sides.
Compression Shorts
Compression shorts provide the perfect balance between support and mobility, making it perfect to wear while completing the rehabilitation exercises or while going about day-to-day activities. Its lightweight design is breathable and won’t ride up during activity.
Wraps
If strong adductor discomfort accompanies your groin pain, a wrap is likely the best option as it can be tightened as desired to create the optimal amount of pressure for the adductor.
Conclusion
While a deeper scientific understanding of the injury is still required and encourages further ongoing research, the medical community has come a long way in working to treat and cure the debilitating groin pain known as athletic pubalgia.
References:
- https://staging.www.multi-specialty.com/node/396 –
- https://staging.www.columbia-stmarys.org/doc/Page.asp?PageID=DOC000201
- https://staging.www.columbia-stmarys.org/Hemiorrhaphy_Athletic_Pubalgia
- https://emedicine.medscape.com/article/87420-overview
- https://staging.acceleratephysicaltherapy.com/2014/02/17/do-supplements-and-vitamins-impact-recovery-after-surgery/
- https://www.myofascialrelease.com/about/definition.aspx
- https://www.painscience.com/biblio/fascia-is-too-tough-for-mechanical-deformation.html
- https://www.strengthandconditioningresearch.com/foam-rolling-self-myofascial-release/
- https://staging.www.nsmi.org.uk/articles/injury-prevention/warming-up.html
- https://staging.www.unionpt.com/archives/919
- https://www.ncbi.nlm.nih.gov/pubmed/10976125
- https://www.ncbi.nlm.nih.gov/pmc/articles/PMC4044507/
- https://www.jospt.org/doi/pdf/10.2519/jospt.2008.2626?code=jospt-site
- https://en.wikipedia.org/wiki/Superficial_inguinal_ring
- https://www.ncbi.nlm.nih.gov/pmc/articles/PMC3582984/
- https://www.ncbi.nlm.nih.gov/pmc/articles/PMC3931344/
- https://www.ncbi.nlm.nih.gov/pmc/articles/PMC5546653/
- https://staging.pubs.rsna.org/doi/abs/10.1148/rg.285075217
- https://www.ncbi.nlm.nih.gov/pmc/articles/PMC3273884/
- https://www.hernien.de/fileadmin/docs/Minimal-Repair.pdf
- https://www.ncbi.nlm.nih.gov/pmc/articles/PMC3069511/
- https://staging.pubs.rsna.org/doi/abs/10.1148/radiol.2473070049
- https://www.cms.gov/Regulations-and-Guidance/Guidance/Transmittals/Downloads/R3654CP.pdf
- https://staging.journals.sagepub.com/doi/abs/10.1177/0363546513519964
- https://staging.www.grastontechnique.com/docs/research/jospt.2018-abstracts.pdf#page=121
- https://www.ncbi.nlm.nih.gov/pmc/articles/PMC4563290/
- https://www.medscape.com/viewarticle/876035
