Some gym goers don’t consider the bench press bar path because pressing the bar upwards seems self-explanatory; however, it’s actually much more complex and if executed correctly, the right bar path will add pounds to your bench press and thickness to your chest while decreasing the chances of getting injured.1
Studies have shown this to be true time and they consistently find that the best bar path looks like a “J” from the side, and not up and down or like an “I”.
So quit pressing without any thought and start benching like the pros by fixing and/or doing this one thing will help you achieve PRs (personal records) in both muscular size, and weight moved during the bench.
Understanding the J Curve & Biomechanics of the Bench Press Bar Path
It is imperative to understand the ‘J’ curve, which is the ideal path the bar should travel when bench pressing, as it could either make or break the lift. It could either lead to years of frustration of not realizing the effort put in or provide maximum gains for the same work.
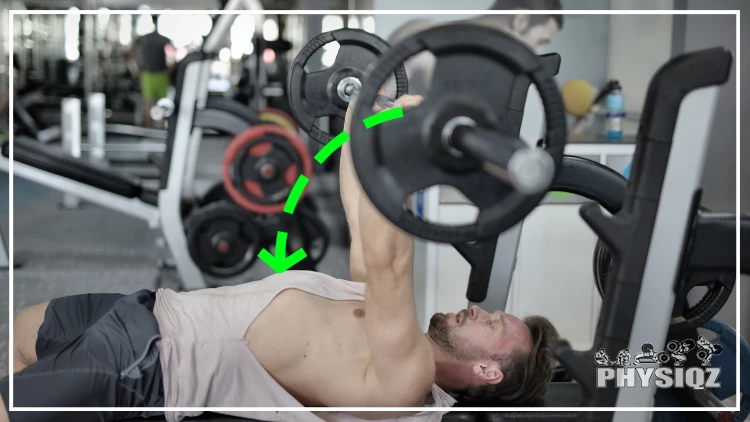
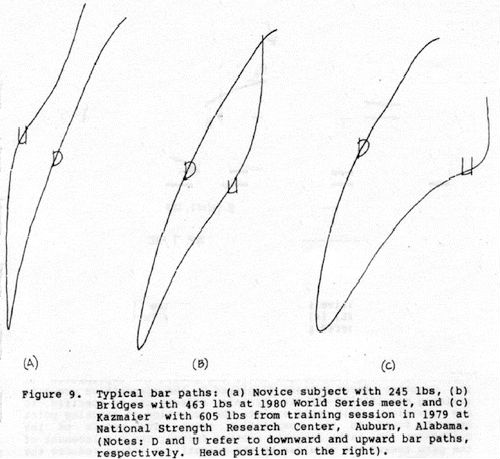
The ‘J’ curve describes the optimal bar path during a bench press, where the barbell follows a slight curve as it descends to the chest and then traces a path resembling the letter ‘J’ as it ascends back up, as illustrated to the far right. This specific movement plays a crucial role in the biomechanics of the bar path on the bench press.2
Simply put, the bar is pressed up in the direction of the head when leaving the chest and then assumes a vertical path as it proceeds to lock out. The path may also not resemble the letter to the tee due to lifters’ different range of motions.
The bench press path cannot and should not be pressed in a vertical lineup due to the distance between where the bar touches the chest and its end position. The starting position after unracking the weight should be directly above the shoulders and upper back—this has to be an exact position that the press ends as well.
When the bar is at the point where it is touching the chest, the elbows should be perpendicular to the bar from a 90-degree under angle—this will place the elbows directly under the bar. When the bar is lowered, the path down is almost vertical with a slight curvature, as seen from the image. The ascent up is a stark contrast.
To get the bar back up to the ending point (which is also the starting point), the bar will follow a path combo of both vertical and horizontal paths resulting in a somewhat diagonal path. The bar should be pushed not only up but back as well.
This will ensure the most significant amount of force that can be generated efficiently, with the result being a path that resembles the letter ‘J’.
Why the Bar Path of Bench Press Isn’t Straight
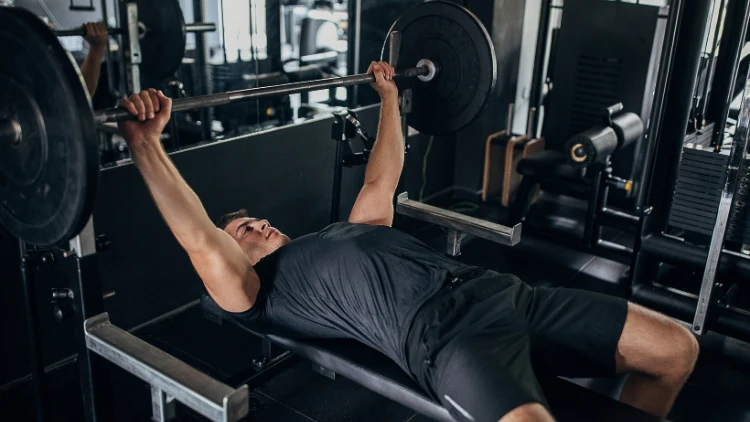
The bar path for bench press isn’t straight because the chest is at a mechanical disadvantage when the bar is directly perpendicular to the shoulder and there is no lateral deviation—even though a vertical path mathematically speaking is the most efficient way of lifting the bar similar to an optimal squat bar path.

Source: Nastasic via Canva.com3
When the bar is sitting on the chest, the lateral distance between it and the shoulders is at maximum (due to a slight horizontal deviation) with the upper arms being parallel to the torso; conversely, there is no horizontal distance between the shoulder and the bar when the arms are perpendicular to the torso i.e 90 degrees.
While being an efficient path, this mechanical position will result in the shoulder joint being compromised; therefore, to ensure there is no risk of injury, a deviation of about 15 degrees off the perpendicular is required for most lifters. The bar locks out perpendicularly above the shoulder and descending (coming down), resting somewhat lower on the pecs than the arm can place it, which will cause a horizontal deviation on the press up.
It is for this reason that the bar path cannot be straight, even if a straight path seems to be the most efficient path for the bar to take on the way up.
Mastering the Correct Technique for a Bench Press
To ensure a proper bench press path will be dialed in, the lifter needs to ensure certain cues, including ensuring they are properly set in an ideal position, before unracking the bar, as this will spill over to the whole press if not done correctly. Perfecting the proper path for the bench press will enable the lifter to be included in list of people that can bench 225 club.
There will need to be enough tension built up and elbows correctly positioned when the weight is coming down and placing the bar on the chest allowing lat engagement. The drive upwards should return the bar to the starting position with the bar being underneath the eyes while not flaring the elbows, ensuring the scapula (shoulder blade) is not displaced in any way.
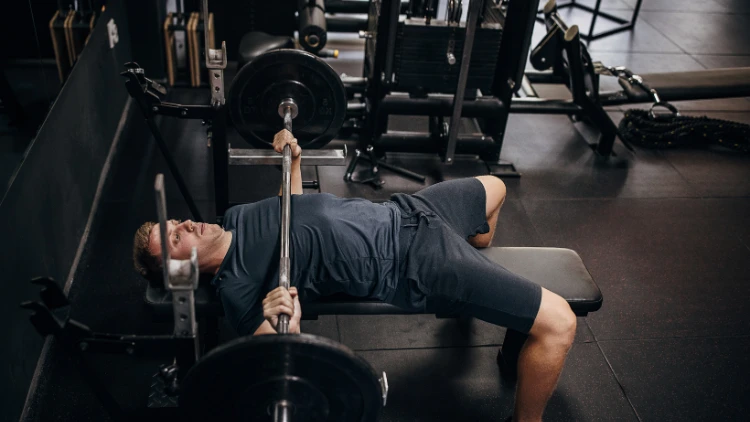
1. The Beginning or Setting Up Underneath the Barbell
Setting up underneath the barbell is one of the most crucial parts of the lift and must be done right to ensure consistency throughout the press. The shoulder blades must be retracted (squeezed together), tucked (pulling them towards hips), and locked into place with the barbell directly above the shoulder joint. The joints have to be stacked directly above one another— from the side view, the wrists should be directly above the knuckles.
Source: Hirurg via Canva.com4
Eyes have to be under the bar; it is essential not to be too much out in front even if the eyes do remain under the bar to avoid reaching out too far to grab the bar in the process of losing the shoulder tuck; this also makes work harder for the spotter if there was one. Placing the head slightly behind the bar can accommodate an individual’s anatomy, helping to prevent horizontal displacement when unracking without impacting the movement of the bar during the bench press.
The lifter should then bridge up, and slide back to allow the shoulders to get tucked under and place the feet down without losing this position. Hips should be dropped down to ensure the glutes are on the bench and the feet should be planted on the ground—externally be rotated out with toes pointing out.
Lifters should be sure to drive the feet down and away towards the floor, pressing the upper back into the bench while maintaining an arch on the lower back and unracking the bar with a wide grip. Wide grips will target the sternal head (pectoral major) and anterior delts, while narrower grips will target the triceps and the clavicular head (upper chest) more.5
It should be noted that a 1.5 times shoulder width is ideal and is best for mitigating injury to the shoulder joint without compromising on strength.6 Some may choose a suicide grip which can be dangerous but it’s worth noting that lifters don’t have a choice of employing either hook grip vs mixed grip since hook grips are ideal for pulling exercises such as deadlifts, and poor for pushing exercises such as bench.
Ensuring tightness by tucking the shoulder hard into the bench will allow tension in the torso, enabling the body to be tight and allowing the lifter greater force on heavy loads.
Before unracking, the lifter should ensure that the wrists are not hyper-extended but can think of punching the ceiling as a queue to keep them neutral. Also, before the lift-off, ensure the shoulder blades are tucked in by cranking the elbows forward, akin to screwing the back into position.
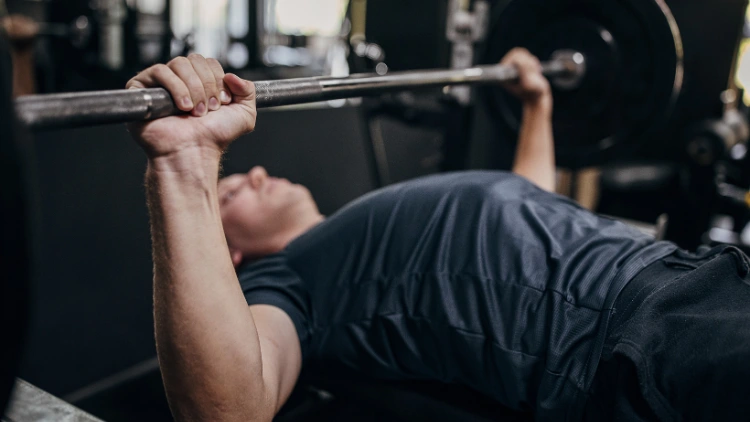
2. Building Tension & Tucking Elbows on the Descent
Building tension is essential for the descent down and this can be done by breathing in and pressing the air out; a cue would be to puff the chest out and expand the rib cage as much as possible. A lifter can take the cue of attempting to bend the bar in half, ensuring tension remains in the upper back. It is essential to stack the joints, and the wrists should be stacked above the elbows.
Source: Hirurg via Canva.com7
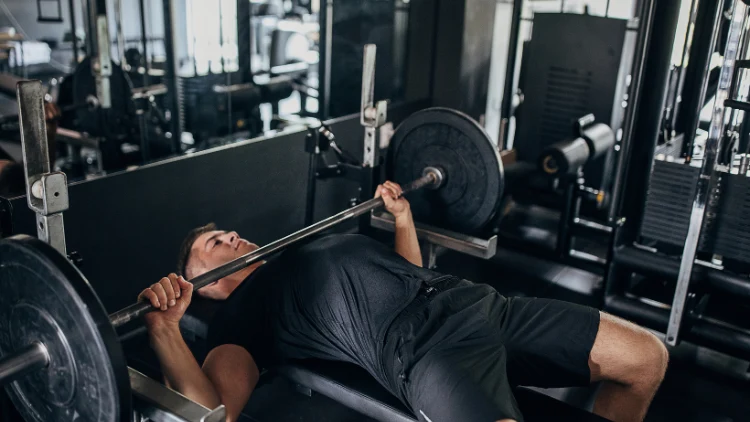
The descending bar path should be down and slightly forward towards the nipple line and/or sternum area. When it is performed down a vertical path, the elbows will flare out at 90 degrees placing the shoulders in impingement. A more natural position would slightly turn the humerus (bone between the shoulder and elbow) to under 90 degrees in relation to the torso by slightly rotating the elbows as the bar is lowered.
The elbows will determine where the bar touches the body by how they are flared out. The bar will touch lower when they are tucked in than if they are flared out, and the lifter should experiment on the best position that works for them based on their anatomy.
Elbows should not be too far out in front of the bar, be tucked in and not flared out, and be at a 45-degree angle relative to the torso. It is a good idea to have the elbows stacked under the bar to ensure proper force transmission.
3. Touching the Chest in the Same Spot & Maintaining Tension
It is imperative to be consistent in touching the same spot on the chest and never bouncing off the chest—it should be a controlled touch and not resemble the touch and go deadlifts in structure.
Source: Hirurg via Canva.com8
This also highlights the ideal bar contact point during the bench press, which should be just below the nipple level, toward the bottom of the sternum.
Tapping the chest without a pause is acceptable for lifters who are bodybuilding; individuals who are concentrated on powerlifting can choose to pause the bar on the chest until it becomes motionless. Maintaining tension always helps in building bigger pecs and hardening muscles by promising good form.
The point at which the bar touches the chest is based on variables such as arm width and height of the torso of the lifter. When the bar is at the chest, the forearms (radius and ulna) will need to be perpendicular or at a 90-degree angle to the bar.
4. Driving the Bar Upwards: The Ascent of the Bench Press Bar Path
The bar should be exploded off the chest, and the elbows should not be flared during this movement. This should be done by driving the heels into the ground, and the lifter should do this and think about pressing the bar back towards their face and off the chest instead of a vertical move up—this will give the bench press bar path its characteristic shape of the ‘J’ curve.
Source: Hirurg via Canva.com9
Another cue is to think about pushing the floor away from the lifter as they press the bar up. The bar should not be lifted too far back where it ends up hitting the rack leading to loss of control; the lifter should think about bringing them back to the start position with the eye level directly beneath the bar.
On the way up, it should be noted that there is a sticking point where the lift would feel most difficult, which is in the first 20-40% of the movement (roughly 3-4 inches of the chest).10 Exploding the chest up will help to get past this point, but building more muscular pecs and triceps through isolation exercises will help overcome this. This ensures a correct and controlled movement to the beginning point.
5. The Ending Position: End Where You Began
As the lifter reaches the endpoint, they may have the option to exhale but can hold their breath until the lift is completely locked up. The bar should complete the arc back to the starting position. Someone should not shrug the shoulders or remove the scapula from its locked position. This must remain firmly in place, providing a foundation to repeat the cycle back down.
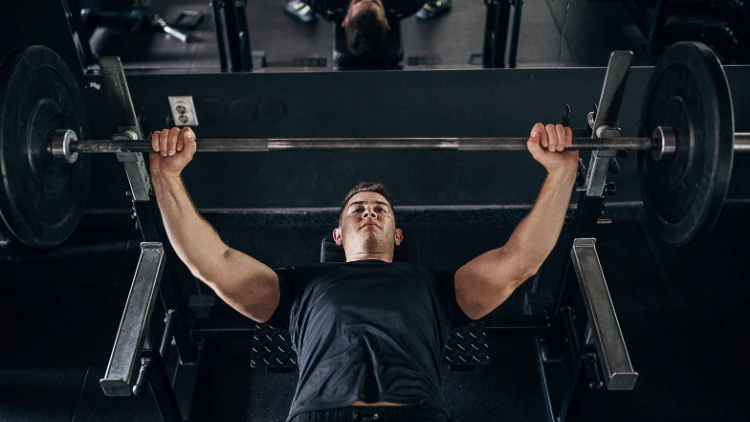
Source: Hirurg via Canva.com11
Once the set is complete, the bar should be re-racked carefully to ensure it is secure before releasing tension in the arms.
Ensuring the correct bar path is definitely one of the techniques that newbies should include in their beginner hypertrophy program to nip in the bud which takes some novice lifters years to correct.
Should the Incline Bench Press Follow the Same Bar Path?
In the incline bench press, the angle of the lift alters the optimal trajectory of the bar, which should follow a straight vertical path rather than the ‘J’ curve associated with the flat bench press. This ensures maximum efficiency in the movement. The bar will need to be above the upper pecs and never drift downwards to the stomach, as this will cause the upper arms to tilt forward, making the bar susceptible to falling forward out of the hands.
When the bar path is lower, the lift will be compromised by having less force and tension but will introduce the risk of injury to the shoulder joint because it will be rotated into a compromised position.
How Does the Decline Bench Bar Path Differ From the Flat Bench?
The decline bench bar path differs from the flat bench in the ascent and descent parts of the press. When the lifter unracks the bar, it will proceed to move the bar over the body rather than keep it high, which places stress on the shoulders.
The bar does rest on the lower part of the chest close to the nipple area and is then pressed up. Decline bench presses will have a vertical path once the bar is placed over the body when unracking, unlike the press done by a flat which takes a slightly diagonal path. Including declines is a great way to add to daily undulating periodization—varying the training variables of intensity and volume.
Common Bench Press Bar Path Mistakes
Several common bench press mistakes lead a lifter to have an incorrect bar path during the press. These include under-tucking the elbows, dumping the barbell, the inconsistent finishing point, dumping the bar, and varying chest touchdown.
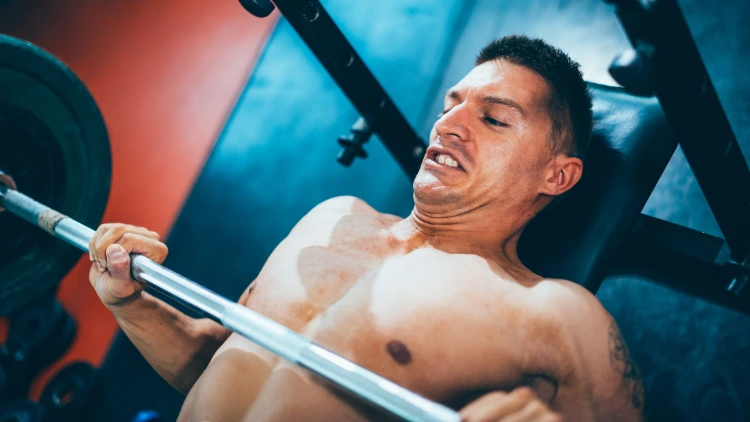
Source: Drazen_ via Canva.com12
- Under tucking the elbow— under tucking the elbows or flaring them out which makes them parallel to the bar. This results in a less efficient, vertical movement during the bench press instead of the optimal ‘J’ curve motion. In addition, it places the shoulders in a compromised position leading to potential injury, and lifters won’t be as strong benching this way.
- Starting position—as explained earlier, the starting point is crucial in a bench press as it spills over and is due to not locking the shoulder blades in place, which translates into the bar being above the face or too back down on the pecs. A starting point that is too high will result in a high touchdown, and a low starting point may find the bar hovering above the waistline.
- Dumping the barbell—when the bar is dumped on the chest, it is usually due to a lack of control, resulting in the bar being in the wrong place, usually too low. Retrieving the bar from this position is difficult because of the effort to bring it back towards the head, resulting in a compromised bar path in the bench press. This may result in someone somewhat getting stronger but not bigger.
- Varying chest touchdown—it is crucial for the bar to touch the same point on the chest each time. When the bar lands an inch higher or lower with each successive rep the bar path will be altered, leading the lifter to constantly re-adjust. This results in an inability to memorize the optimal pattern leading to lax form.
- Inconsistent finishing point—the starting point and finishing point will need to be at the same position—with the bar directly above the shoulders. Lifters tend to make the mistake of the bar being over the face or the chest. The lifter is pushing the bar straight up or transferring the weight to the shoulders overlooking the pecs and thus passing the position where the lift started.
- Shoulders being released from retraction—the shoulders will need to be constantly retracted, which may happen naturally due to fatigue along with the elbow, especially in high-rep scenarios.13 Lifters must therefore pay attention to ensuring that the scapula is always tucked in and listen to what their bodies may tell them about fatigue—form must always be maintained.
Lifters who are worried about losing muscle mass during a cut can improve their pressing skills by practicing straight bench pressing techniques, which will enhance their performance when they resume their full weight training routine.
Other Bench Press Cues & Techniques to Perfect Form
Several simple bench presses and techniques can aid a lifter to perform its form and ensure an ideal path is achieved. In addition, these cues will ensure the good form is maintained and mitigate risks of injury or even causing varicose veins bodybuilding can produce.
Following these cues will provide an effective workout plan for skinny guys to build muscle fast. They include ensuring there is proper bench press leg drive, stacking the elbow and wrist, and arching the back to protect the shoulder joint.
Work on Your Leg Drive
The feet should be planted flat as far back as is possible on the ground, driving down and away from the floor as if pushing it apart with feet rotated outwards.
Experiment With Grip Widths
Experiment with different grip widths, closed or wide, depending on anatomy, to ensure joints are stacked.
Stack Your Elbow & Wrist
Wrists should be neutral and roughly positioned or stacked over the elbows by not tucking in the elbows too tight—the elbow should be brought down in line with the wrist.
Arch Your Back More to Protect Shoulder Joint
Lift the arms and grab the bar with a shoulder-width grip, lift hips up high, think about pulling shoulder blades towards the glutes, and push the upper body forward while keeping feet in place.
How to Hold the Bar During Bench Press
Lifters should think about the bar like a jar being screwed in, spread the bar in an attempt to rip it in half, and then lock the lats in.
When done optimally, the bench press bar path will lead to unlocking phenomenal results in the press, leading to massive pecs; lifters should do this to ensure all the hours spent in the gym count for something.
Frequently Asked Questions
How High Should the Bar Be for Bench Press?
Rack height for the bench press is crucial. The starting bench press bar height for the bar should be low enough to allow the lifter to safely unrack with shoulder blades still retracted and not compromised by them being shrugged out of position.
Conversely, the bar should not be so high that the shoulders round up to get the bar off the rack and not be retracted. The lats should be recruited right from the start and eliminate the need for engaging the shoulders to unrack.
How Do I Fix or Address an Uneven Bench Press?
An uneven bench press has an uneven lockout with one arm reaching before the other. It can be fixed by addressing the potential mobility issue—one scapular being retracted more than the other. The quick fix for this would be to move fingers on the side causing the imbalance, essentially widening the grip width on the side that is uneven. This will allow the bar to get even.
References
1Piacquiadio, Anrea. Canva. Accessed 11 April 2023. <https://www.canva.com/photos/MAD7J9PSbvk-strong-sportsman-doing-bench-press-during-workout-in-modern-gym/>
2Duffey, M. J. (2008, December). A BIOMECHANICAL ANALYSIS OF THE BENCH PRESS. Retrieved 2022, from <https://etda.libraries.psu.edu/files/final_submissions/4136>
3Nastasic. “Personal trainer with client in gym on bench press.” Canva. Accessed 11 April 2023. <https://www.canva.com/photos/MAEI0dHxCLg-personal-trainer-with-client-in-gym-on-bench-press/>
4Hirurg. “Bench Press Training.” Canva. Accessed 11 April 2023. <https://www.canva.com/photos/MAFZ-lsAQGA-bench-press-training/>
5Medicine, N. L. (2017, June 22). The Effects of Bench Press Variations in Competitive Athletes on Muscle Activity and Performance. Retrieved 2022, from <https://www.ncbi.nlm.nih.gov/pmc/articles/PMC5504579/>
6Medicine, N. L. (2021, June 14). The Effect of Grip Width on Muscle Strength and Electromyographic Activity in Bench Press among Novice- and Resistance-Trained Men. Retrieved 2022, from <https://www.ncbi.nlm.nih.gov/pmc/articles/PMC8296276/>
7Hirurg. “Bench Press training.” Canva. Accessed 11 April 2023. <https://www.canva.com/photos/MAFZ-idbNjs-bench-press-training/>
8Hirurg. “Bench press exercise.” Canva. Accessed 11 April 2023. <https://www.canva.com/photos/MAFYc5eF99s-bench-press-exercise/>
9Hirurg. “Bench press exercise.” Canva. Accessed 11 April 2023. <https://www.canva.com/photos/MAFYc730I8k-bench-press-exercise/>
10Medicine, N. L. (2016, September 6). The Sticking Point in the Bench Press, the Squat, and the Deadlift: Similarities and Differences, and Their Significance for Research and Practice. Retrieved 2022, from <https://www.ncbi.nlm.nih.gov/pmc/articles/PMC5357260/>
11Hirurg. “Bench press training.” Canva. Accessed 11 April 2023. <https://www.canva.com/photos/MAFZ-nDXziA-bench-press-training/>
12Drazen_. “Bench press exercise in gym.” Canva. Accessed 11 April 2023. <https://www.canva.com/photos/MAEJMKB5w5Y-bench-press-exercise-in-gym/>
13Medicine, N. L. (2014, June). Elbow Joint Fatigue and Bench-Press Training. Retrieved 2022, from <https://www.ncbi.nlm.nih.gov/pmc/articles/PMC4080597/>