DISCLAIMER: You’re Going To Need A Theraband.
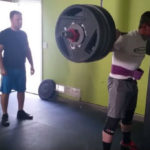
Taking care of your shoulders is extremely important. Without a doubt, it is the place that most people get injured. This is because every beginner or “gym bro” runs to the nearest bench, slaps on some weight, and proceeds to use terrible form. Next thing you know, your shoulder capsule and rotator cuffs are torn to pieces.
Your rotator cuff is a group of muscles and tendons that allow your shoulder to move around. When you sit down to consider it, you will realize that your shoulder is one of the most complex joints in the body (second only to your hips, but maybe not even then). Rotator cuff tendons provide the support and stability needed for your shoulder to operate.
However, nobody is going to come up to you on the beach and say “nice rotator cuff muscles!” For that reason (along with a lot of other body parts), rotator cuff muscles are often neglected. On top of that, they are often the victim of terrible posture caused by excessive slouching. But, following the posture tips I gave above, you will be good to go on that particular front!
After self diagnosing shoulder pain, there are two phases involved for the shoulder protocol. The first phase is what you do every single time you touch weights, whether that be for your upper body or lower body. Simply grab each end of the Theraband with each hand. Here are the following drills you should go through:
- Pull-apart: simply pull each end of the Theraband while focusing on getting your rear deltoids to engage.
- Pull-down: now put both hands overhead and pull the Theraband apart while allowing it to travel behind your head and down your body.
- Row: now place the Theraband around a machine or bench and pull the ends towards yourself to create a light row.
- External Shoulder Rotation: this sounds scary but it simply refers to your shoulder’s ability to cause your arm to rotate clockwise for your right side and counterclockwise for your left side.
Now that you have completed phase one, you are good to go kill it in the gym! However, you also need to make sure that you complete phase two some other time during the week. I highly suggest that you do phase 2 right after you complete the hip protocol. In that way, you will handle both areas at once. And also like the hip protocol, I recommend that you complete this three times a week for maximal returns in strength, flexibility, injury prevention, and mobility. It really is a no brainer. When you are jacked and healthy a few months from now, remember to thank me.
Phase two comprises a list of exercises that will build strength and flexibility in the tendons that make up your rotator cuff. There are only three movements that you need to complete for this. Luckily, you don’t need anything but your trusty Theraband, which means you don’t even need to be at the gym to do this! Here you go:
- Medial Rotation (Internal Rotation): wrap your Theraband around something and stand so that it is at your side; next took your elbow and begin to pull the band toward your abs.
- Lateral Rotation (External Rotation): this is the exact opposite movement to the one above; this time, start with the band over your abs and pull away from the midline of your body.
- Face Pulls: this isn’t exactly for your rotator cuffs, but targets the posterior (rear) deltoids which aid in shoulder retraction (pulling your shoulders blades back into perfect posture).
About the Author