Psoas muscle pain is no joke. It can cause not only deep discomfort, but lead to mobility and flexibility issues as well–which can compound and lead to even more lower-body issues and injuries.
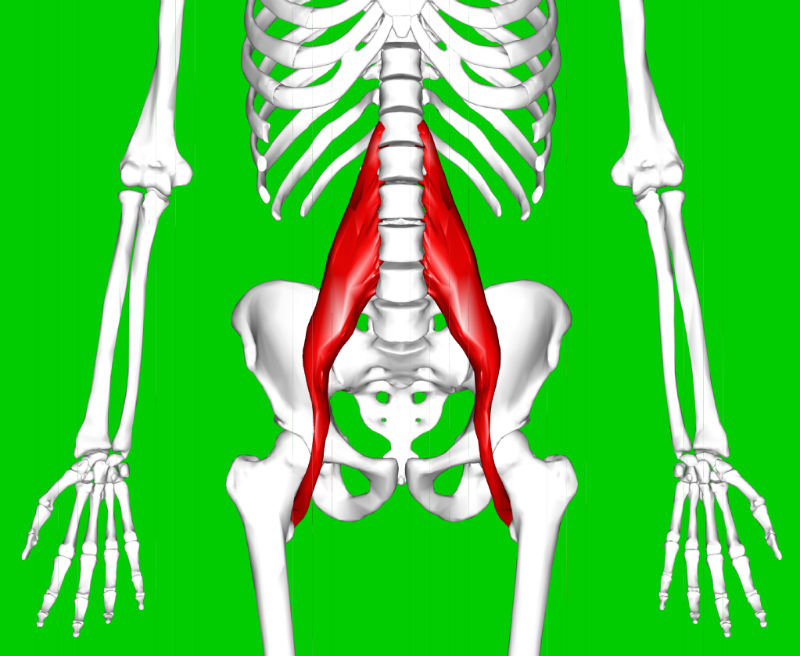
The psoas major muscle is one of the two muscles that make up what is referred to as your iliopsoas. Separated at the abdomen, these two muscles merge in the upper thigh and provide stability and structural integrity to your posterior chain—this includes not only your groin and hip region but your lower back as well.
This is because the psoas muscle attaches to your lower spinal lumbar. It then runs directly down through your groin before connecting to the top of your femur.
The psoas muscle is the only muscle in the body that joins the upper body to the lower body. It allows you to flex your hips forward, bringing your upper leg towards your torso while walking or performing any number of daily life tasks or recreational activities.
If you have a tight psoas muscle, you may experience a range of different pain symptoms.
While anyone can experience issues with the psoas, it mostly affects those who are highly active, such as athletes and recreational enthusiasts. Additionally, if you have a sedentary lifestyle that includes an office job or other extended periods of sitting, you have a much higher chance of experiencing problems.
Psoas Muscle Pain Symptoms
There are a host of different psoas muscle pain symptoms—narrowing down on your specific issue will allow you to better treat your injury by choosing the correct rehabilitation plan.
- Psoas muscle lower back pain: the psoas muscle attaches to the lower part of your spine; when it becomes inhibited and tight it can lead to compression on the lower lumbar discs and contribute to nagging lower-back pain.
- Upper back pain: while the psoas muscle does not connect to the muscles of your upper back directly, if your lower back is tight and inhibited it is likely that you will develop kyphosis—leading to excessive curvature and hunching of your shoulders and upper back. This in turn leads to pain.
- Psoas muscle groin pain: when the psoas muscle becomes inflamed and the surrounding tissue begins to develop excessive pressure, it can lead to irritation and entrapment of the ilioinguinal and iliohypogastric nerves which help to make up the inner abdominal wall of your groin region. This sensation is sometimes described as heat or running water along the front of the thigh.
- Psoas muscle abdomen pain: the psoas is located deep in the abdomen region; when it becomes tight and inhibited, it can lead to a range of pain symptoms—most notably pain in the lower abdomen area near the groin.
- Inguinal ligament pain: when the psoas muscle becomes so tight that it begins to restrict movement of the inner abdominal wall (transverse abdominis), it can lead to a host of inguinal ligament issues.
- Discomfort in the front of your hip, near the socket
- Pain that radiates down your leg
- Restricted movement and mobility of the hips, specifically where your femur meets your hips at the socket
- Deep pain in your pelvic region on the same side that feels tight
- Limping while walking
Psoas Muscle Pain Treatment
While psoas muscle pain can be a cause for panic, luckily it is a relatively easy case to treat from a physical therapy perspective. It just requires that you read and understand the treatment plan—and then stick to it.
The psoas muscle pain treatment plan is comprised of 4 parts:
- Psoas muscle massage
- Psoas muscle stretches
- Lower-body hip mobility routine
- Psoas muscle exercises
By completing all four steps with consistency, not only will your pain disappear—you will also improve upon your hip’s structural health, avoiding serious and debilitating lower-body conditions in the future.
Psoas Muscle Massage
Receiving a psoas muscle massage is a great way to start off your rehabilitation process. By getting a deep-tissue massage to the area, you will experience pain relief and increased mobility which will then allow you to better perform the stretches and exercises for a permanent recovery from pain.
While this form of physical therapy is effective for relieving pain, it will not give you lasting results. For that, you will need to perform stretches and exercises to restore balance, flexibility, and strength to your hip region. In turn, this will correct your poor movement patterns which caused your issues in the first place.
Psoas Muscle Stretch for Back Pain Relief
Because of its connection to the lower lumbar, a tight psoas muscle can lead to spasms or other lower back pain and discomfort by compressing the lumbar discs. Knowing this, there is a specific stretch you can perform to experience almost immediate back pain relief.
While sitting on the edge of a chair or bench, rotate your affected leg and place your angle on your opposite knee as if you were crossing your legs. Then, provide external rotational pressure to your hip by pressing down slowly on your knee—you should feel a deep stretch across not only your hip and groin, but lower back as well. Hold for at least 30 seconds before performing on the other leg; make sure to complete both sides even if you only have pain on one half of your body.
For a more detailed explanation, the video below to outlines the exact steps.
Psoas Stretch Using a Foam Roller
As explained thoroughly in the physical therapy section, a proper rehabilitation program always utilizes the 3-point approach:
- Myofascial release
- Stretching
- Strengthening
Step one requires the use of a foam roller. Originally, therapists thought the foam roller was useful for actually breaking up adhesions in your muscle tissues and the fascia lining that surrounds them. However, more conclusive research shows that something else is actually happening.
Instead, you are providing your body with a “neuromuscular stimulation”. It is the same thing as blowing on your finger or shaking it when you hurt it—you are providing an additional external stimulus to mask the less pleasant, painful one.
By using a foam roller, you are able to essentially “erase” your muscle soreness and inflexibility for a limited period of time. But that is the catch.
You can’t just do the psoas stretch with a foam roller and expect to see lasting pain relief. You have to first use the foam roller, and then complete the exercises below so that you can train your new and improved range of motion. By performing exercises using this new and improved form, you can begin to fix and rebalance the muscular asymmetries (uneven muscle tissue) which are the true source of the pain.
To use the foam roller on your psoas, lie facing down on the ground and place it on one side in the “crease” of your hip. Then slowly roll up and down while rotating—you will experience a lot of stiffness and tenderness. When you reach an especially sore or tender spot, pause and allow your body to slowly relax so that you can experience a full psoas muscle release.
As soon as you have finished, move onto the full lower-body mobility routine which will release tightness in the surrounding muscles of your hip region.
Once you have completed the initial optional massage, stretches, and lower-body mobility routine, it is time to move onto the psoas muscle exercises.
Psoas Muscle Exercises for Pain Treatment
While psoas muscle strengthening exercises are challenging, luckily there are only two exercises you need to complete. It is recommended that you complete 2-5 sessions per week of the entire outlined psoas muscle pain treatment plan—including the lower-body mobility routine, stretches, and exercises.
- Supine Psoas Hold
While lying on the ground with your back flat against the floor, bring one leg towards your chest as far as you can, contract forcefully, and then release. Make sure that you point your toe up and towards your torso. Start with two sets of five repetitions and work your way up to 4 sets of 15 repetitions over time. Watch the video below for form if you are confused.
- Hanging Leg Raises
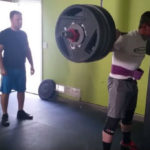
While hanging from a pull-up bar with both arms extended overhead, raise your knees until your body forms a 90-degree angle. Contact forcefully before relaxing and bringing your legs back down. Complete 2-3 sets and try to increase the amount of repetitions you can perform per set with each workout.
About the Author